Personalize your Default Campaign
Unleash the full potential of your Aiwifi Portal with your Default Data Capture Campaign.
Your brand’s crucial first impression!
This is the campaign every guest sees the first time they connect to your Wi-Fi Network, making it your most valuable tool for building connections and capturing vital customer data. Optimize it to be an irresistible, attention-grabbing powerhouse.
The Default campaign is a Data Capture Campaign, it will always be active on your Aiwifi Portal and is very important to prioritize it with colors and eye-catching text to attract their attention and generate more responses and connections.
By dedicating a few moments to these personalization steps, you’re not just setting up a campaign, you’re crafting a high-converting guest experience that fuels your growth and deepens customer engagement.
Steps to personalize your Data Capture Campaign
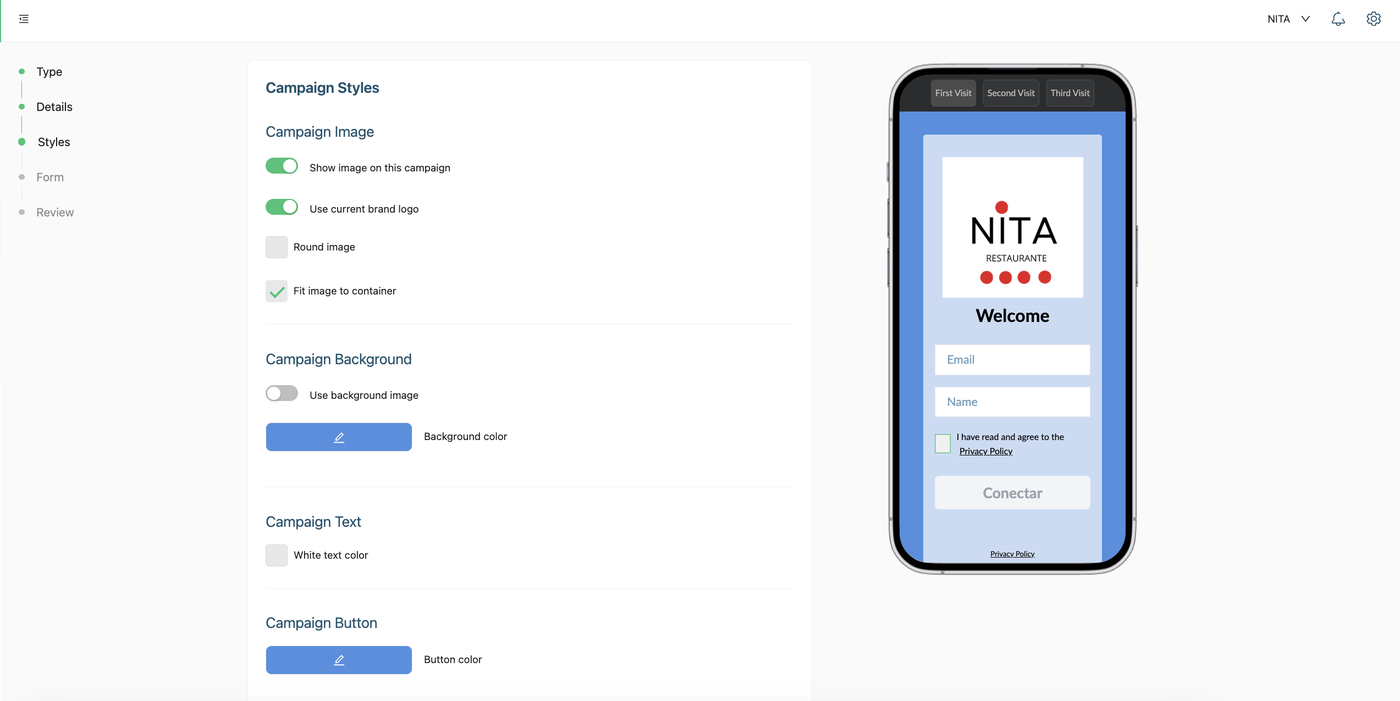
1) Campaign Styles:
Show image in this campaign.- You can activate or disable the button a side as your desire.
Use current brand logo.- You can activate or disable the button a side.
Round Image.- You can activate or disable the button a side.
Fit image to container.- You can activate or disable the button a side as you prefer.
Campaign Background.- If you want to use a background image you can drag your file or you can click on "Select from media" if you have images or gifs already in your "Media Section".
Campaign Text and Campaign Button
Campaign Text Color.- Select white or black for maximum contrast against your background.
Campaign Button.- You can select here the button color.
Font.- Typography defines your brand’s personality. You can choose between: lato, Covik sans, Work sans and Roboto.
Messaging that Converts
The right text and button are the keys to unlocking more connections.
Campaign Text Color: Select white or black for maximum contrast against your background.
Campaign Button Color: This is your call-to-action! Choose an eye catching button color that pops and encourages the click.
Font Flair: Typography defines your brand’s personality. choose a font that resonates with your style:
Lato (Classic & Approachable)
Covik Sans (Modern & Bold)
Work Sans (Clean & Professional)
Roboto (Versatile & Universal)
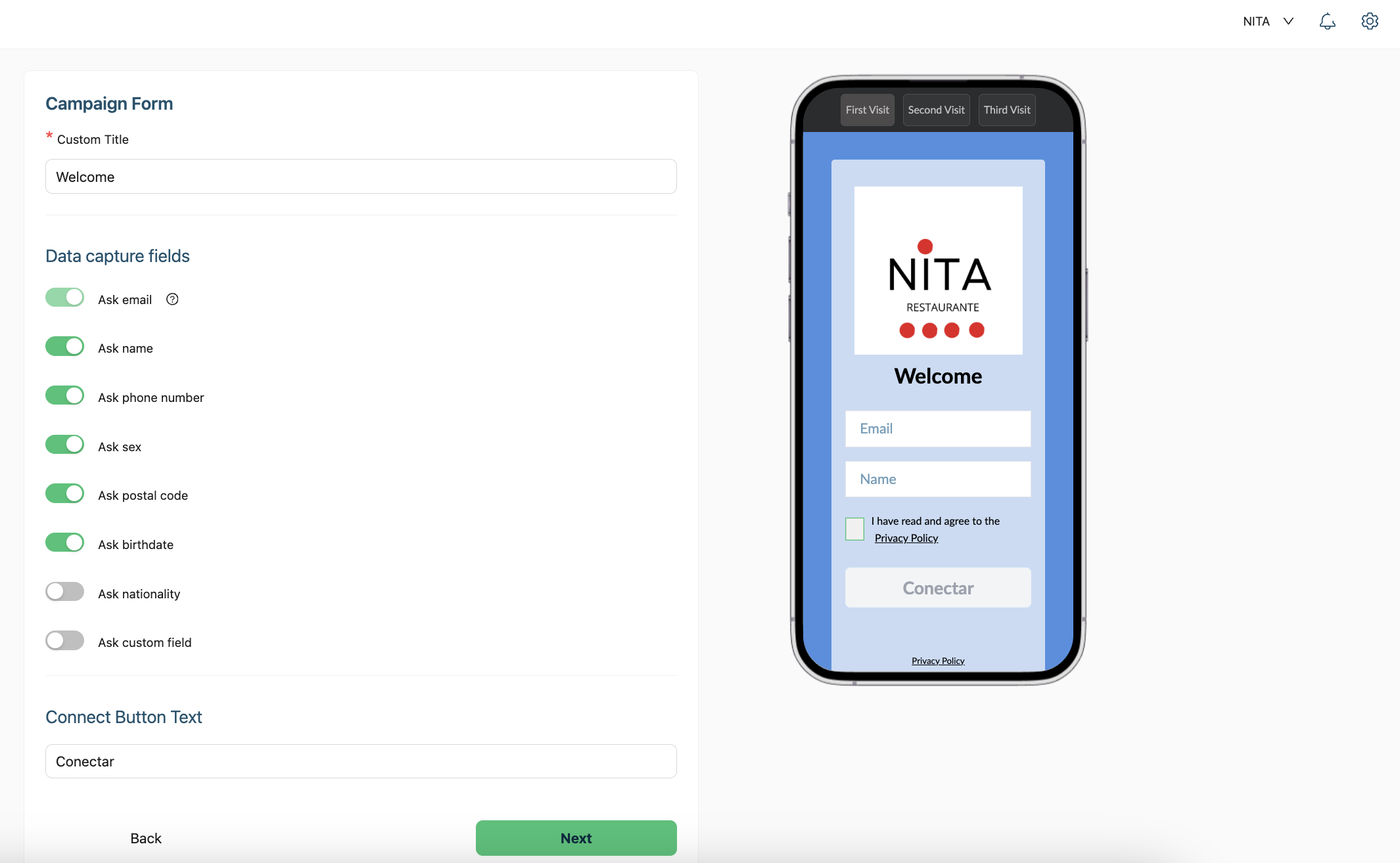
2) Personalize your Campaign Form
Ensure your message is crystal clear:
In the Form Section you can choose all the information to be captured.
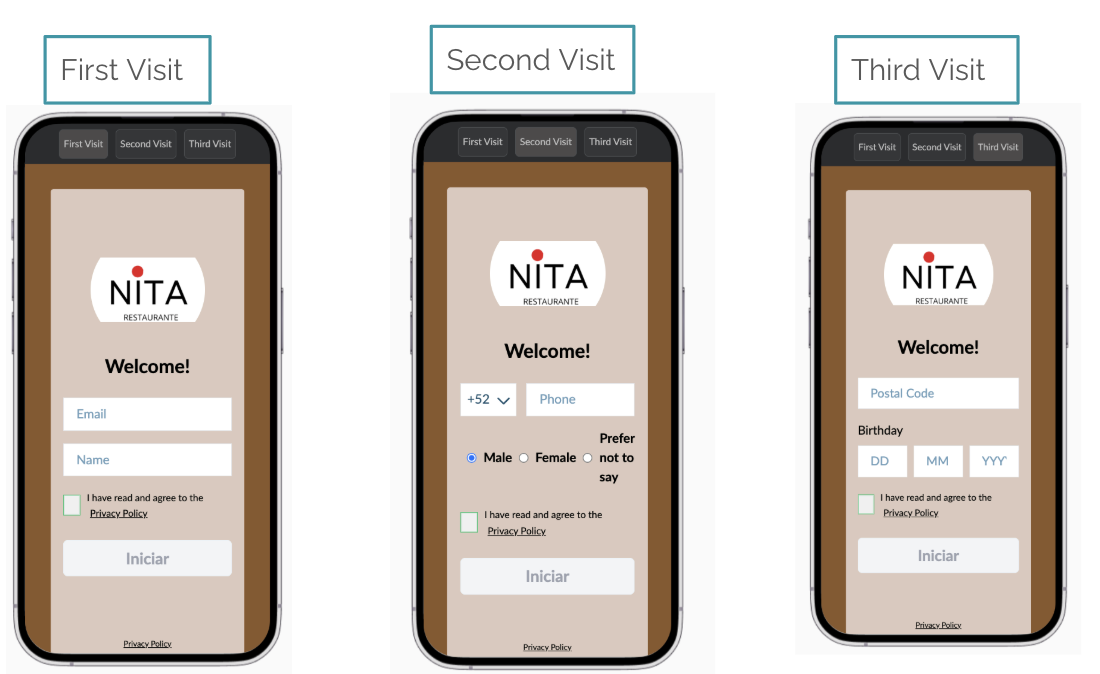
The Data Capture campaign is a 'progressive' campaign - meaning it is a multi-visit campaign.
In order to ask for more than 2 fields we will show the guest only two fields at a time, which means the user will answer the fields on multiple visits/connections to the captive portal.
Here is an example of the multiple visits / connections campaign:
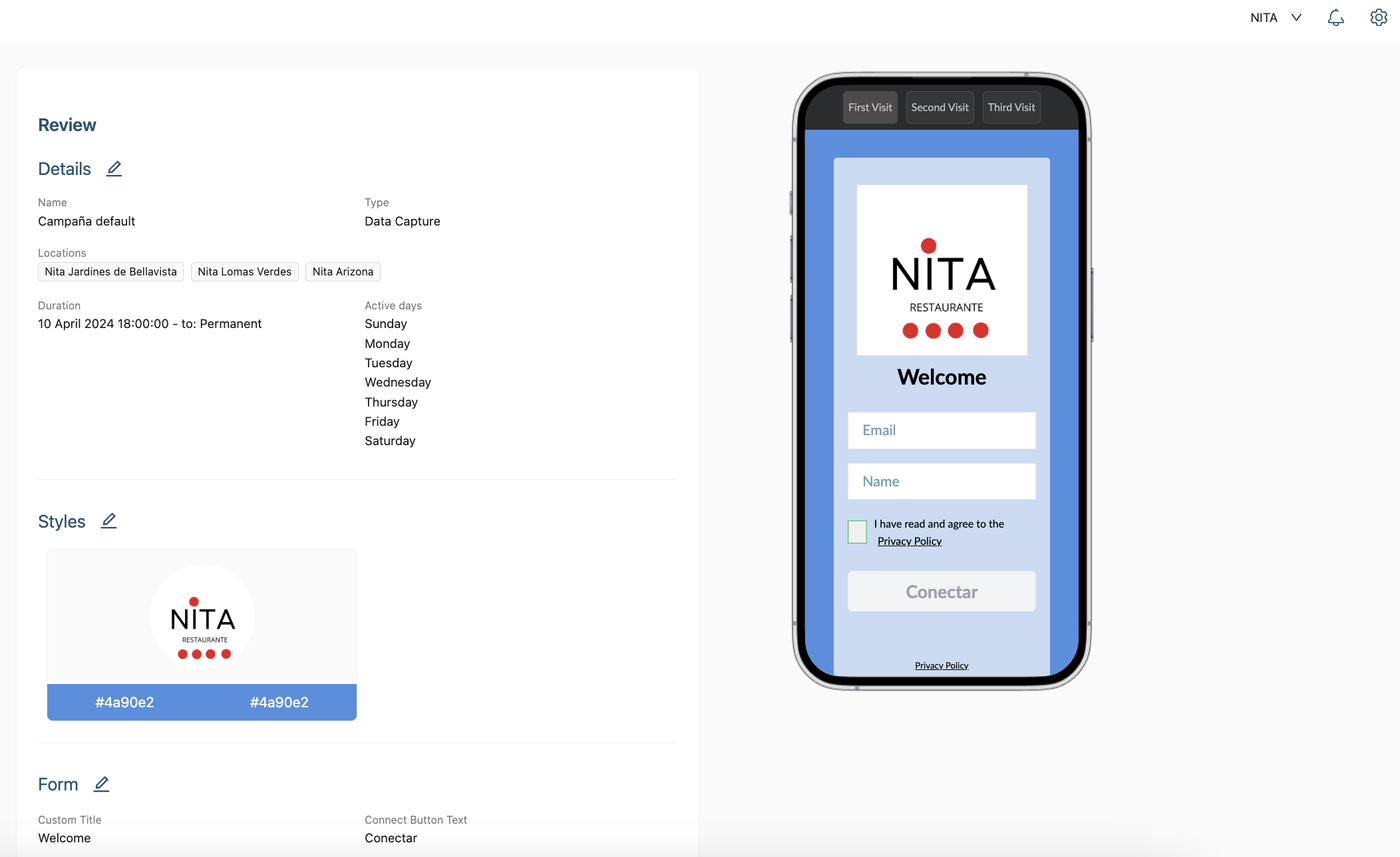
3) Confirm your Details and Styles of your Default Campaign
In this section you will find a summary of your campaign fields. If you want to make any change, click on the "return button", if you don't want to make any modification then click on "save campaigns".