AIWIFI SSID and CAPTIVE PORTAL creation manual. (FORTINET)
Step 1: RADIUS Server and Group Configuration
First, we prepare the communication with the AIWIFI system.
Go to User & Device > RADIUS Servers

Click on Create New.
Name:
RADIUS_AIWIFIPrimary Server IP/FQDN: (The IP provided by AIWIFI).
Primary Service Secret: (The AIWIFI shared secret).
Authentication Method: Select PAP.
Click OK.

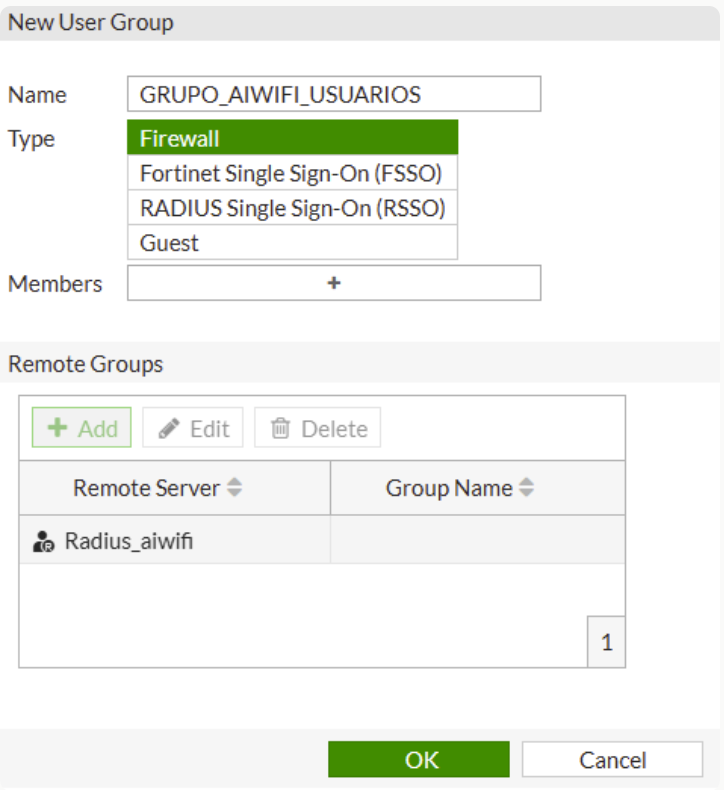
Go to User & Device > User Groups.
Click on Create New.
Name:
GRUPO_AIWIFI_USUARIOSType: Firewall
Remote Groups: Click Add, select the RADIUS_AIWIFI server, and click OK.
Step 2: Walled Garden Creation
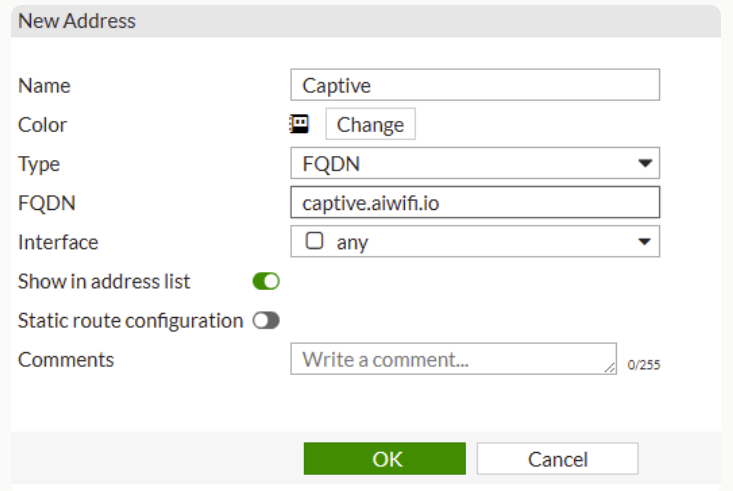
Go to Policy & Objects > Addresses.
Click Create New > Address for each of the following domains:
Category: Address.
Type: FQDN.
FQDNs:
captive.aiwifi.iostorage1-prod-media.s3.us-east-2.amazonaws.comapi.aiwifi.ioconnect.facebook.netfacebook.comsentry.iocloudfront.comlr-ingest.iodoubleclick.netfbsbx.com
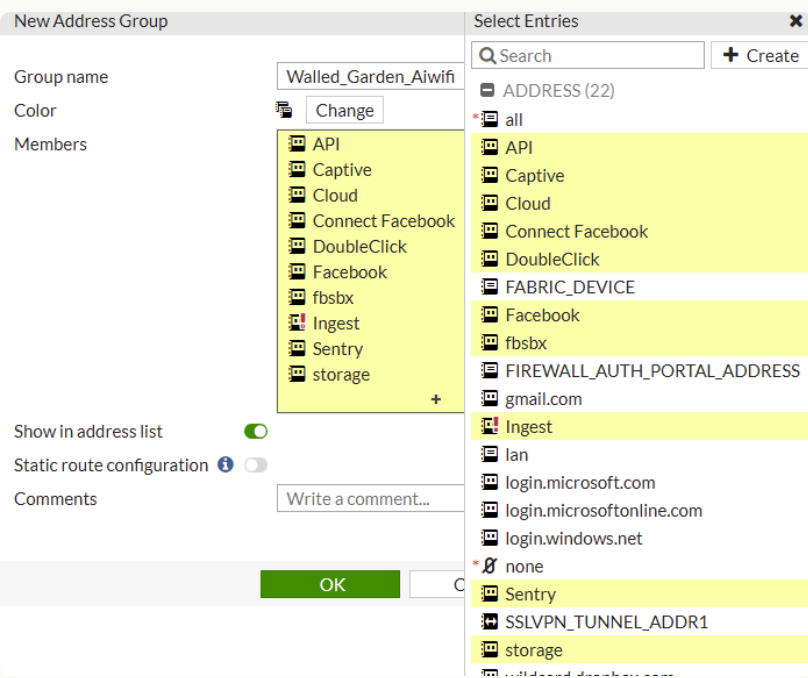
Go to Policy & Objects > Address Groups.
Click Create New.
Name:
WALLED_GARDEN_AIWIFIMembers: Add all the FQDNs created above.
Click OK.
Step 3: SSID (WiFi) Creation
We configure the wireless signal and link the previous steps.
Go to WiFi & Switch Controller > SSIDs.
Click Create New > SSID.
Interface Name:
wifi_portalIP/Network Mask:
10.50.0.1/255.255.255.0DHCP Server: Enabled (Range
10.50.0.2-10.50.0.254).DNS Server: Select Specify and enter
8.8.8.8and8.8.4.4.
Under the Security Mode section:
Select Captive Portal.
Authentication Portal: Select External.
URL:
http://captive.aiwifi.ioUser Groups: Select GRUPO_AIWIFI_USUARIOS (from Step 1).
Exempt Destinations: Select WALLED_GARDEN_AIWIFI (from Step 2).

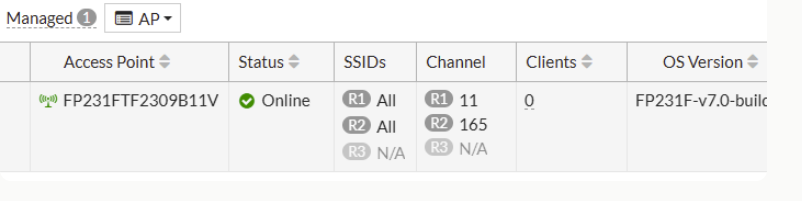
Step 4: Access Point (FortiAP) Authorization
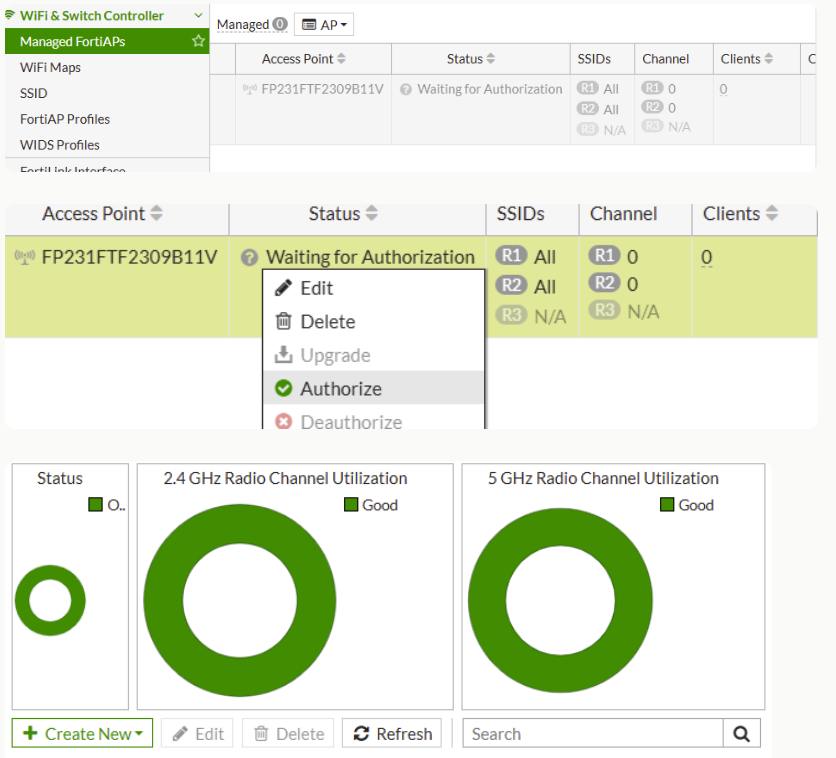
Go to WiFi & Switch Controller > Managed FortiAPs.
Find your Access Point in the list (it will appear with a waiting icon or in grey).
Right-click on the AP and select Authorize.
Wait for the status to change to Online (Green).
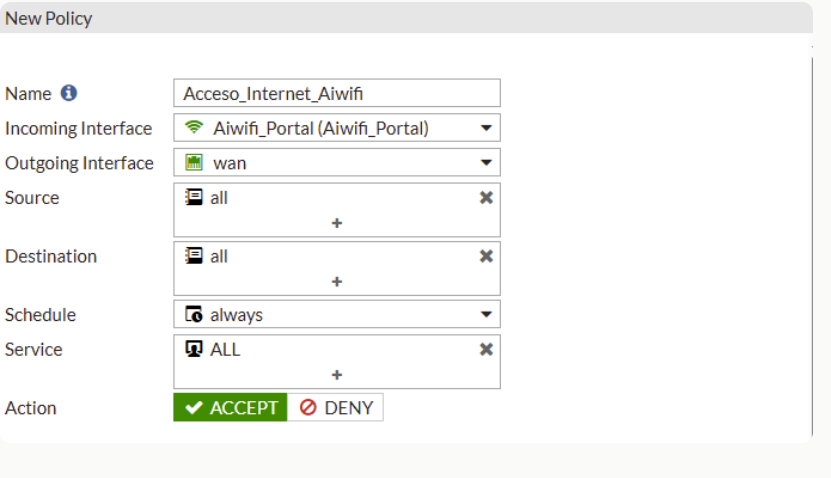
Step 5: Firewall Policy Rule
Go to Policy & Objects > IPv4 Policy.
Click Create New.
Name:
Acceso_Internet_AiwiFiIncoming Interface: Select your SSID (
wifi_portal).Outgoing Interface: Your internet exit port (WAN).
Source: Click the + and add the all object.
Click again and add the GRUPO_AIWIFI_USUARIOS group.
Destination: all
Service: ALL
Action: ACCEPT
NAT: ENABLED (Ensure the toggle is green).
Click OK.
Step 6: In case of SSL Certificate Errors
Go to User & Device > Authentication Settings.
Disable HTTPS.