
Create new webhooks
A webhook is a method for receiving real-time notifications whenever an event is triggered. Data associated with the triggered event is sent to a specified webhook URL.
Aiwifi can notify your application of events using webhooks. Each hook is cryptographically signed to prevent tampering. When you receive a webhook, you can validate it to ensure it comes from Aiwifi and corresponds to the event you subscribed to.
1) How webhooks work
Before you begin with webhooks, it's important to understand their purpose.
Suppose you want to track the information you receive from a guest connection in your brand. One approach would be to check for the guest in your app at regular intervals. However, this method is repetitive and may not yield real-time results.
Instead, a webhook can be configured to listen for a guest connection event. When a guest connects to your captive portal, you'll be notified immediately.
2) Webhook terminologies
Before configuring a webhook, it's essential to understand the common terminology used in a typical webhook system.
Webhook URL: The URL where you want to receive the webhook data (payload). This URL must meet the following criteria:
It should be an HTTPS URL.
It should be publicly accessible.
Event: The action performed by guests in your captive portal. We support notifications (webhooks) for multiple event types, such as guest connections, selected interests, and survey campaign responses.
Payload: The data related to the event that we will send to your URL. Generally, the payload sent to your webhook URL is in JSON format, and you can utilize it according to your business use case.
Steps to create a new webhook:
1.- Create your first webhook:
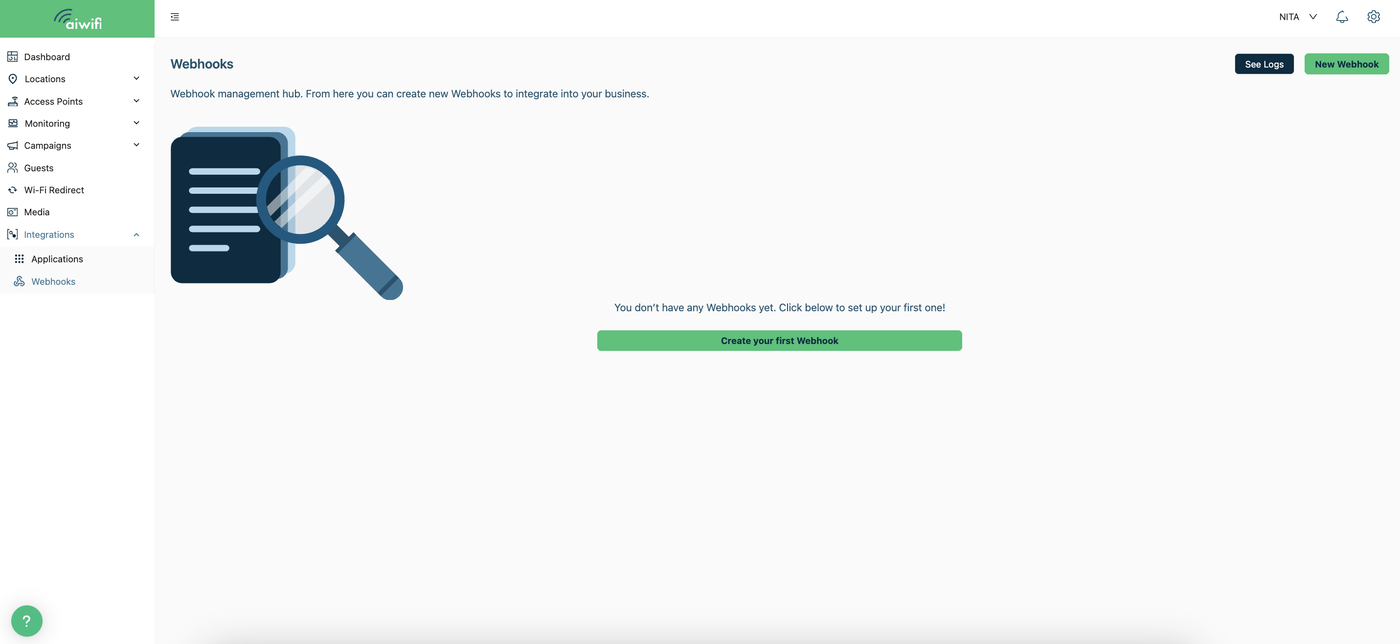
Once you entered to your brand platform, go to the left column of your screen and clic on “Integrations” and then select “Webhooks”. Press the button “Create your first Webhook”.
2.- Webhook Settings
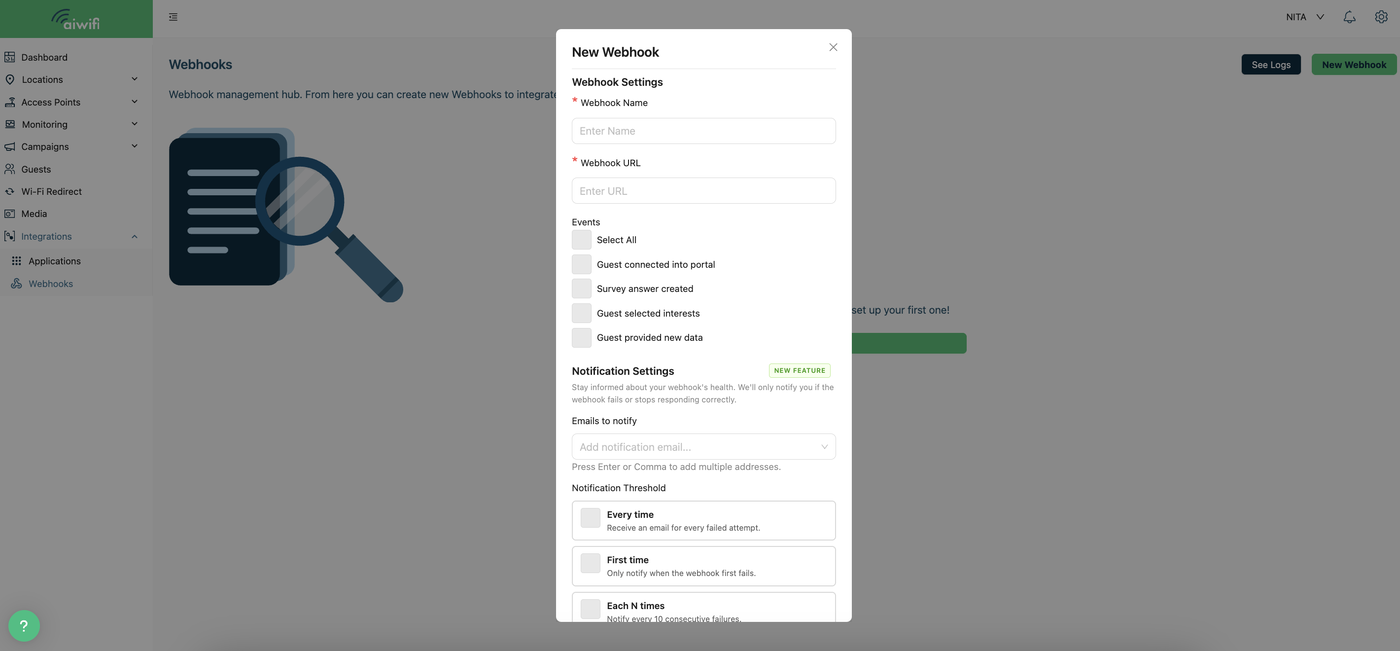
On your screen it will deploy a space where you have to fill the Webhook settings. The Webhook name, the webhook URL and select the event desired then clic on “Save”.
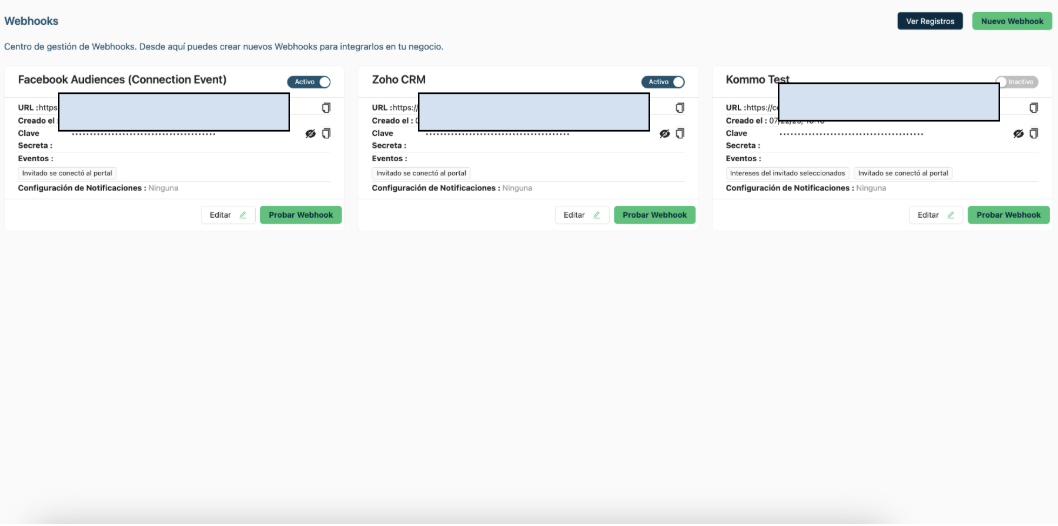
3.- Once you have already created webhooks they will be shown on your screen. Here is an example.
See logs:
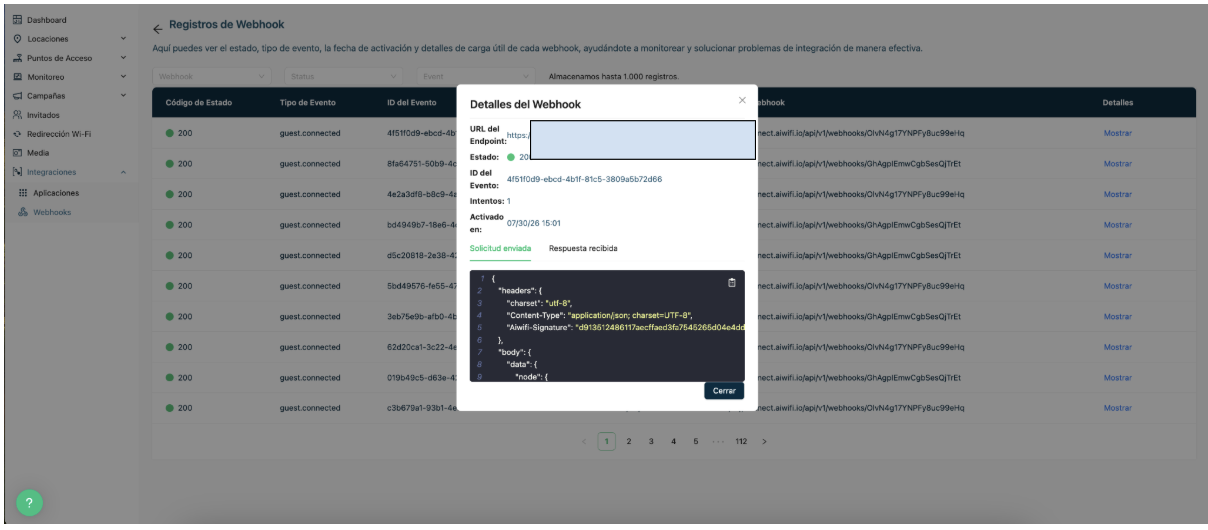
Select the button “See logs” to see the status code, the event type, the event ID, the webhook URL, and the webhook details.
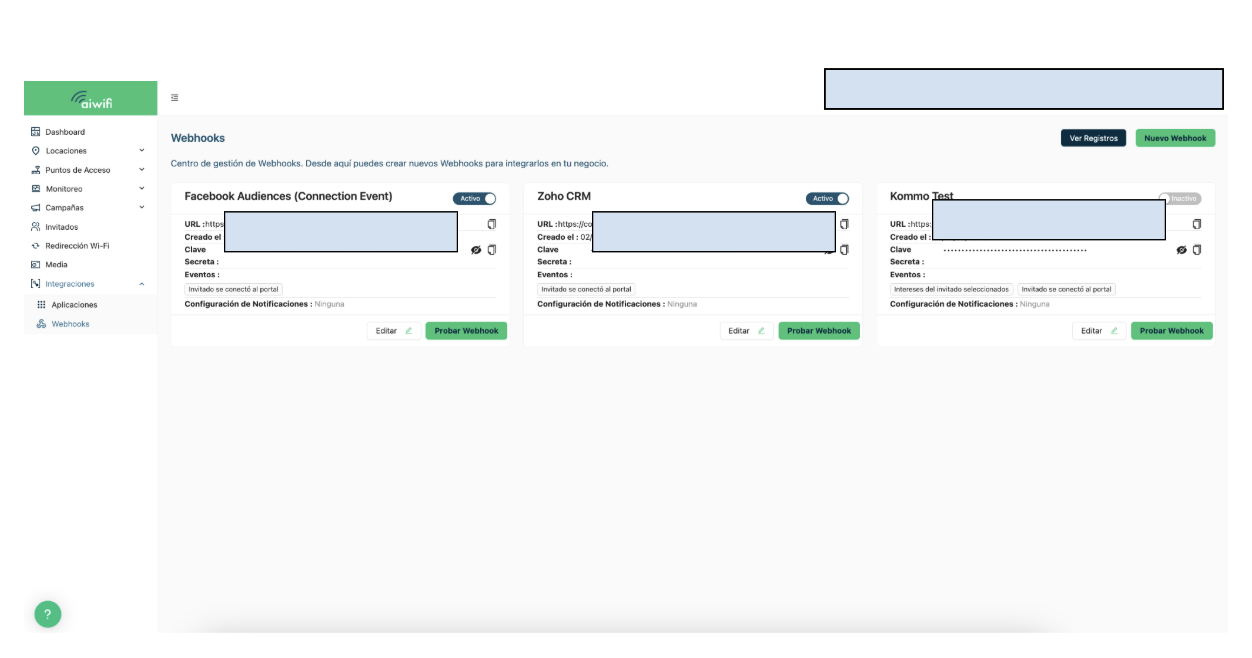
It will deploy on your screen the Webhook logs Dashboard, here you can see all the information the webhooks created.
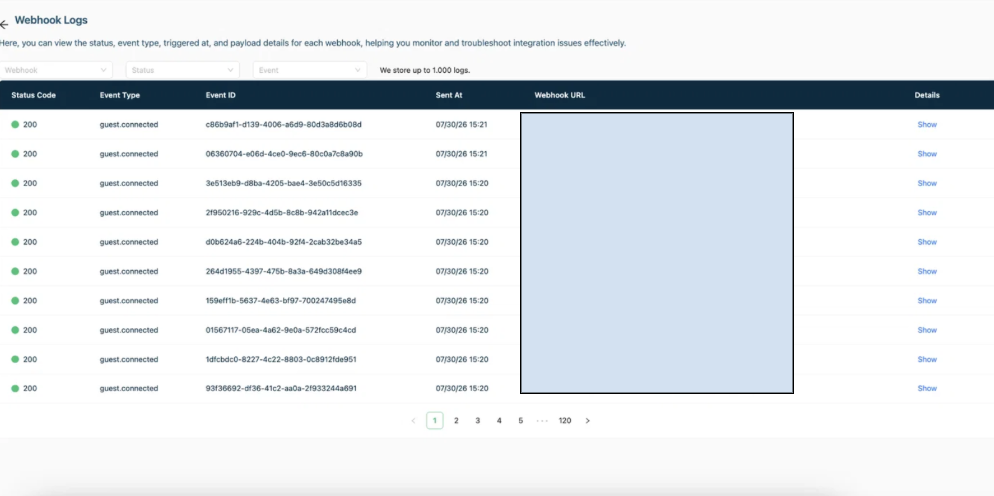
Webhooks Details:
To see the details of an specific webhook, go to the menu and below “Details” select “show” to see the webhook details.