Add a banner of images in to a campaign
You can add promotional images of your product in to a banner and when the promotion have expired you can disable the banner so it will stop appearing on the campaign you added previously. This is a perfect way to show your promotions to tour clients.
Steps to add a banner with images in to an specific campaign
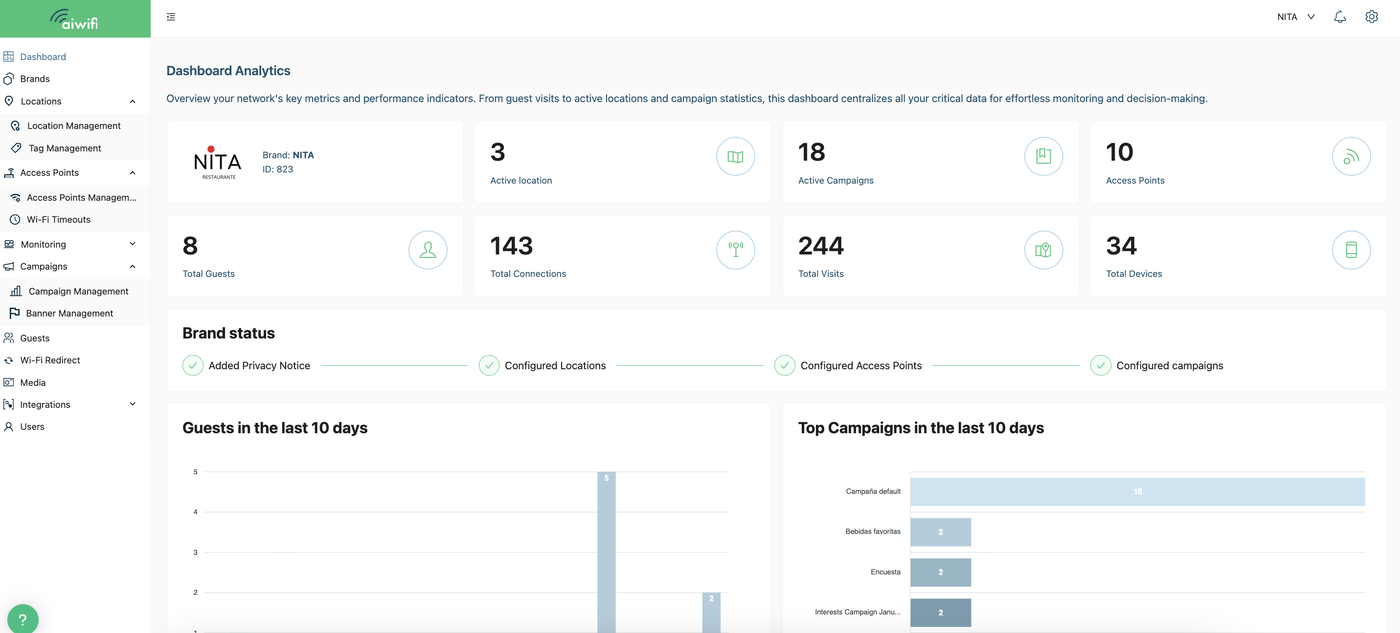
1) Dashboard Analytics
On your dashboard go to the left ride of your screen and select “Campaigns” then click on "Banner Management”.
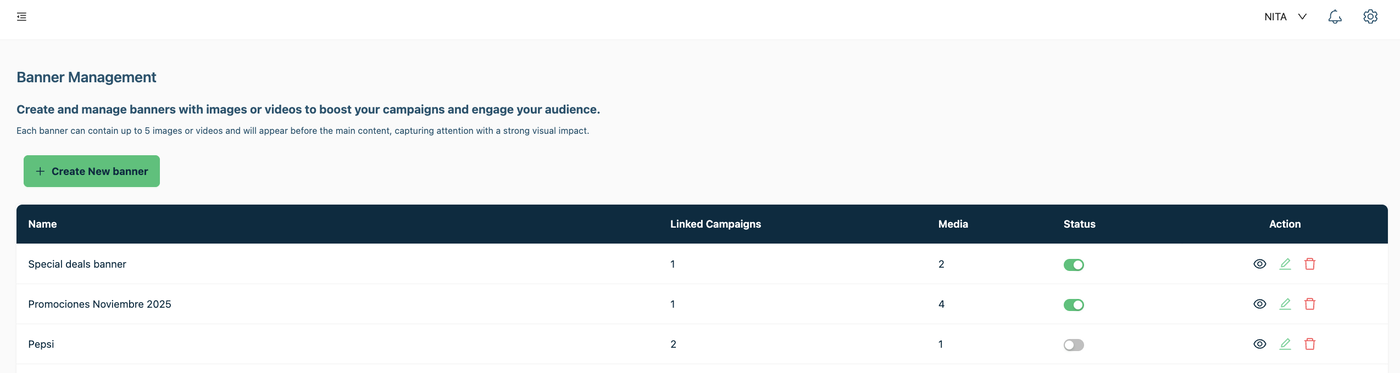
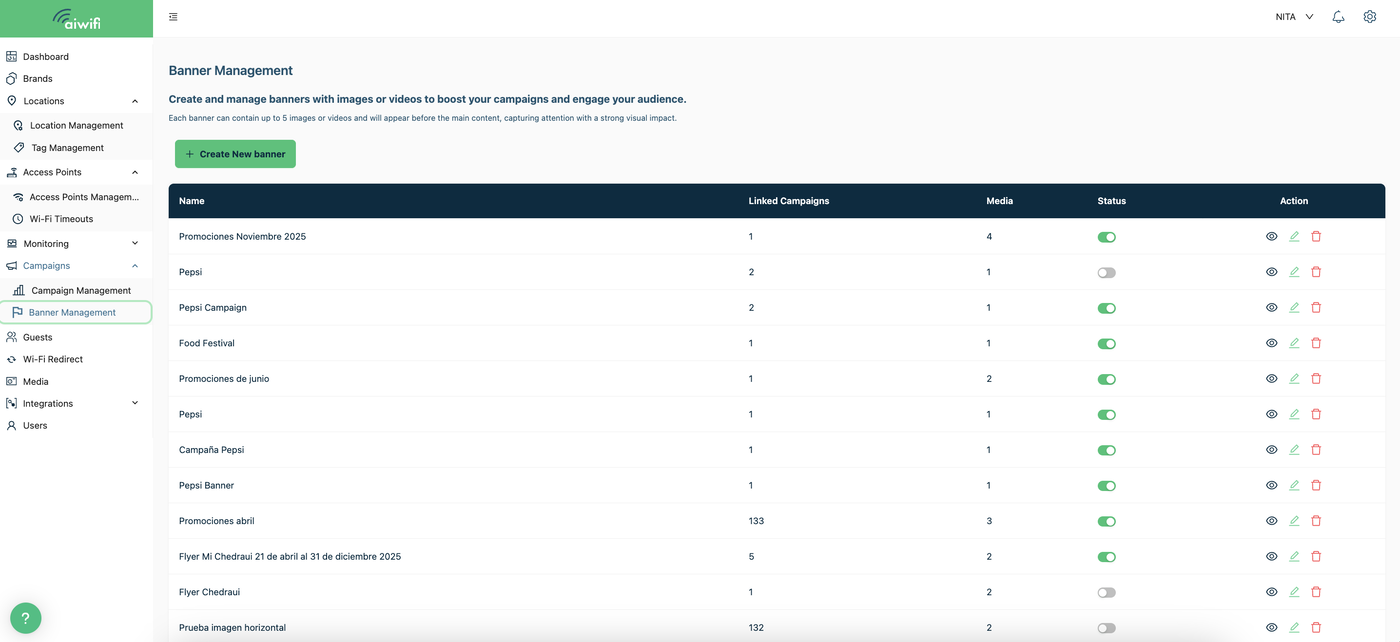
2) Banner Management
In this section you have to click on "add banner"
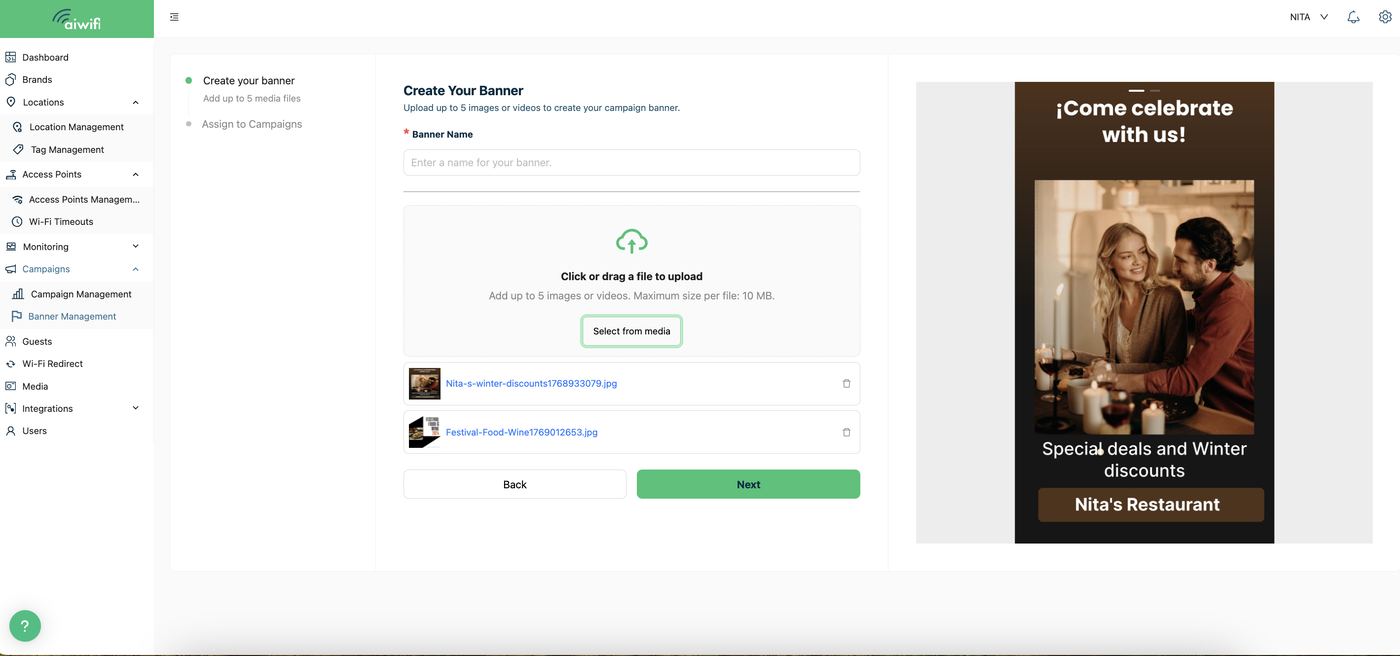
3) Banner Details
In this section you have to assign an specific name for your banner of images and gifs. It can be for example: Hot sale or Grand opening or Christmas sale.
Click on "Select from media" to upload the images (maximum 5) you want to add to your banner. Or click on "drag your file from your browser" to upload the images or gifs you want to add to your banner.
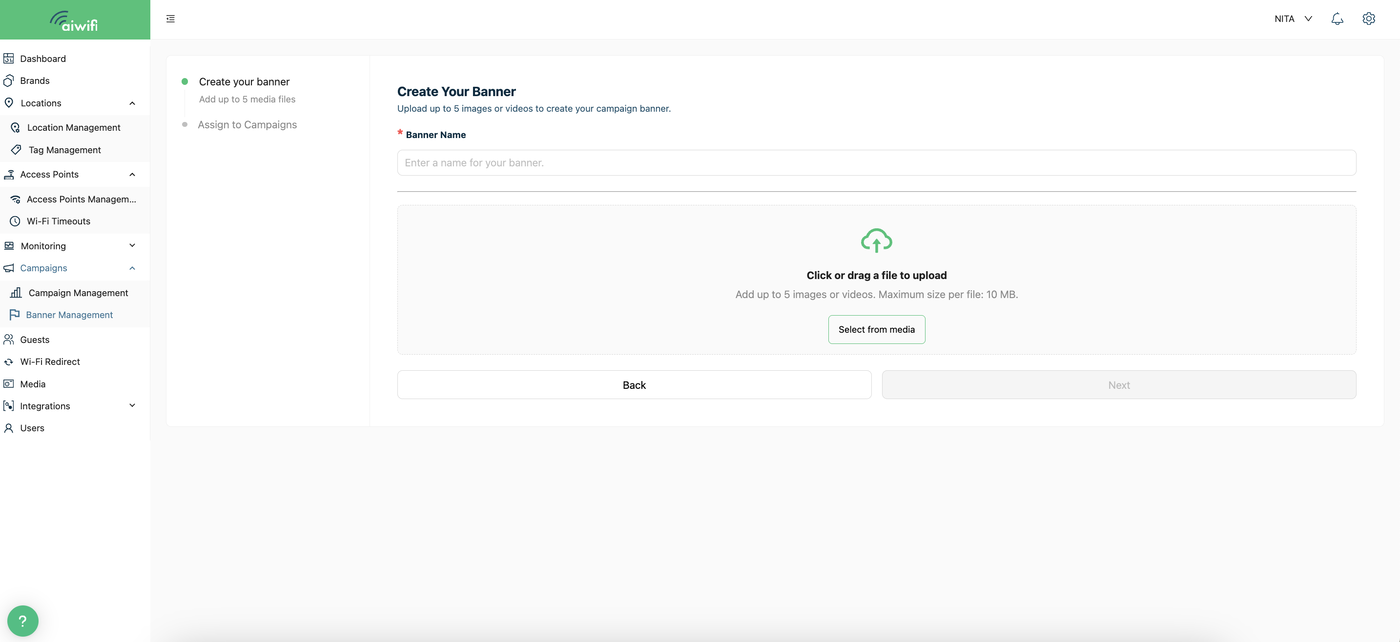
4) Select the image or gif you want to add.- Repeat the operation each time you want to add another image. (maximum 5 images or gifs per banner). Is importan to add the images in the same banner because if you do it separately only the last image you added will be shown on the screen. Once you have done adding the images to your banner then click on "Next".
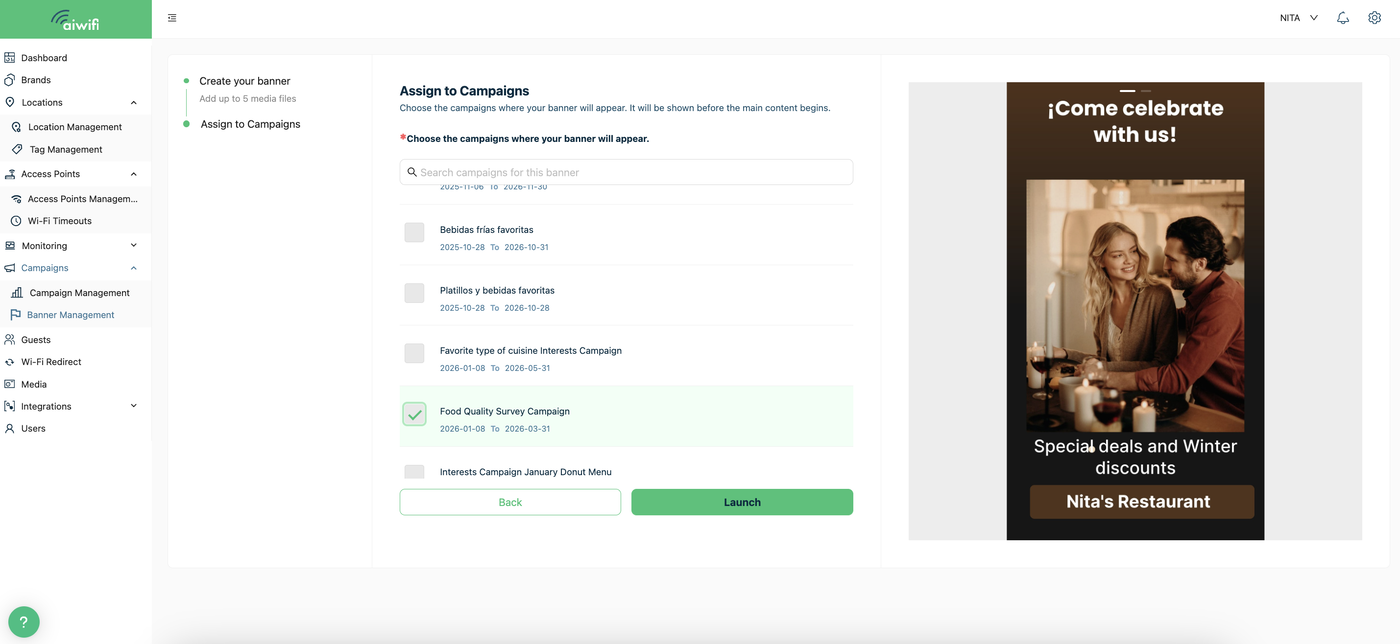
5) Select the campaign desired.- Select the campaign for adding your banner and clic on "Launch"
6) Banner Activated.- On your Banner Management Dashboard you will see your banner activated.
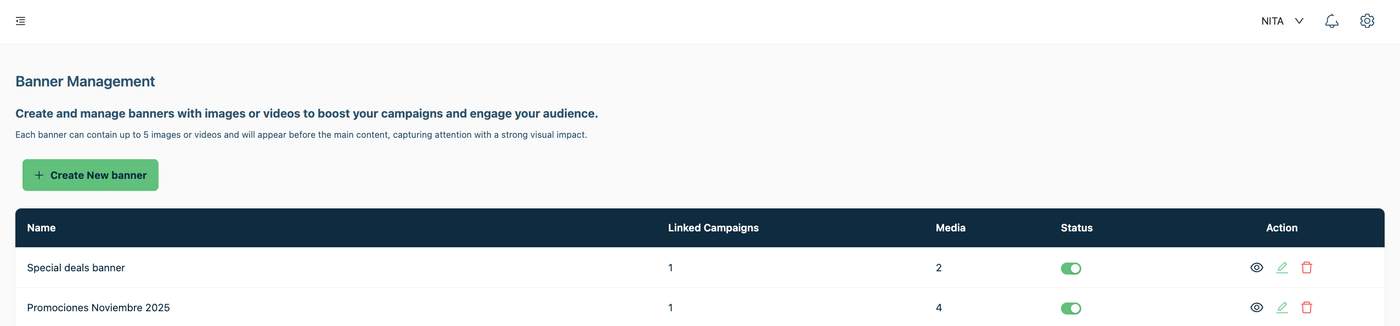
7) To disable the banner.- If you desire to disable the banner when the date of promotion have expired go to the status button to disabled it successfully.