NOTE: Controller 5.7 or superior required.
Login into your UniFi controller and click on the Configuration icon.
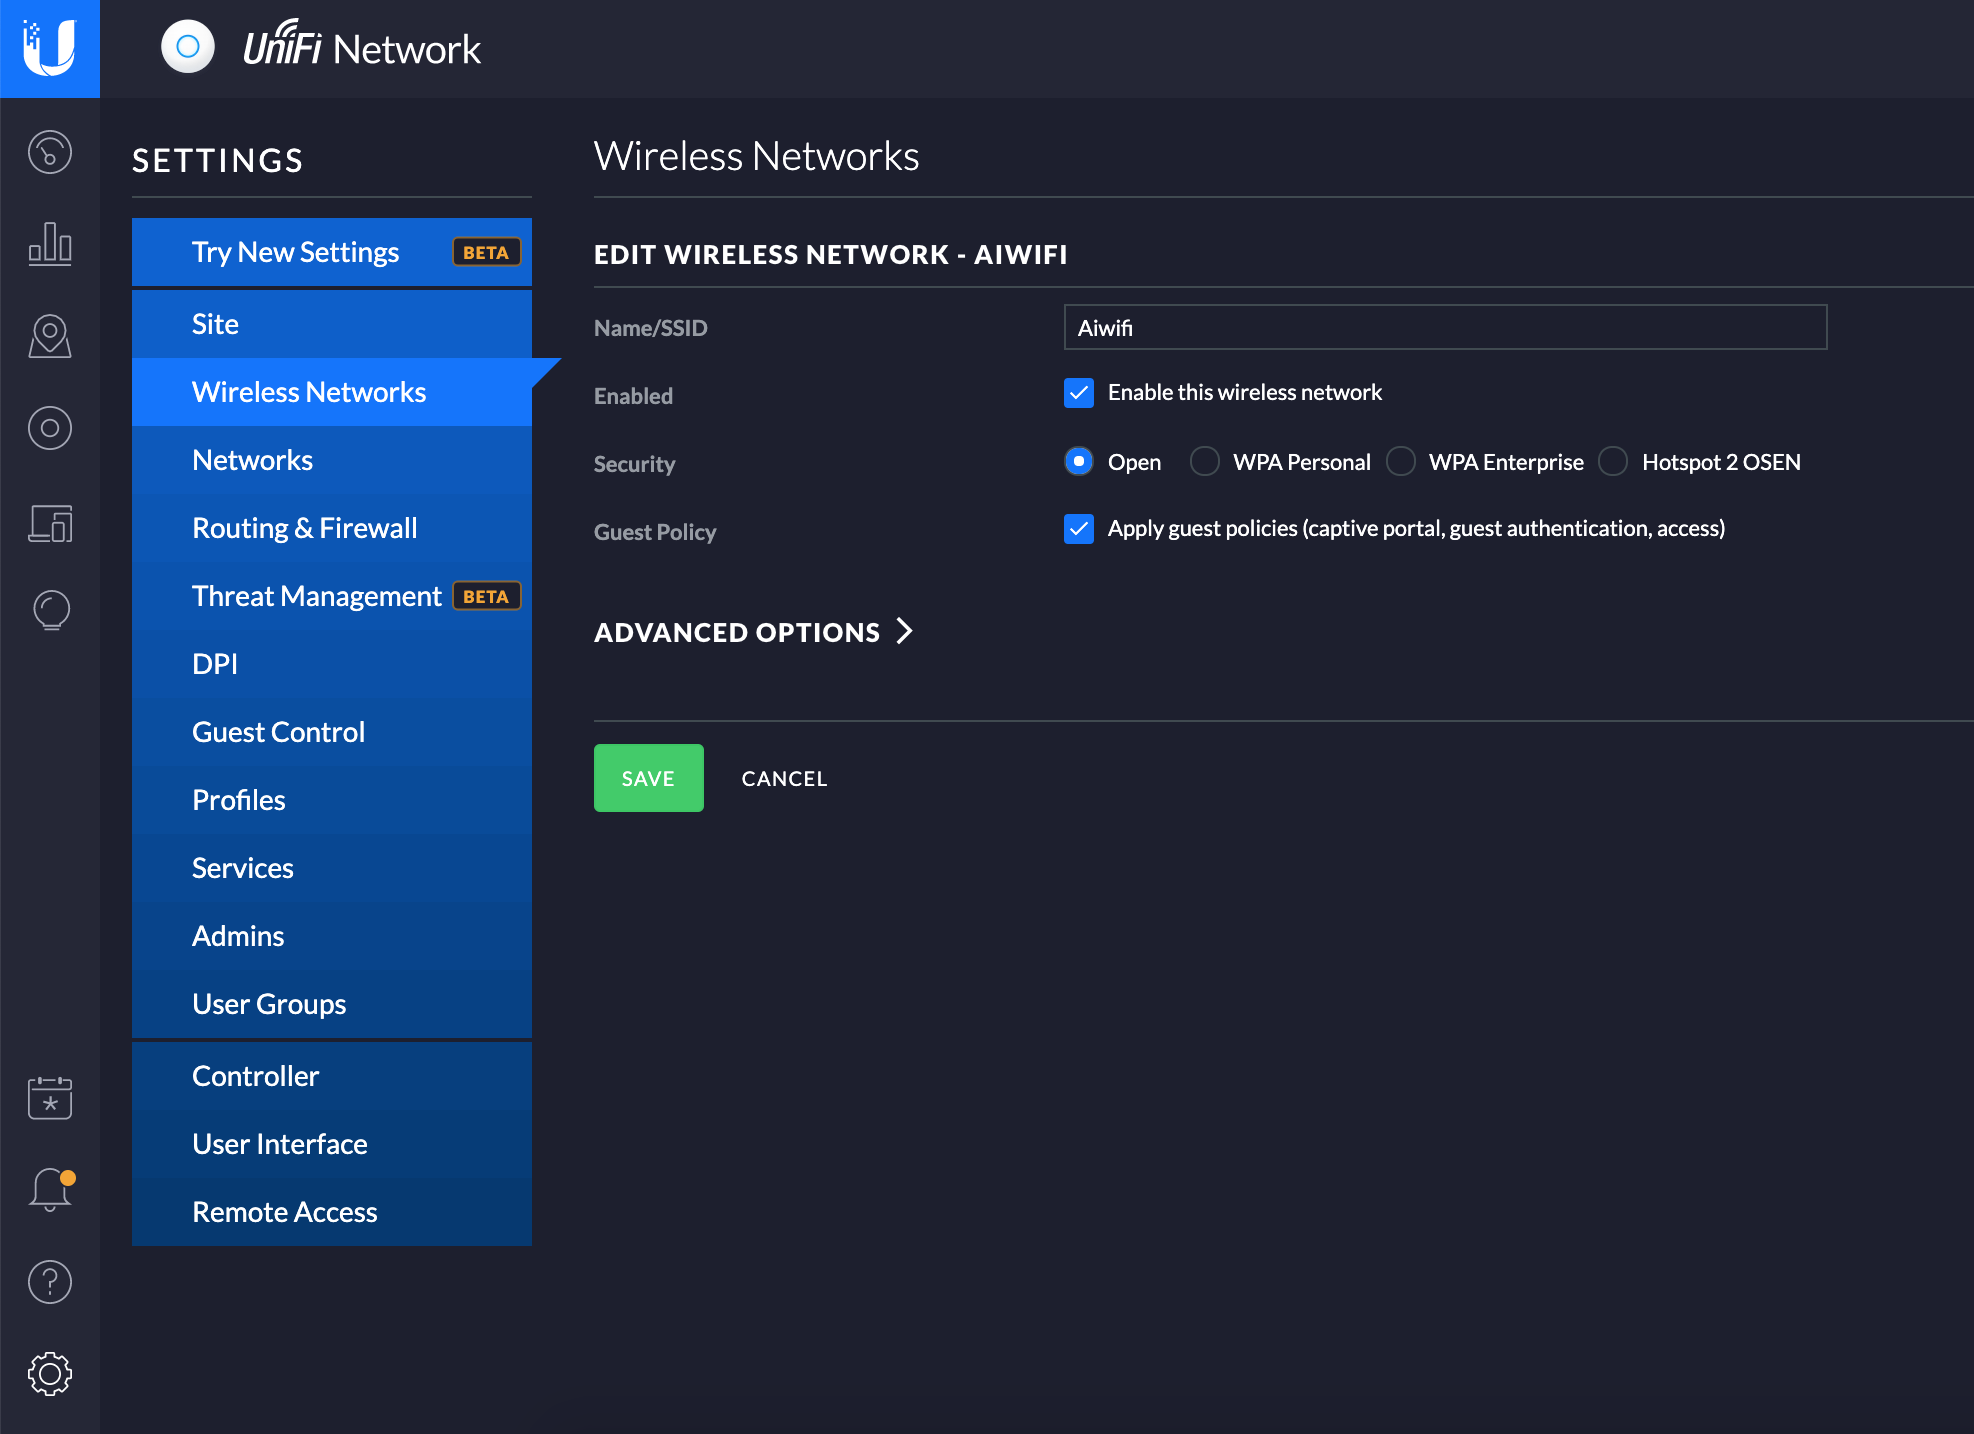
On the side menu, click one Wireless Networks and +Create a new Wireless network.
- Name/SSID : Free Wifi [or choose your Wifi SSID]
- Enabled: Enabled
- Security: Open
- Guest Policy: Enabled
Save changes

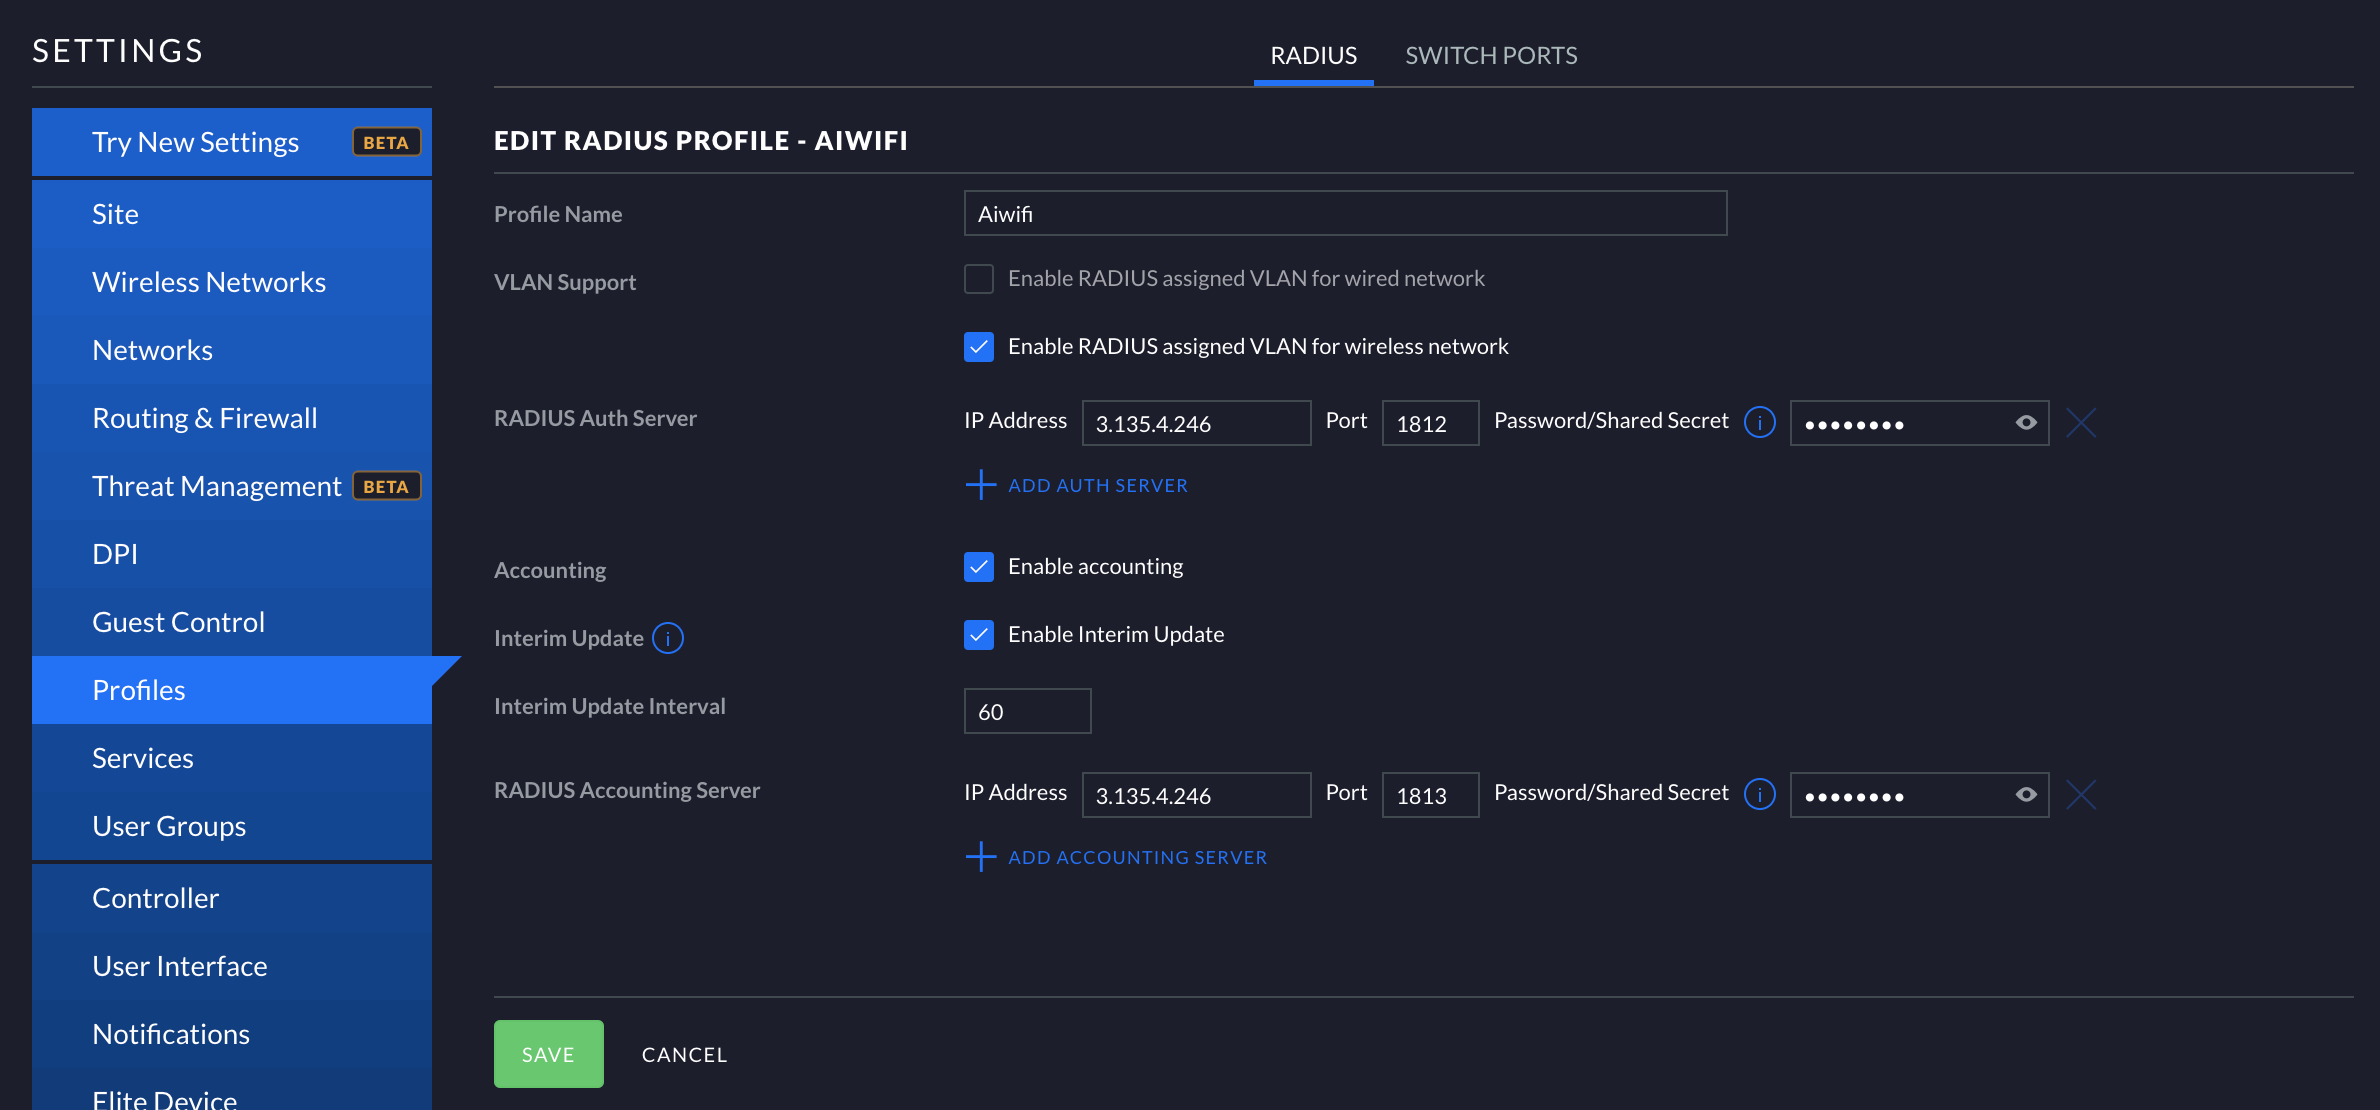
On the left menu, navigate to Profiles and create a new Radius Profile with the information shown in the image and click Save:

On Guest Control > Guest Policies set it up with the following parameters (as shown in the image below:
- Enable Guest Portal: Enabled
- Authentication: Hotspot
- Default Expiration: 8 hours
- Landing Page: Redirect to the original URL
- Use Secure Portal: Disabled
- Redirect using hostname: Disabled
- Enable HTTPS Redirection: Enabled
On Porta Cusotmization:
- Template Engine: Angular JS
- Override Default Template: Checked
- Leave the rest of the configuration of this section as it is.
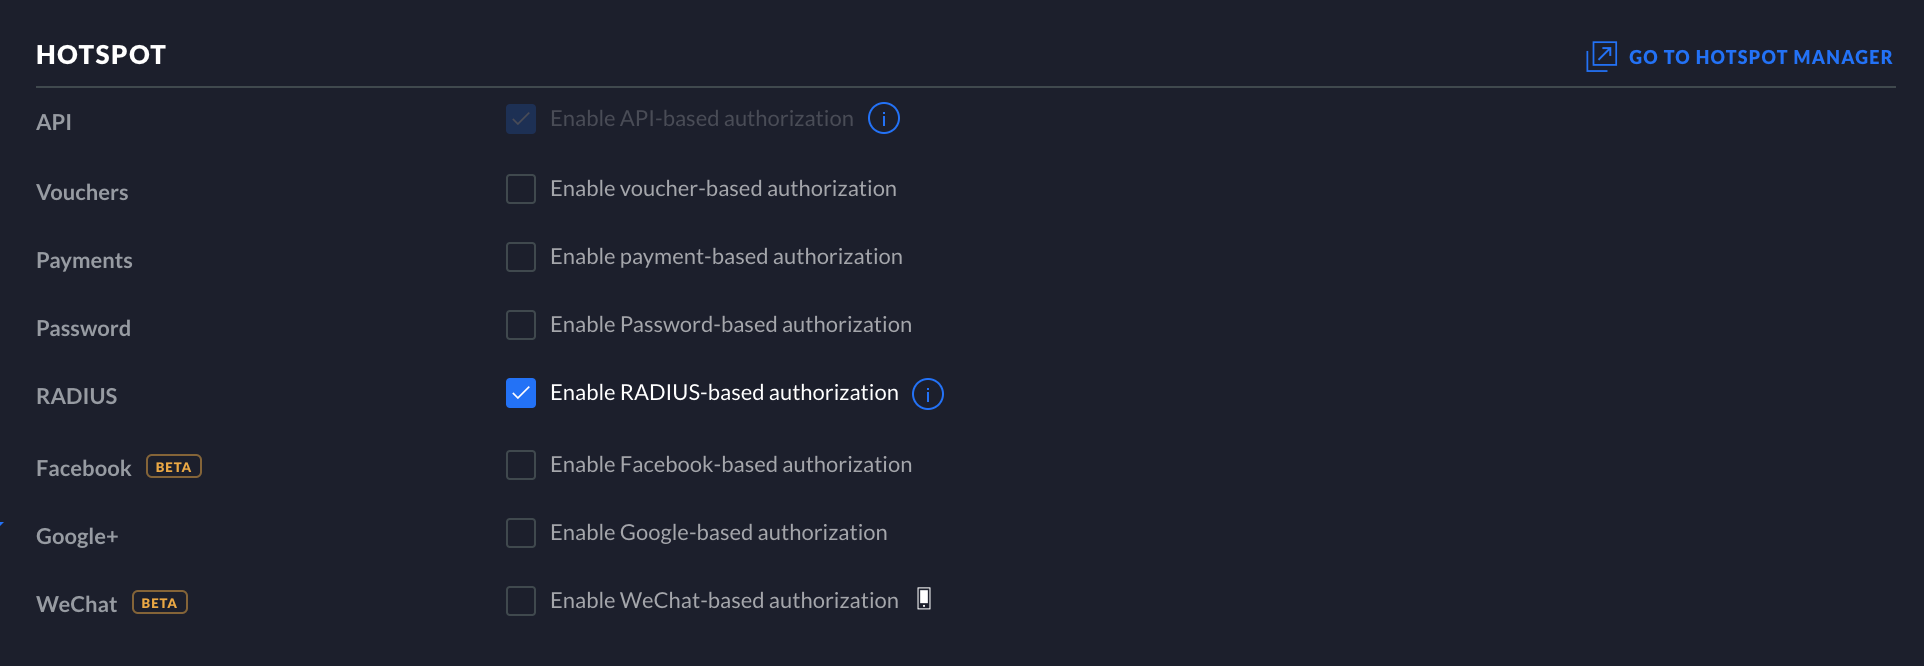
On Hotspot Section:
Make sure you have checked the Enable RADIUS-based authorization option only

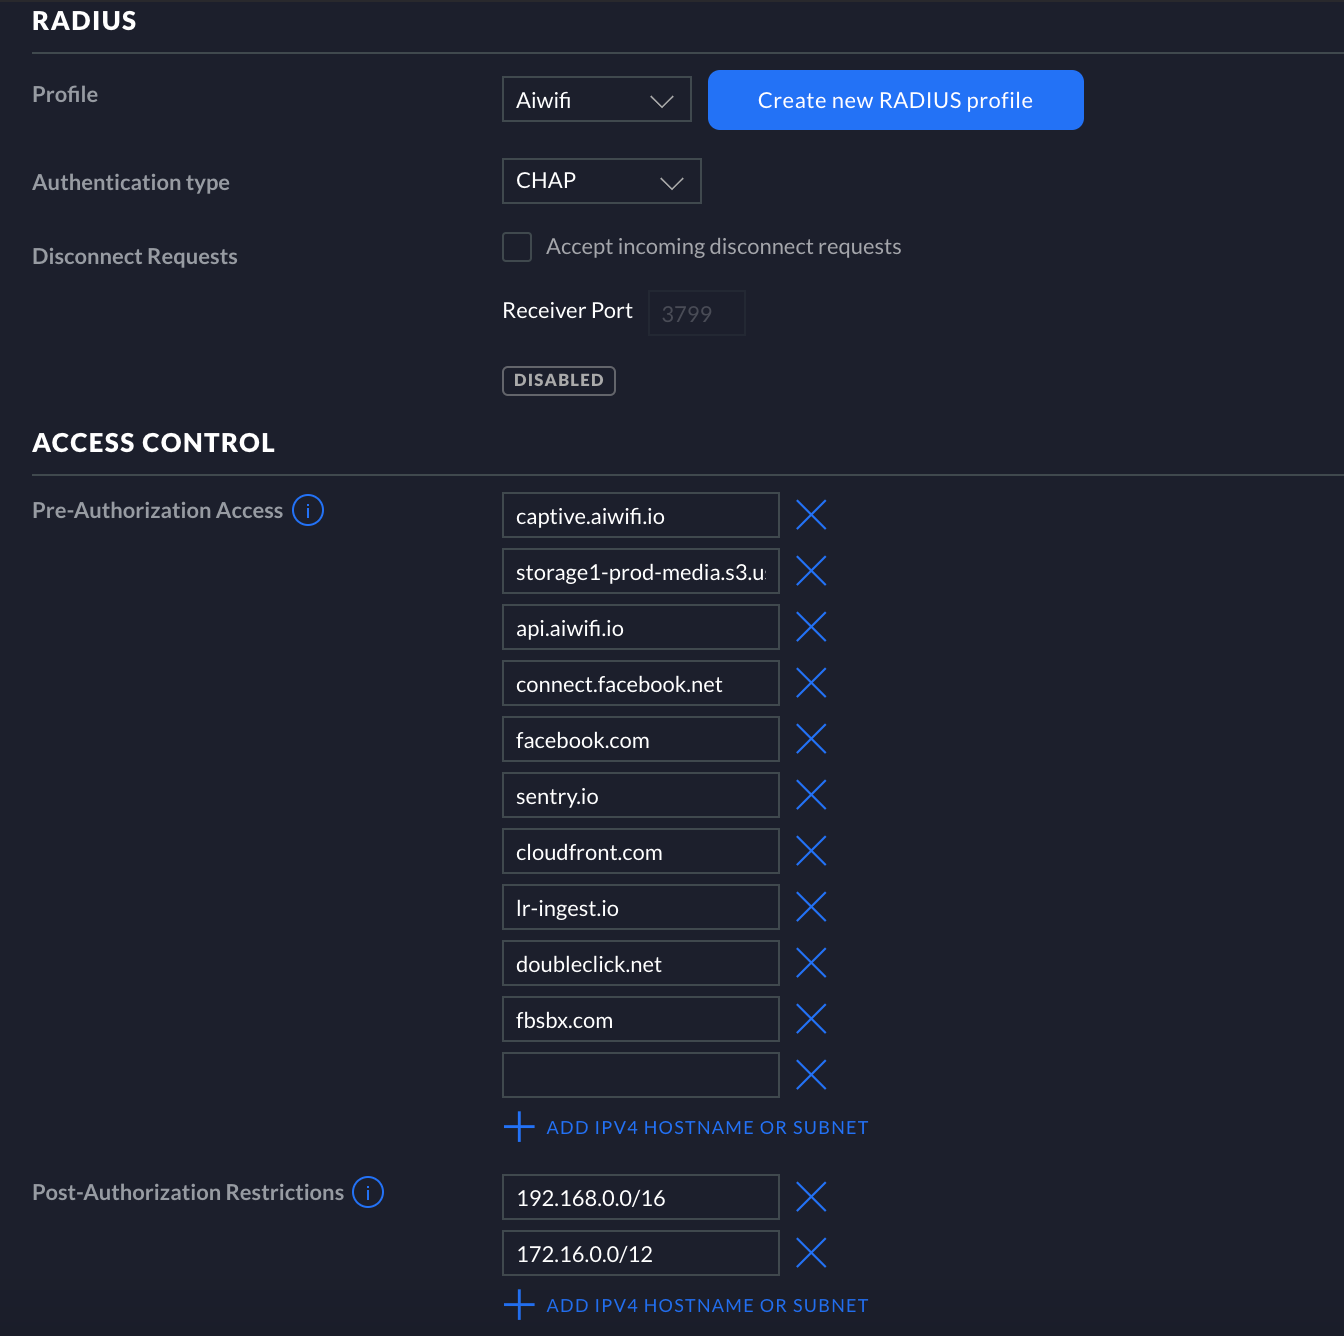
On the Radius and Access Control sections, copy the parameters as displayed.
Profile: Aiwifi (this is the profile you created a couple steps above)
Authentication type: CHAP
Pre-Authorization Access. Add the following list one by one on this section, add the URL where you want the user to be redirected without the https:// or http://:
Look at the basic setup information article to find the URL's you should open on the Walled Garden for following steps.

Finally, download the .zip file on this link and unzip it. You will find 3 files: https://pastebin.aiwifi.io/oOoasI
Use WinSCP in case you are using a UDM, UDM Pro or CloudKey, or on your computer navigate to the following folder:
- Windows: C:\Users\\Ubiquiti UniFi\data\sites\default\app-unifi-hotspot-portal
- MAC: ~/Library/Application Support/UniFi/data/sites/default/app-unifi-hotspot-portal
- Linux: /usr/lib/unifi/data/sites/default/app-unifi-hotspot-portal
- CloudKey: /srv/unifi/data/sites/default/app-unifi-hotspot-portal
Once there, rename the index.html and signin.html files to index.html.old and signin.html.old to create a backup of those files.
- Copy the signin.html and index.html files into the Controller folder.
- Edit the aiwifiUnifi.js by opening it with Notepad or a code editor such as Visual Studio Code or Notepad++. You'll be able to add the redirection URL of your choice on the second line of the file. Whatever URL you add, you should also add it on the Walled Garden URLS on the steps above. Save the file and go to the next step.
- Go into the JS folder inside the Controller and copy and paste the aiwifiUnifi.js file in there.
Remember you have to add your Controller MAC address into your Aiwifi account in order to see the captive portal.