1. Install DD-WRT (you can find the compatible devices here: https://dd-wrt.com/support/router-database/)
2. Access to the device through the web interface
| Enter URL to your web browser: | 192.168.1.1 |
| Default user: | admin |
| Default password: | admin |
3. It may occur that WAN and LAN port cause a clash of DHCP server DD-WRT and local DHCP server.
(default setup IP 192.168.1.1 with configured DHCP server on in the range 192.168.1.100-192.168.1.255)
Go to Setup tab > Basic setup tab
Connection Type: Automatic Configuration - DHCP
4. It may occur that WAN and LAN port cause a clash of DHCP server DD-WRT and local DHCP server.
(default setup IP 192.168.1.1 with configured DHCP server on in the range 192.168.1.100-192.168.1.255)
Go to Setup tab > Basic setup tab
Connection Type: Automatic Configuration - DHCP

You set and split again WAN and ETH ports by changing the parameter "Connection Type" on the tab Setup/BasicSetup from "disabled" to "Automatic Configuration - DHCP" (to distribute IP address from the parent DHCP server) or "Static IP" (to manual setup).
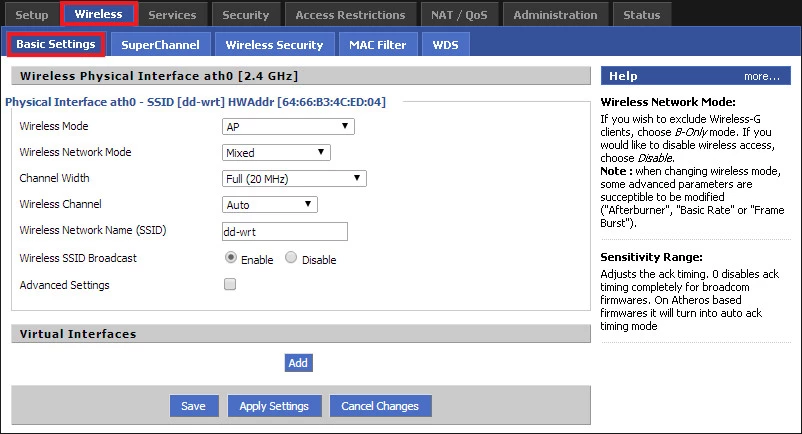
5. Wireless interface configuration
Go to: Wireless tab > Basic Settings tabmake sure that the WiFi interface is enabled
Wireless Physical Interface ath0
| Wireless Mode: | AP |
| Wireless Network Mode: | Mixed |
| Wireless Network Name: | Your Wireless Network SSID (name) |
| Wireless SSID Broadcast: | Enable |
and SAVE
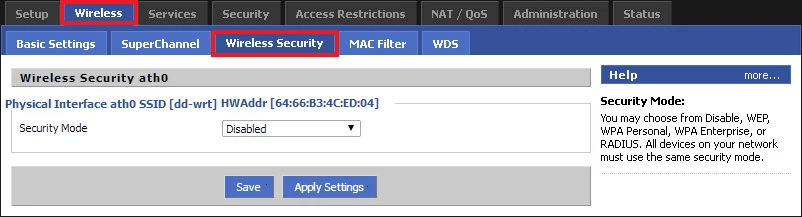
Go to Wireless tab > Wireless Security tab
Security Mode: Disabled
and SAVE
6. Hotspot configuration
Some versions of DD-WRT suffer from firmware error causing not rewriting UAM Domains from the Chillispot setting. Due to this fact, you enter these domains also to the hotspotsystem.com setting.
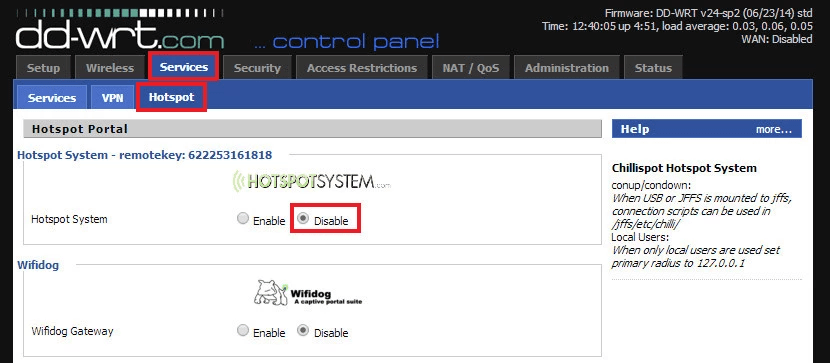
Go to Services tab > Hotspot tab
Hotspot Portal section / Hotspot System.com
Hotspotsystem.com: Enable (this is temporarily ON and must be disabled when all done - bypassing the firmware error. Follow the instructions below)
Special settings: Enable
UAM Allowed:
UAM Domains (space separated):
captive.aiwifi.io storage1-prod-media.s3.us-east-2.amazonaws.com api.aiwifi.io sentry.io connect.facebook.net facebook.com sentry.io cloudfront.com lr-ingest.ioand SAVE
Now disable the hotspotsystem.com settings you've just adjusted.
Hotspotsystem.com: Disable
and SAVE again
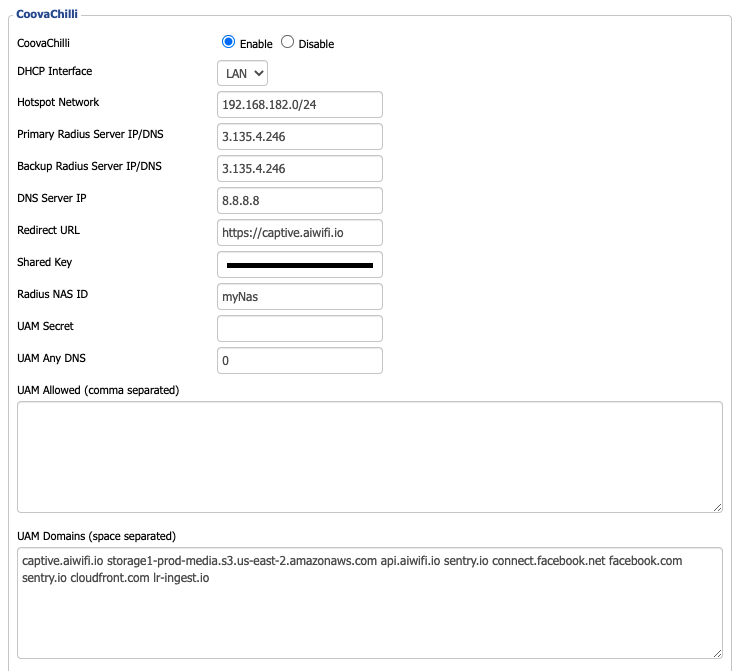
Configure chillispot now:
Hotspot Portal section / Chillispot
| Chillispot: | Enable |
| DHCP Interface: | LAN |
| Hotspot Network: | 192.168.182.0/24 |
| Primary Radius Server IP/DNS: | 3.135.4.246 |
| Backup Radius Server IP/DNS: | 3.135.4.246 |
| DNS IP: | 8.8.8.8 (it's recommended use DNS server address of your internet service provider) |
| Redirect URL: | https://captive.aiwifi.io |
| Shared Key: | request to [email protected] (case sensitive) |
| Radius NAS ID: | myNas |
| UAM Secret: | |
| UAM Any DNS: | 0 |
| MACauth: | Disable |
| 802.1X Authentication (EAP): | Disable |
UAM Domains (space separated):
captive.aiwifi.io storage1-prod-media.s3.us-east-2.amazonaws.com api.aiwifi.io sentry.io connect.facebook.net facebook.com sentry.io cloudfront.com lr-ingest.ioand Save & Apply Settings
It should look something like this:
7. Configure Time Settings
- Navigate to Setup > Basic Setup
- Under Time Settings, set:
- Save and Apply Settings