Pre-requisites
Your Access Point and Controller should be already paired and working together for a simple WiFi Network.
Captive Portal Setup
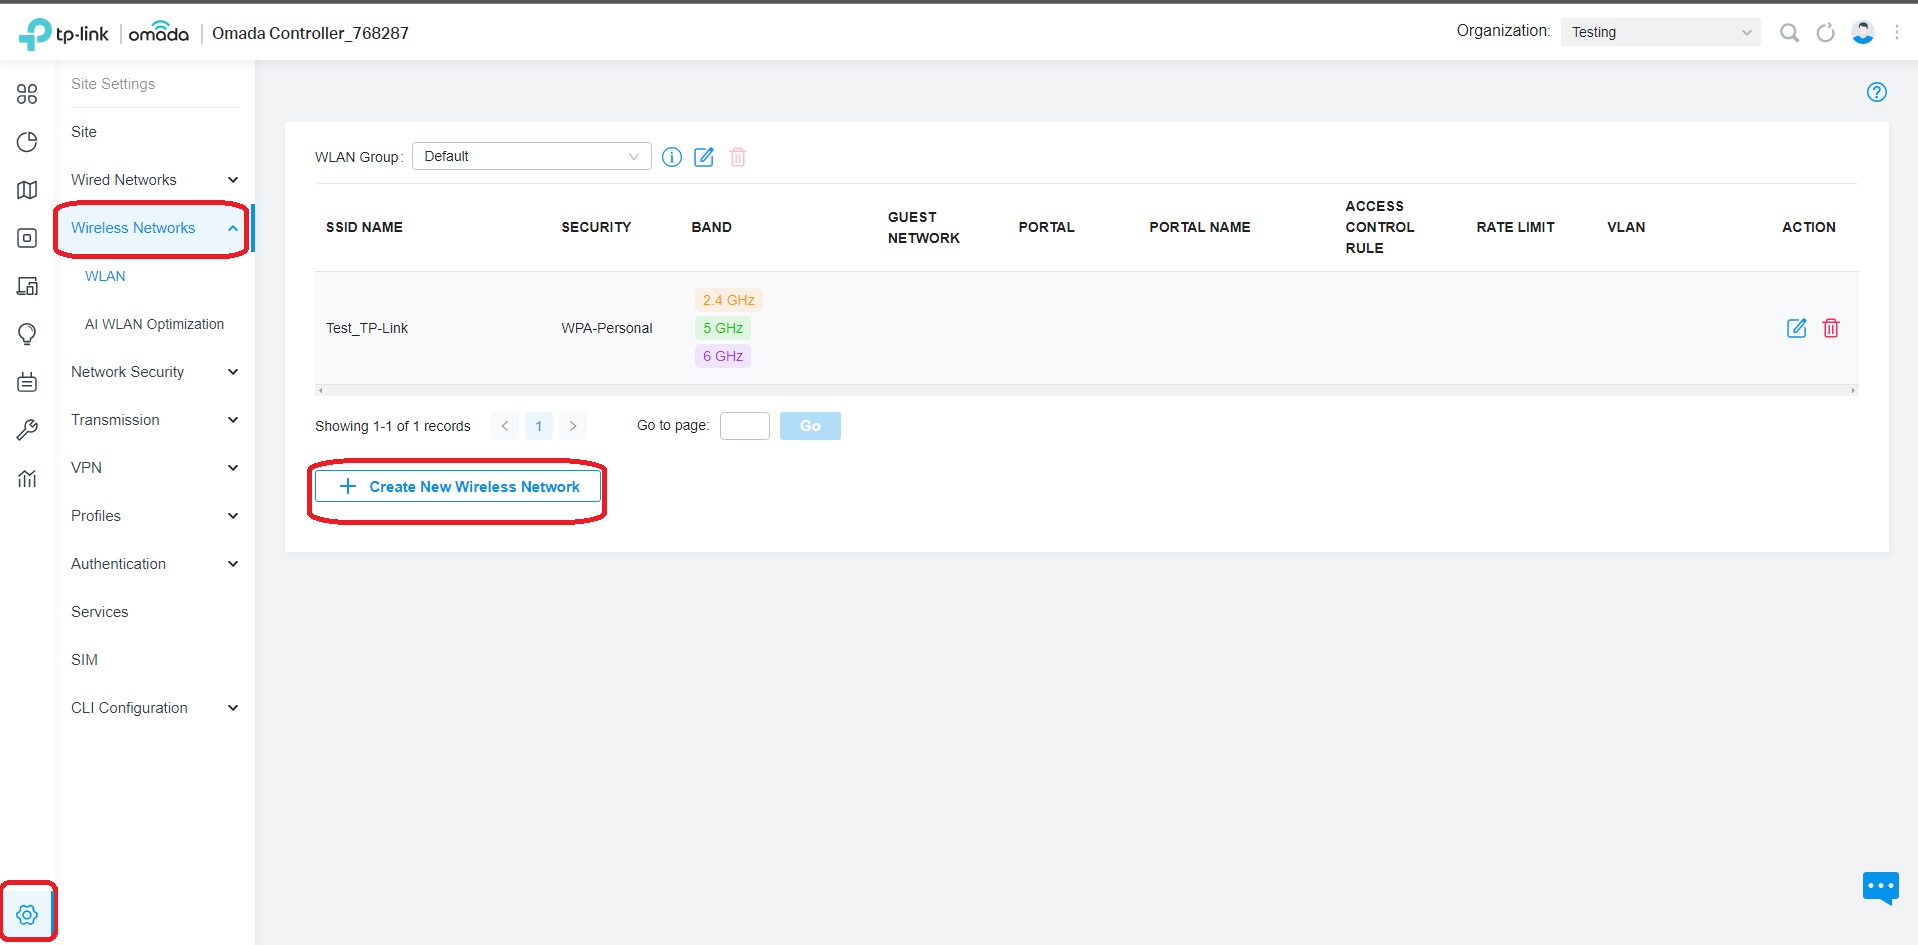
1. Go to “Configuration” then “Wireless Networks” and click con “+ Create New Wireless Network”
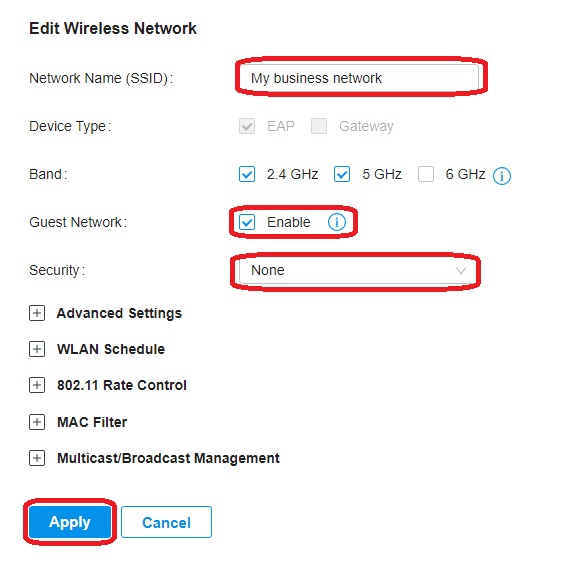
2. Setup a name for your wireless network, for example: "My Business WiFi"
- Check the Guest Network Option
- Select “None” on the Security option
- Click on “Apply”
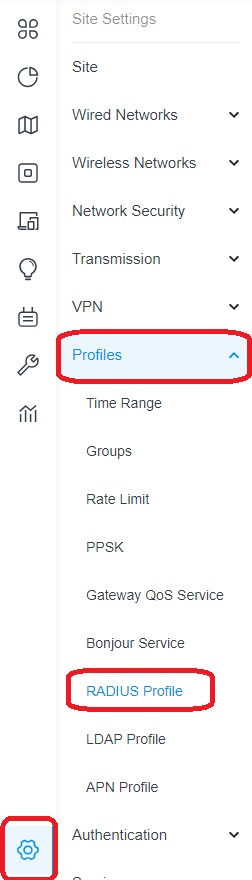
3. Navigate to the Site Settings Menu and go to “Profiles” > “Radius Profile”
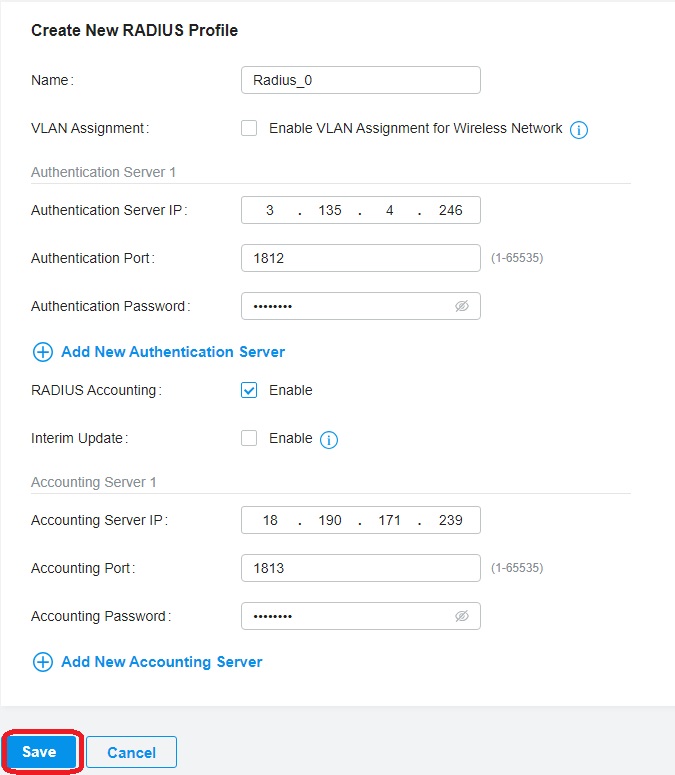
4. Create a Radius Profile:

5. Fill out the Settings following the general data in the next URL:
https://help.aiwifi.io/en/category/configuration-manuals/article/basic-setup-information
Then, click on “Save”
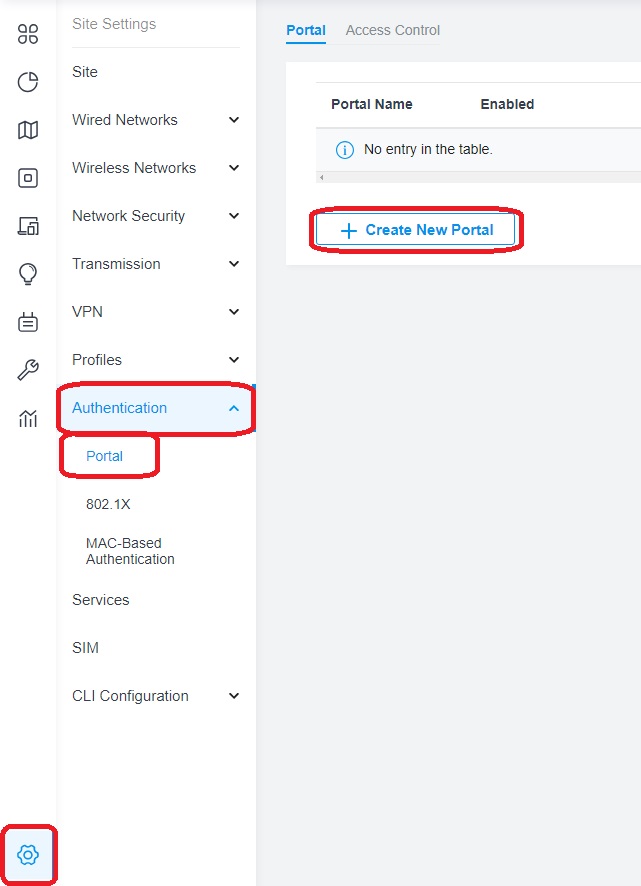
6. Navigate to Authentication > Portal and click on “+Create new portal”
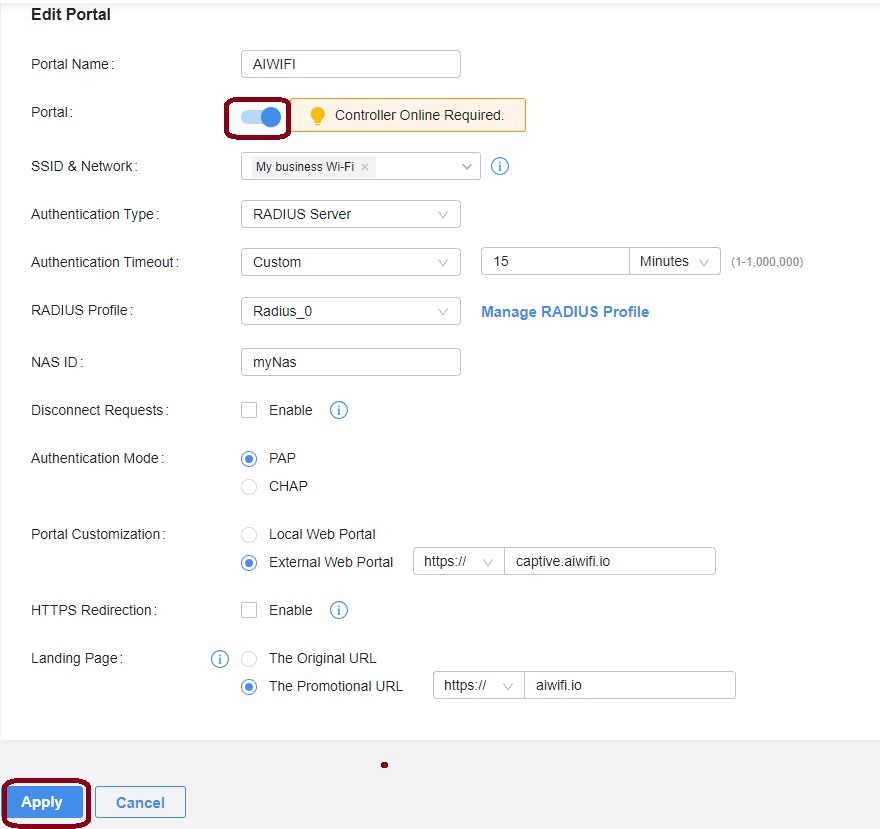
7. Fill out the form as follows:
- Portal Name: AIWIFI
- Portal: Enabled
- SSID & Network: Select the WiFi network created on step 2.
- Authentication Type: Radius Server
- Configure a custom Authentication Type (you can choose the best option for you)
- Radius Profile: Select the radius profile you created on the previous step.
- Portal Customization: External Web Portal
- https://captive.aiwifi.io
- Landing Page: The Promotional URL
- https://yourwebsite.com // Define this URL as desired. This would be your website for most cases.
- After that, click on “Apply”
8. Once created, we need to allow free access to some URL's. This URL's should be added in the Walled Garden. Navigate into the "Access Control" tab inside the "Portal" menu. Enable Pre-Authenticatoin Access and click on "Add"


9. Add the addresses on the “Walled Garden” section on the following URL:
https://help.aiwifi.io/en/category/configuration-manuals/article/basic-setup-information
Then, click on “Save”
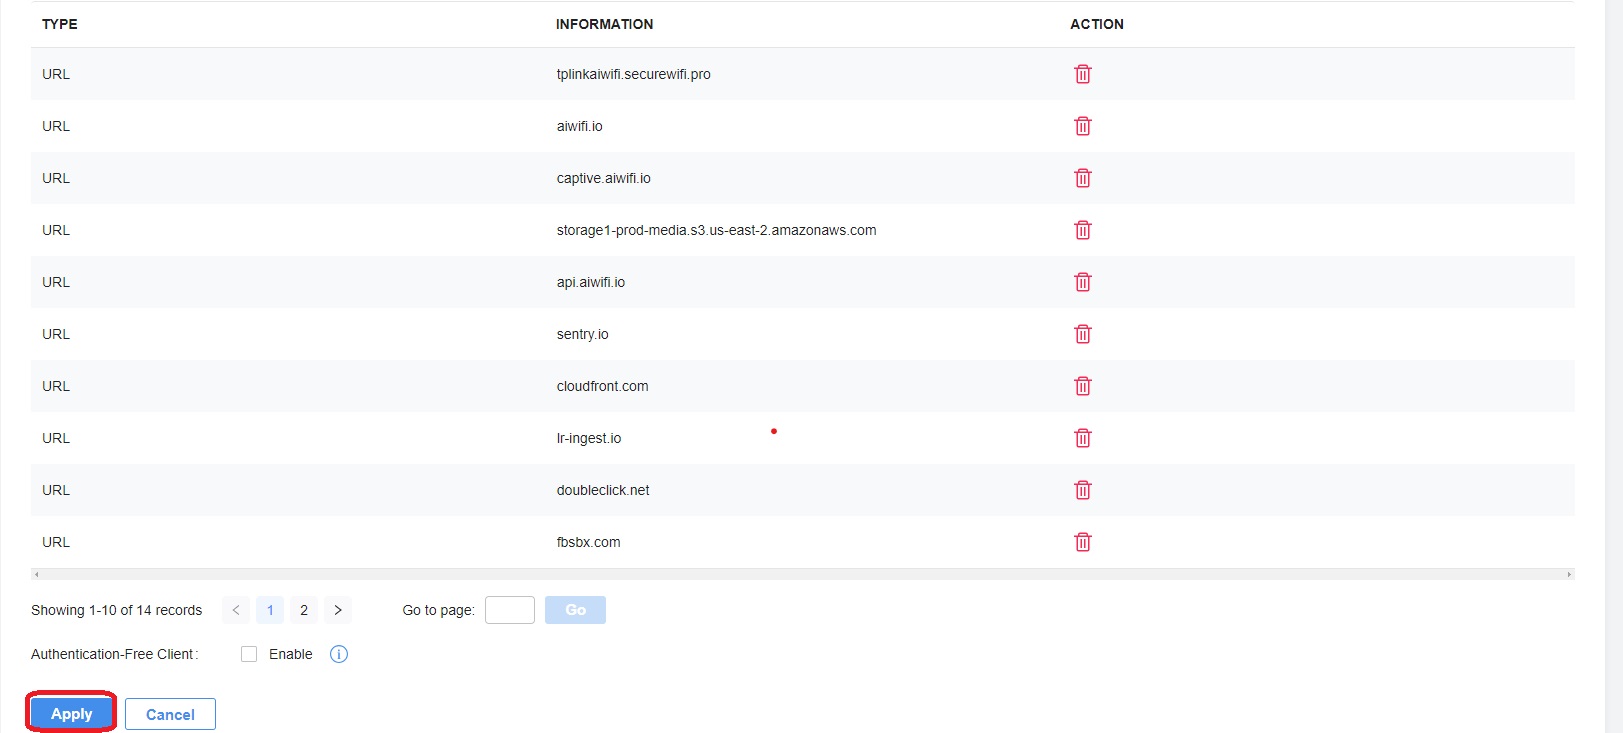
10. Click on “Apply”

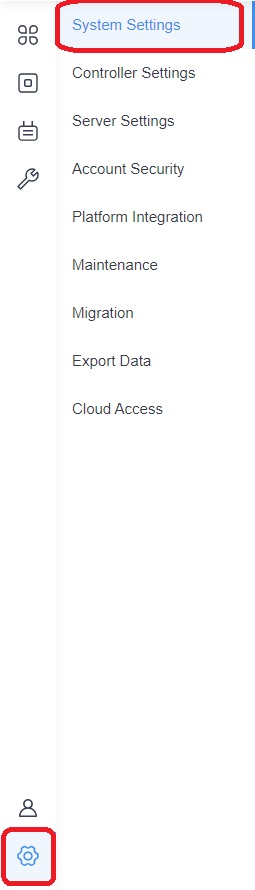
11. After that, you need to go to “Global”

- Click on “Settings”
- Click on “System settings”
In this point, you need an SSL Certificate, only if you want to avoid a certificate error when displaying the captive portal. (in this case, the recommended format is PFX).
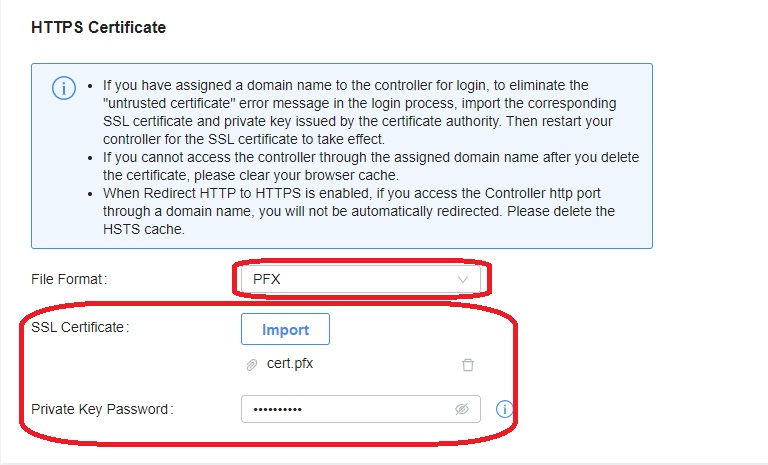
NOTE: You need to buy an exist SSL Certificate, and depends on your format, you need the next tool to convert into PFX, you can do it in the next URL: https://www.interssl.com/de/ssl-tools-pfxconverter.php (you need .key, .crt, CABundle.crt / .ca-bundle / DigiCertCA.crt (optional) and a password for PFX)

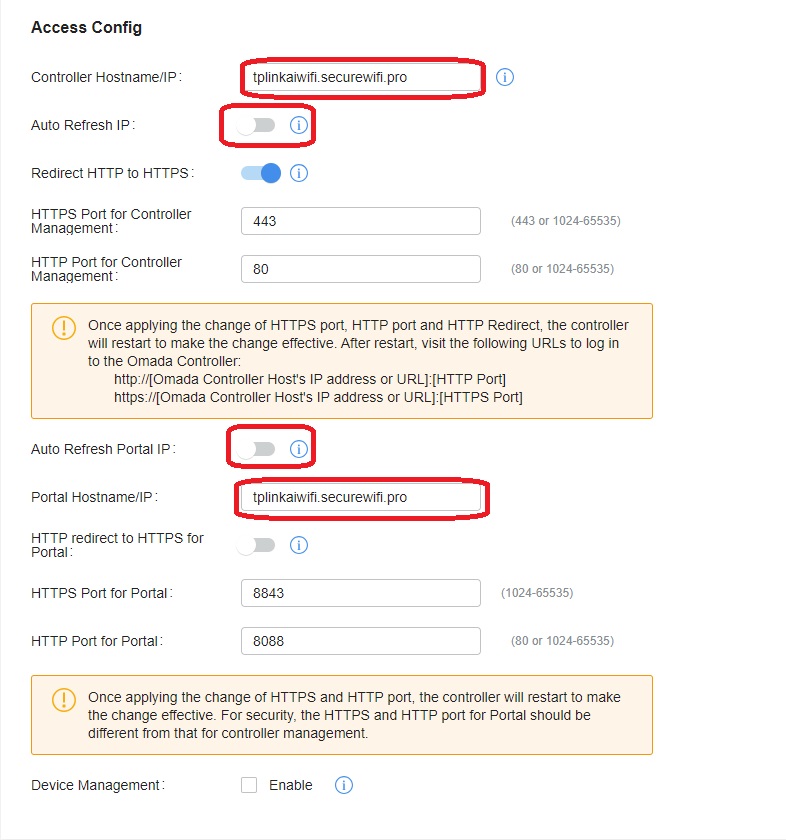
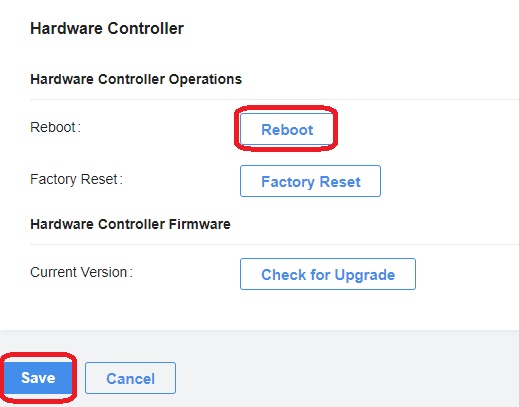
12. You need to change the IP address on “Controller Hostname/IP” for the domain, disabled “Auto Refresh IP”, disabled “Auto Refresh Portal IP” and put the same domain of your SSL Certificate on “Portal Hostname/IP”. After that, you need to click on “Save” and then click on “Reboot”.
13. You should now be able to test your captive portal by connecting to the WiFi network you created. If you haven't added your Access Point to your Aiwifi account you should see the following message on the portal. Add your AP to your Aiwifi account to customize your captive portal.
