Pre-requisites
Firstly, your Access Point (GWN76xx) and your computer should be already connected to same local network by Wi-Fi.
Captive Portal Setup
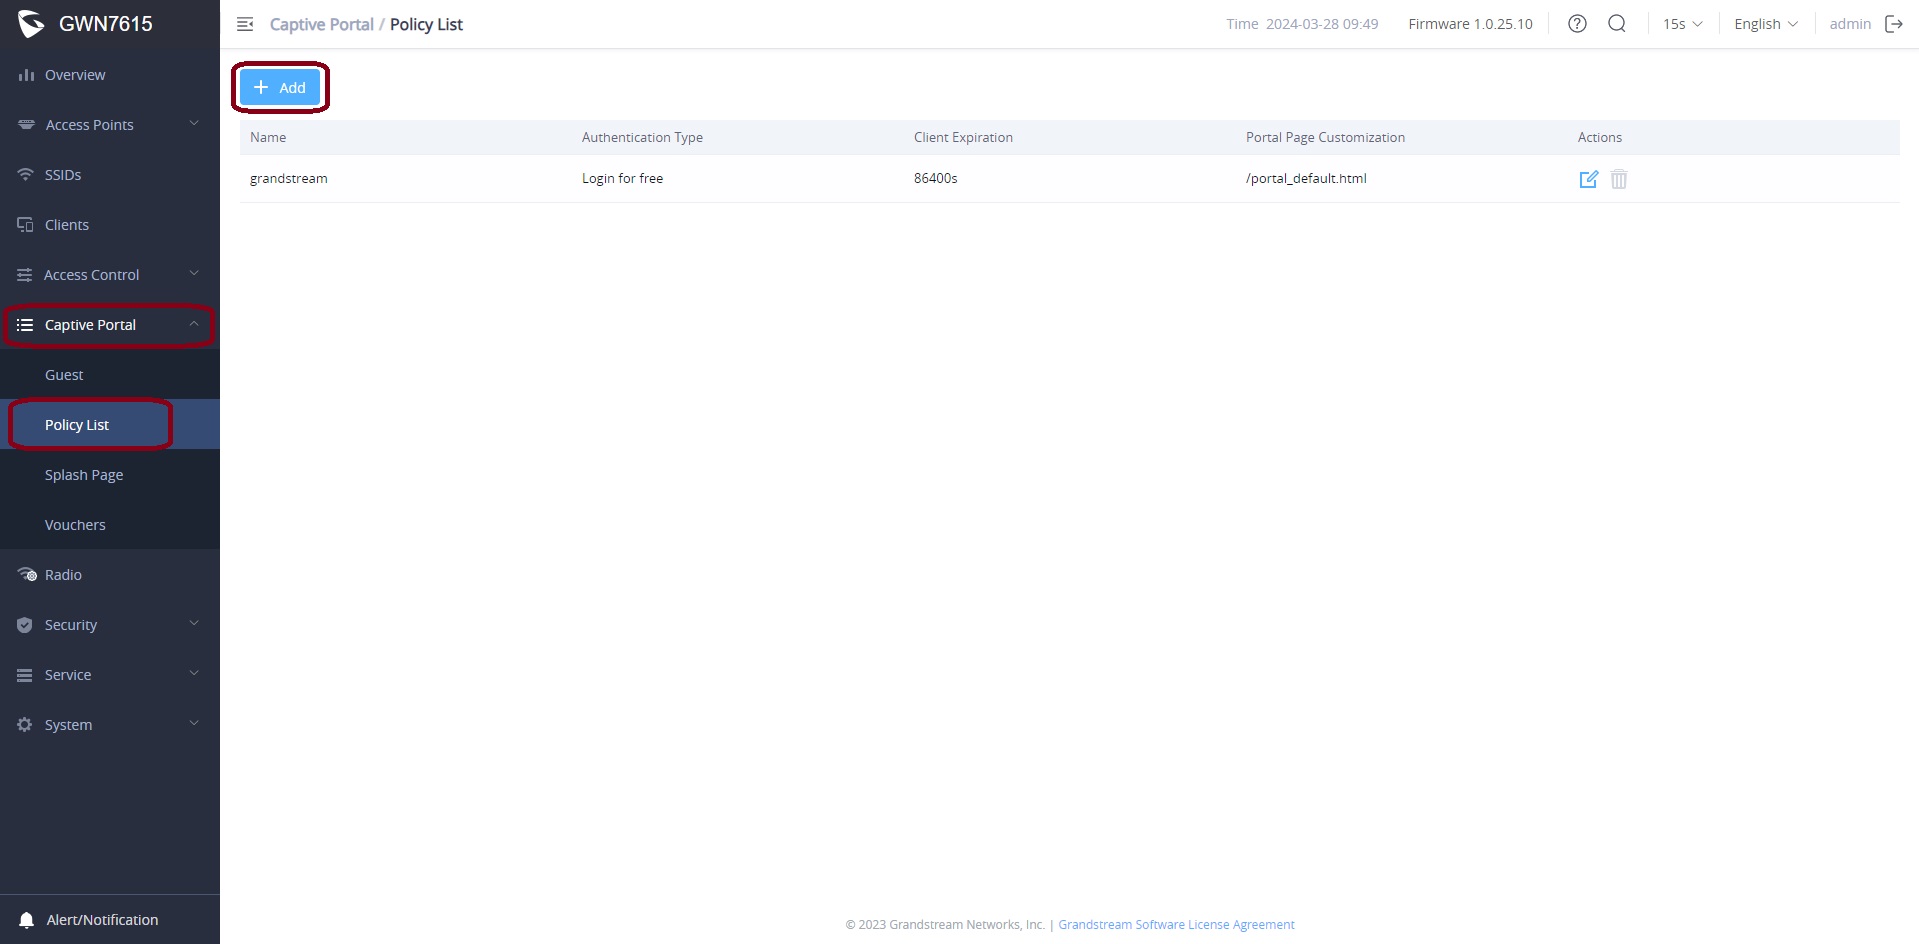
1. Set up Policy list, click on Captive Portal, Policy list and +Add:
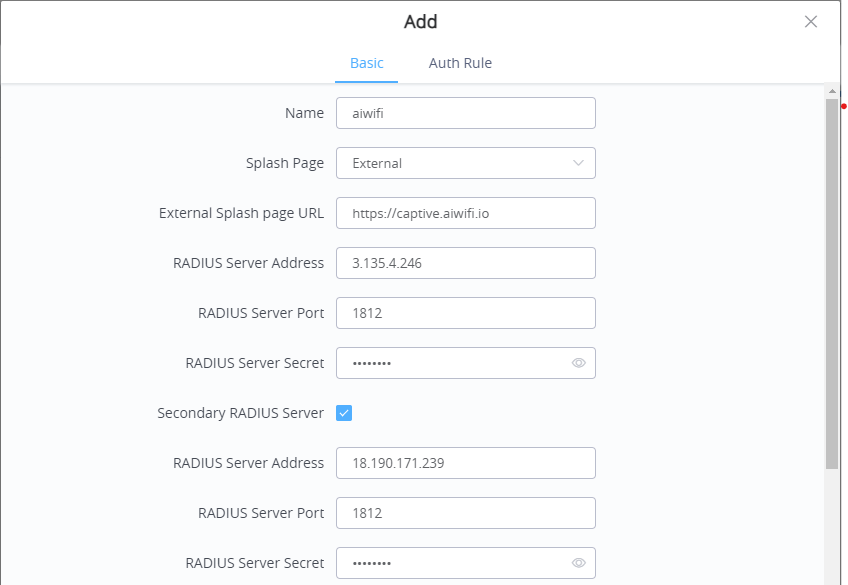
2. Set up the next steps on Policy List:
- Name: “aiwifi” -> Chose a name you do want.
- Click on “External” on Splash page.
- Put on External Splash page URL the following URL: https://captive.aiwifi.io
- Put the RADIUS Server Address, you can find it in the next URL: https://help.aiwifi.io/en/category/configuration-manuals/article/basic-setup-information.
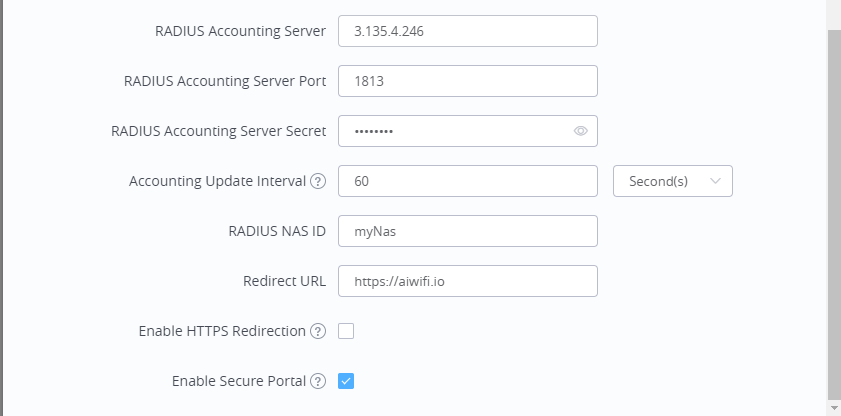
- Determine 60 seconds on Accounting Update Interval.
- On the Redirect URL, put the landing page you do want.
- Enable Secure Portal.
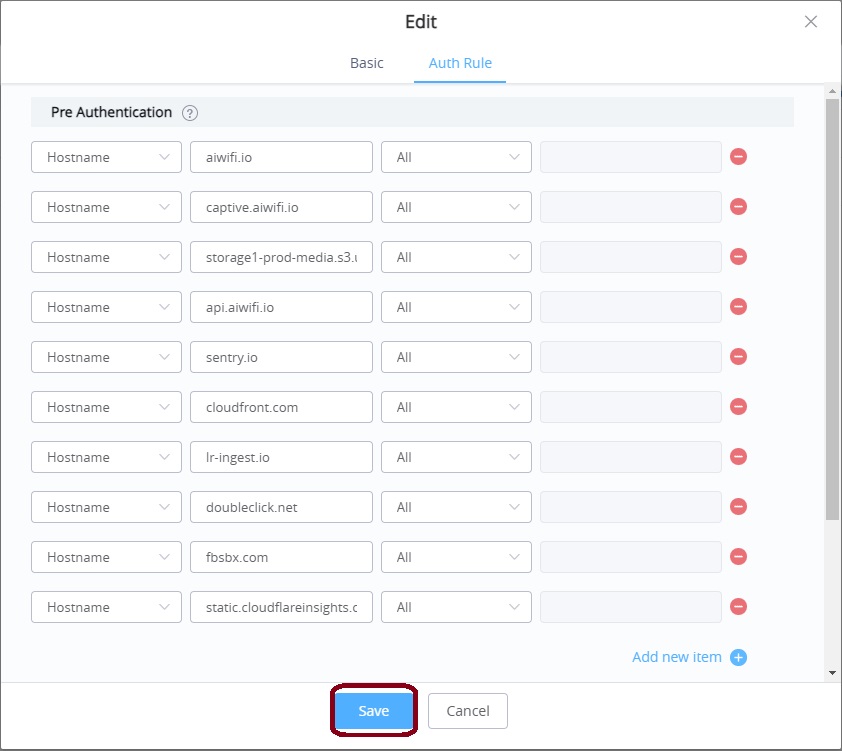
3. Set Up Authentication Rule, put the following URLs on Pre-Authentication, you can find them on the next URL in Walled Garden section: https://help.aiwifi.io/en/category/configuration-manuals/article/basic-setup-information
- On destination, select: Hostname.
- On Service, select: All.
- Click on “Save”.
- Click on “Apply” after your set-up a configuration.

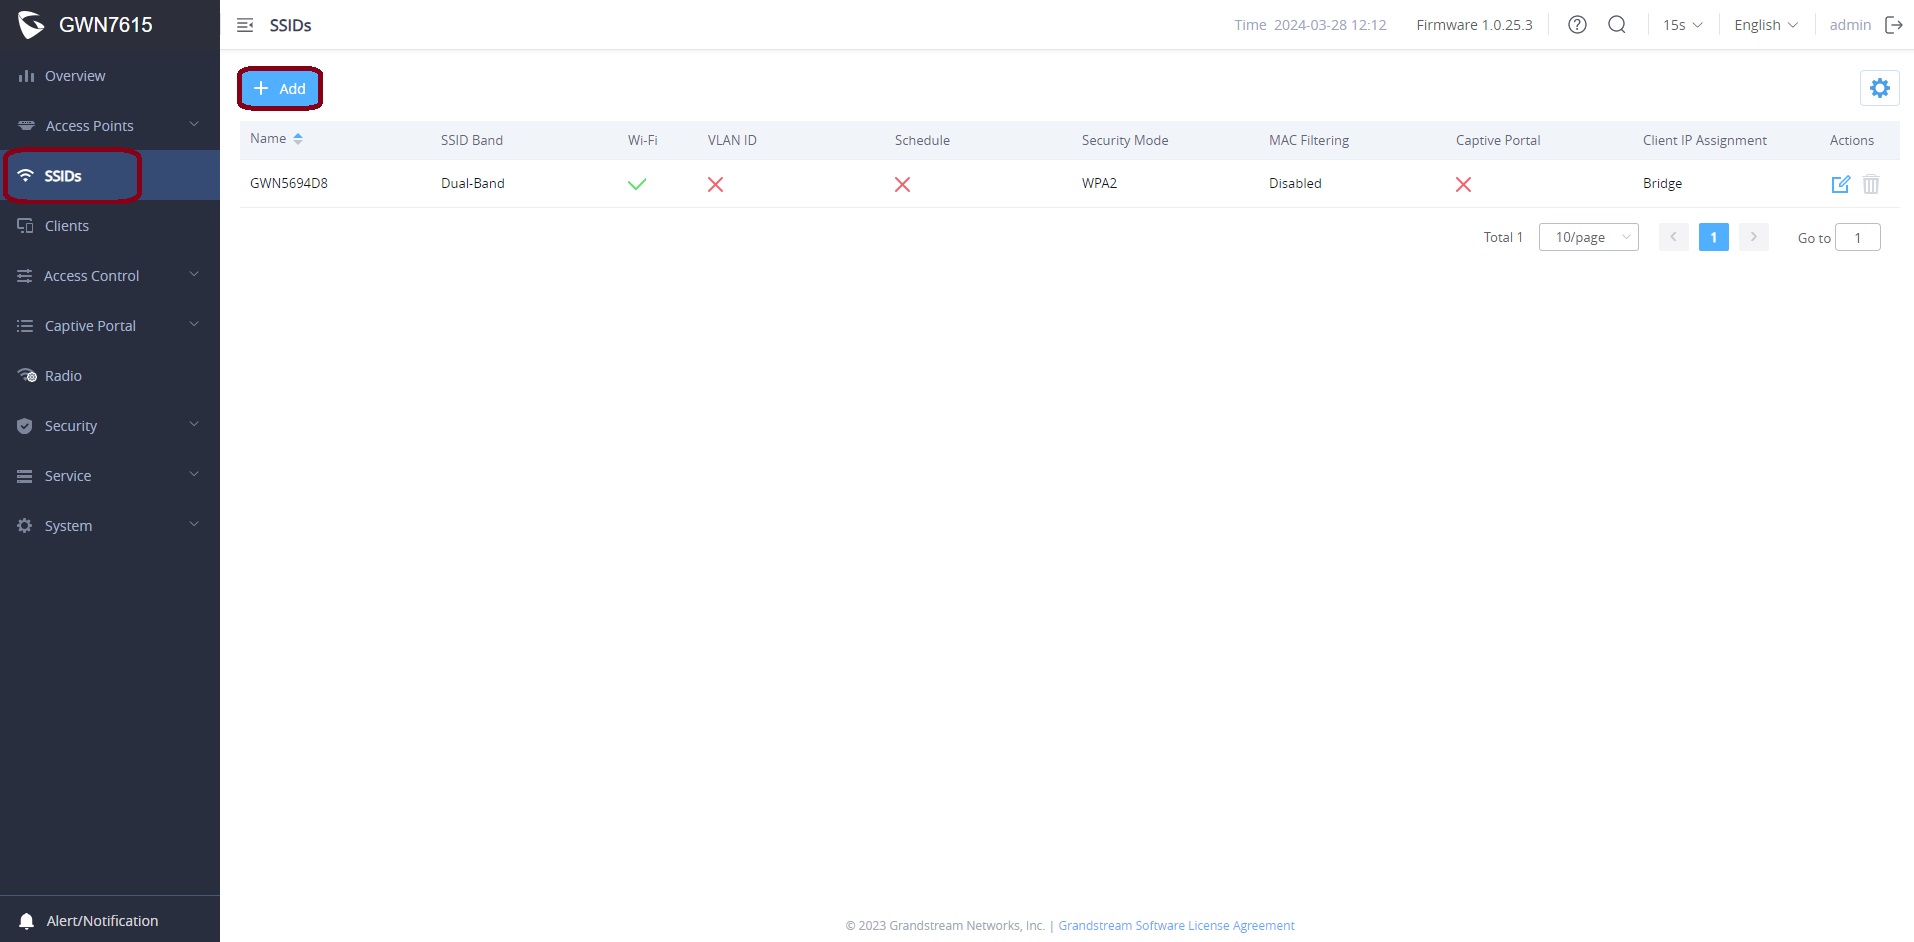
4. Go to “SSIDs” and click on “+ Add”
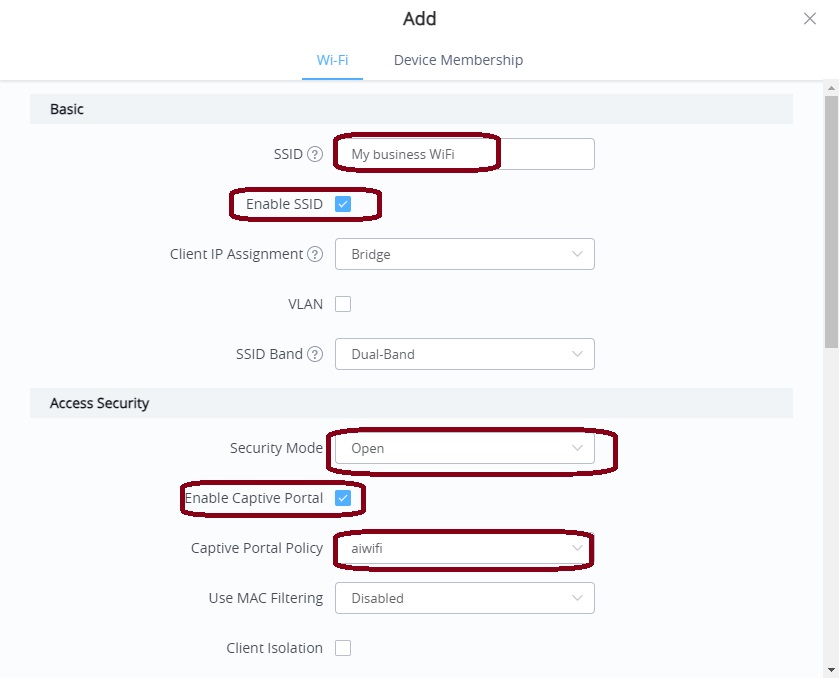
5. Set up a name for your wireless Wi-Fi, for example: “My Business WiFi”
- Check the Enable SSID option.
- Click Open on Security mode.
- Check the Enable Captive Portal.
- Click on “Captive Portal Policy” and then click on the previous created.
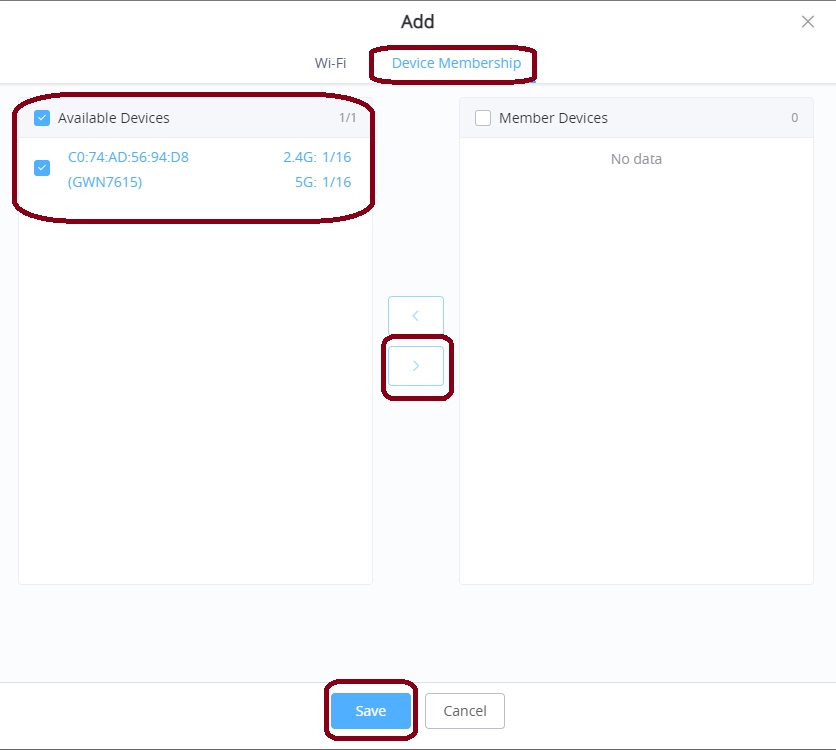
6. Go to Device membership, check on Available devices and then click on the button ">" and then click on Save and click on “Apply” after your set-up a configuration.

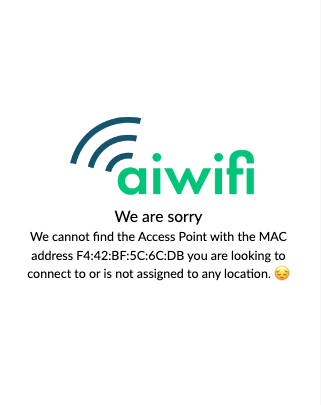
You should now be able to test your captive portal by connecting to the WiFi network you created. If you haven't added your Access Point to your Aiwifi account you should see the following message on the portal. Add your AP to your Aiwifi account to customize your captive portal.