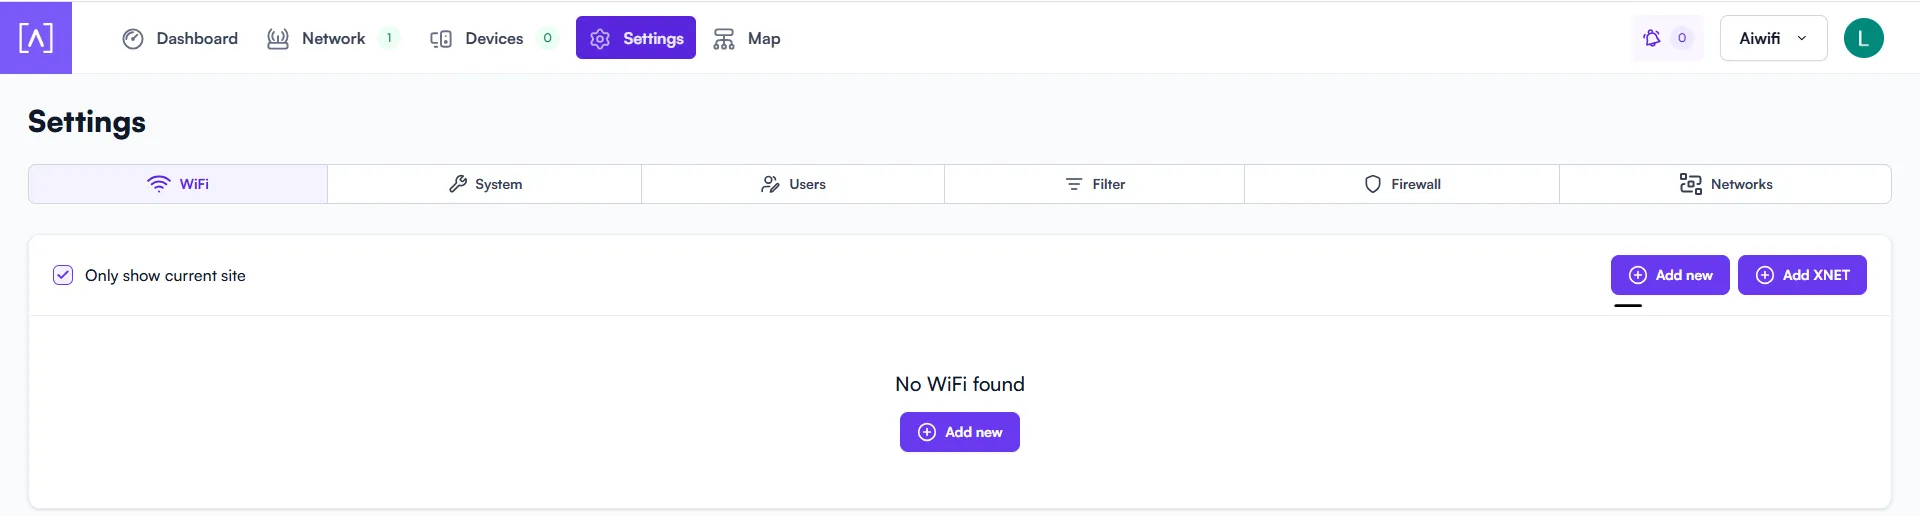
Step 1: Login to the Cloud Controller
1. Log in to the cloud controller platform with your username and password.
2. In the main menu, go to Settings.
3. In Settings, select the Wi-Fi option.

Step 2: Create a New Wi-Fi Network
1. In the Wi-Fi section, click the "Add New" button.
2. A form will open to configure the parameters of the new Wi-Fi network.
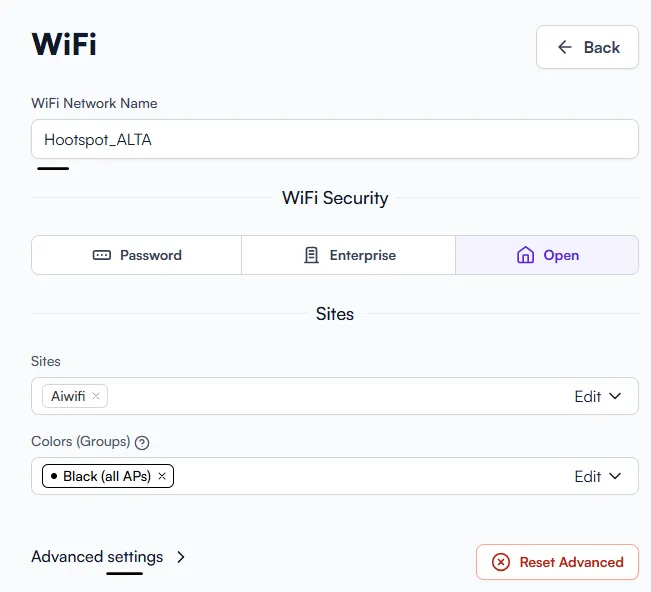
Step 3: SSID Configuration
1. In the configuration form, in the SSID field, enter the name of the Wi-Fi network: Hotspot_ALTA
2. In the Wi-Fi Settings section, select the OPEN option.
3. Expand the Advanced Settings section to adjust additional options.
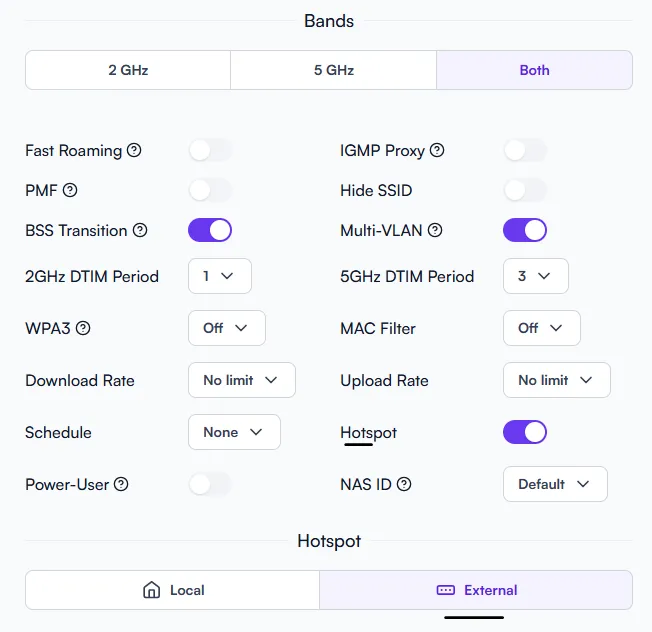
Step 4: Band Configuration
1. In the Advanced Settings section, look for the Bands option.
2. Enable the following options: (External) (Hotspot)
Step 5: Configuring Redirection and Authorized Hosts
1. In the Captive Portal Settings section, locate the Redirect URL field and enter: https://captive.aiwifi.io
2. In the Secret field, enter the key provided by Systems. If you don't have it, request it before continuing.
3. In the Additional Authorized Hosts/IP section, add the following domains to allow unrestricted access:
captive.aiwifi.io, storage1-prod-media.s3.us-east-2.amazonaws.com, api.aiwifi.io, sentry.io, cloudfront.com, lr-ingest.io, doubleclick.net, fbsbx.com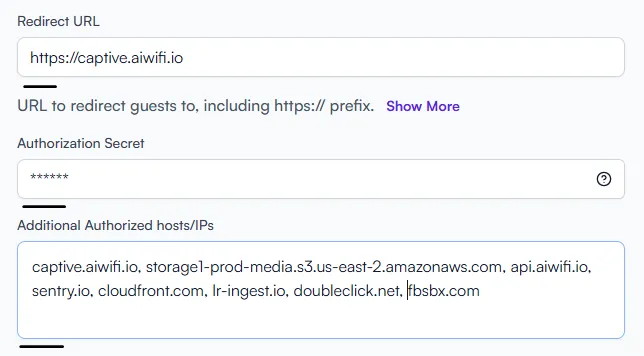
Step 6: Save Configuration
1. Leave the rest of the settings at their default values.
2. Check that all configured parameters are correct.
3. Click Save to apply the changes.
✅ Configuration complete!
