Step 1: Log in to the Juniper Cloud Controller (Mist Juniper)
1. Access the Mist Juniper Cloud platform through your web browser.
2. Enter your user credentials (email and password).
3. Once inside the control panel, go to the main menu.

Step 2: Create a Test SSID for the Captive Portal
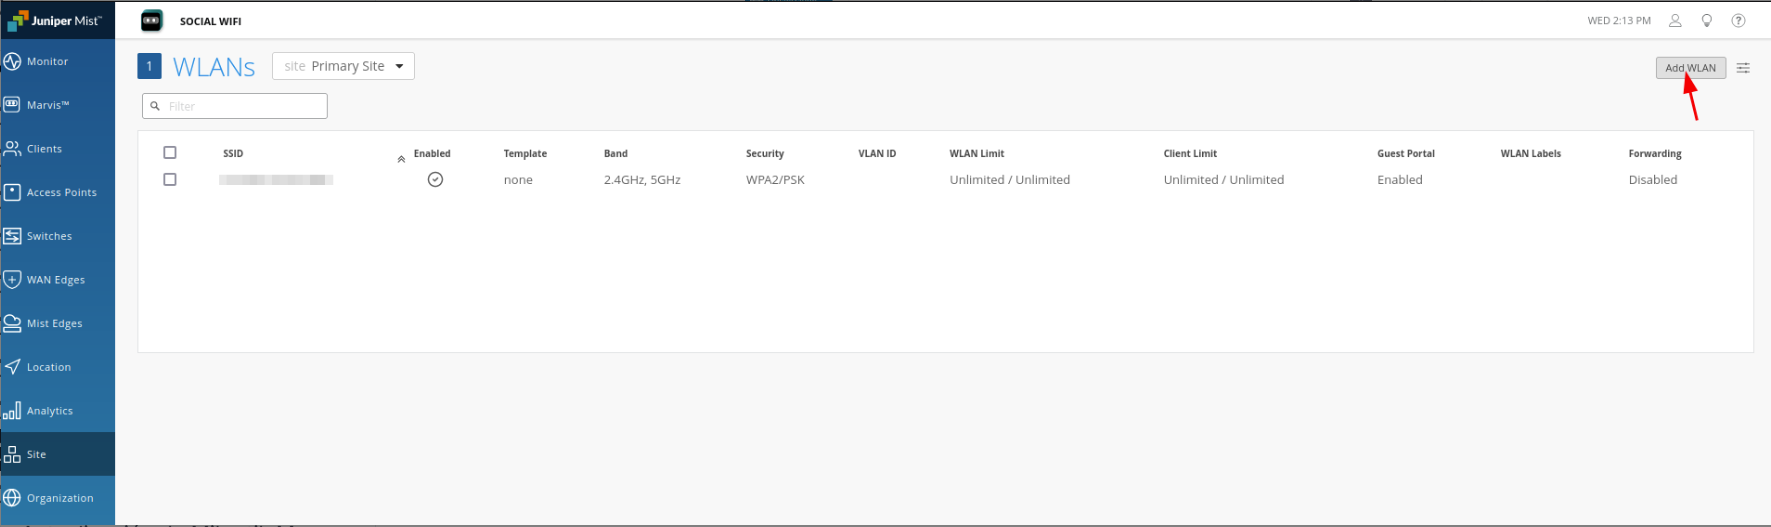
1. In the main menu, go to Site → Wireless → WLANs.
2. Click Add WLAN to create a new Wi-Fi network.

Step 3: Add the New SSID
1. In the WLANs section, click "Add New."
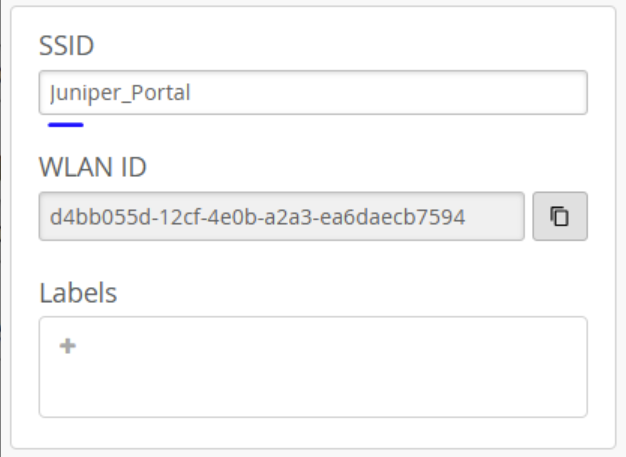
Step 4: Configure the SSID
1. In the SSID field, enter the name of your Wi-Fi network.
2. If there is a predefined name such as Juniper_Portal, replace it with the final name you will use.
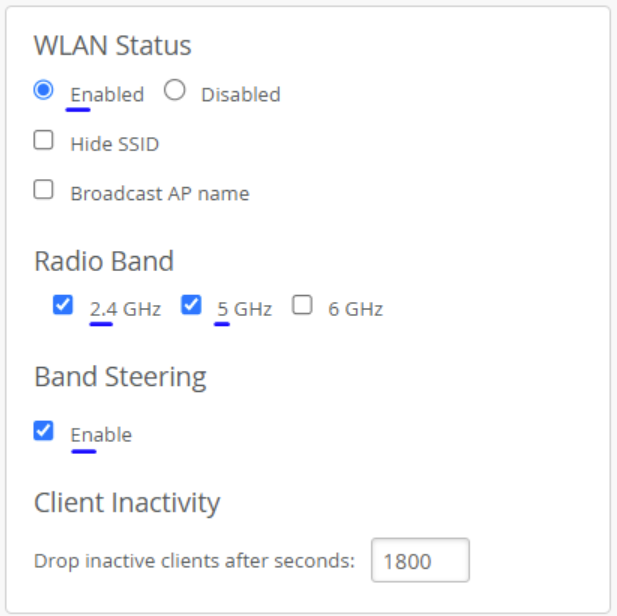
Step 5: Configure Wi-Fi Bands
1. In the SSID settings, look for the operating frequency option.
2. Disable the 6 GHz band unless your technology supports it and you want to enable it.
3. Enable only the 2.4 GHz and 5 GHz bands to ensure compatibility with most devices.
4. Enable the Band Steering option so compatible devices connect preferentially to the 5 GHz band, optimizing network performance.
Step 7: Configuring the External Captive Portal
1. Go to the Guest Portal section.
2. Select the Forward to External Portal option.
3. In the Portal URL field, enter: https://securewifi.pro (JUNIPER MIST and UNIFI only)
In the Allowed Hostnames field, add the following list of authorized domains to allow communication with the captive portal:
captive.aiwifi.io, storage1-prod-media.s3.us-east-2.amazonaws.com, api.aiwifi.io, sentry.io, cloudfront.com, lr-ingest.io, doubleclick.net, fbsbx.com, aiwifi.io, nel.heroku.com, heroku.com, app.aiwifi.io, api.aiwifi.io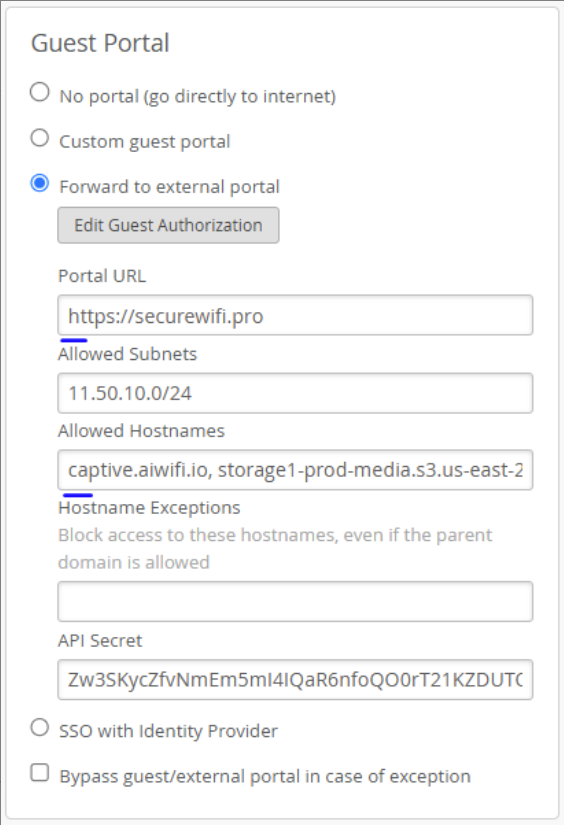
Step 8: Save and Test the Connection
1. Check that all the configured parameters are correct.
2. Click Save to apply the changes.
3. On a mobile device or computer, search for the configured Wi-Fi network and connect to the SSID.

Step 9: Verifying the Captive Portal
1. After connecting the device to the configured SSID, wait a few seconds.
2. The system will automatically display a prompt or pop-up window requesting authentication through the captive portal.
3. If this prompt appears correctly, the configuration has been successful.
✅ Your captive portal is working correctly.