Interactive Guide
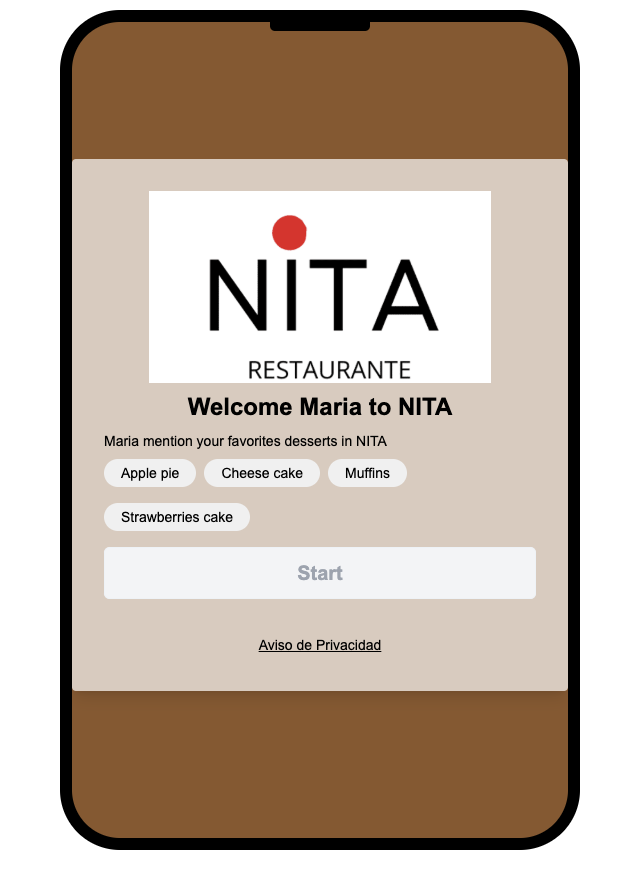
Now you can create an Interests Campaign personalized with guests and brand name!
The Interests Campaign is perfect when you want to segment your guests by the inetersts or categories you define.
Inthe Interests Campaign the objetctive is a multiple choice question where the guest can respond with one or more answers, the platform allows you to add tags for possible answers to the question An example question could be "Select your favorites desserts".
Steps to create an Interests Campaign
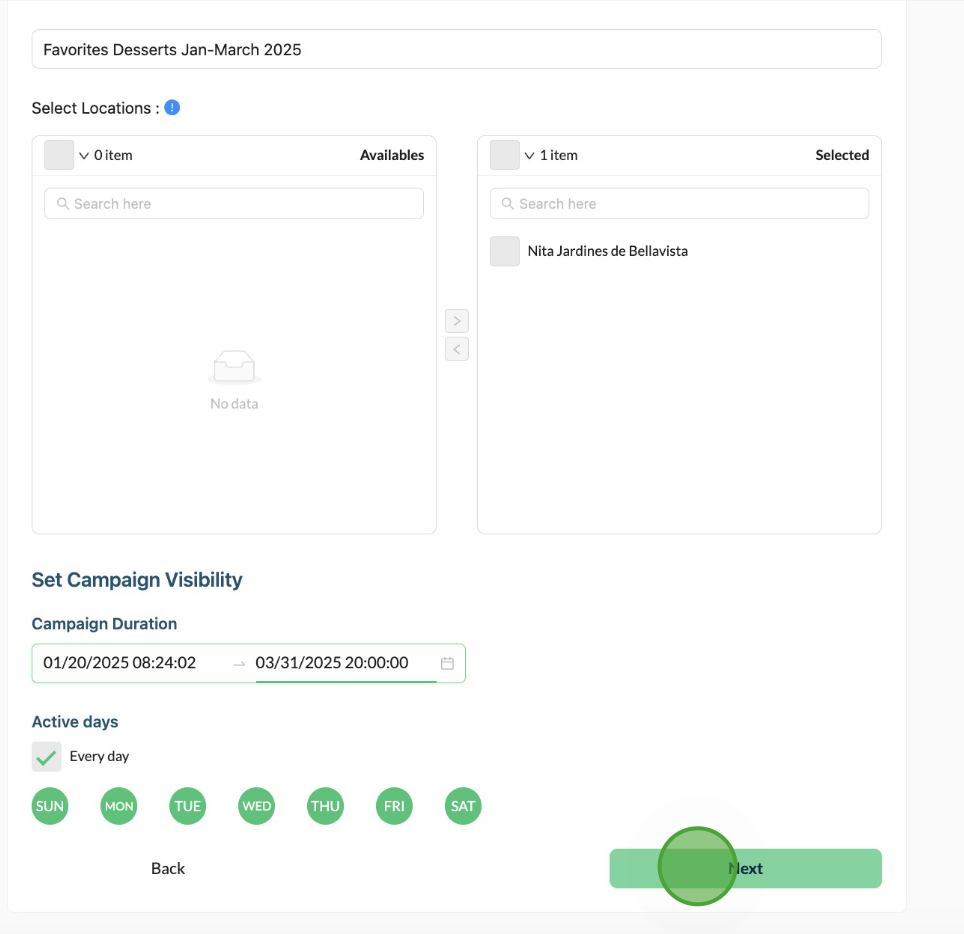
1) Customize your Campaign Details
Campaign Name: Fill out the name of your Interests Campaign for your reference.
Select locations: You have to select from your available locations which one you want to use for your Interests Campaign (you can select one or several locations).
Range Date and Time: You may select the duration date (start date, the end date as well and the start and end hour of your campaign.
Here is an example of Campaign Details section:
2) Customize your Campaign Styles
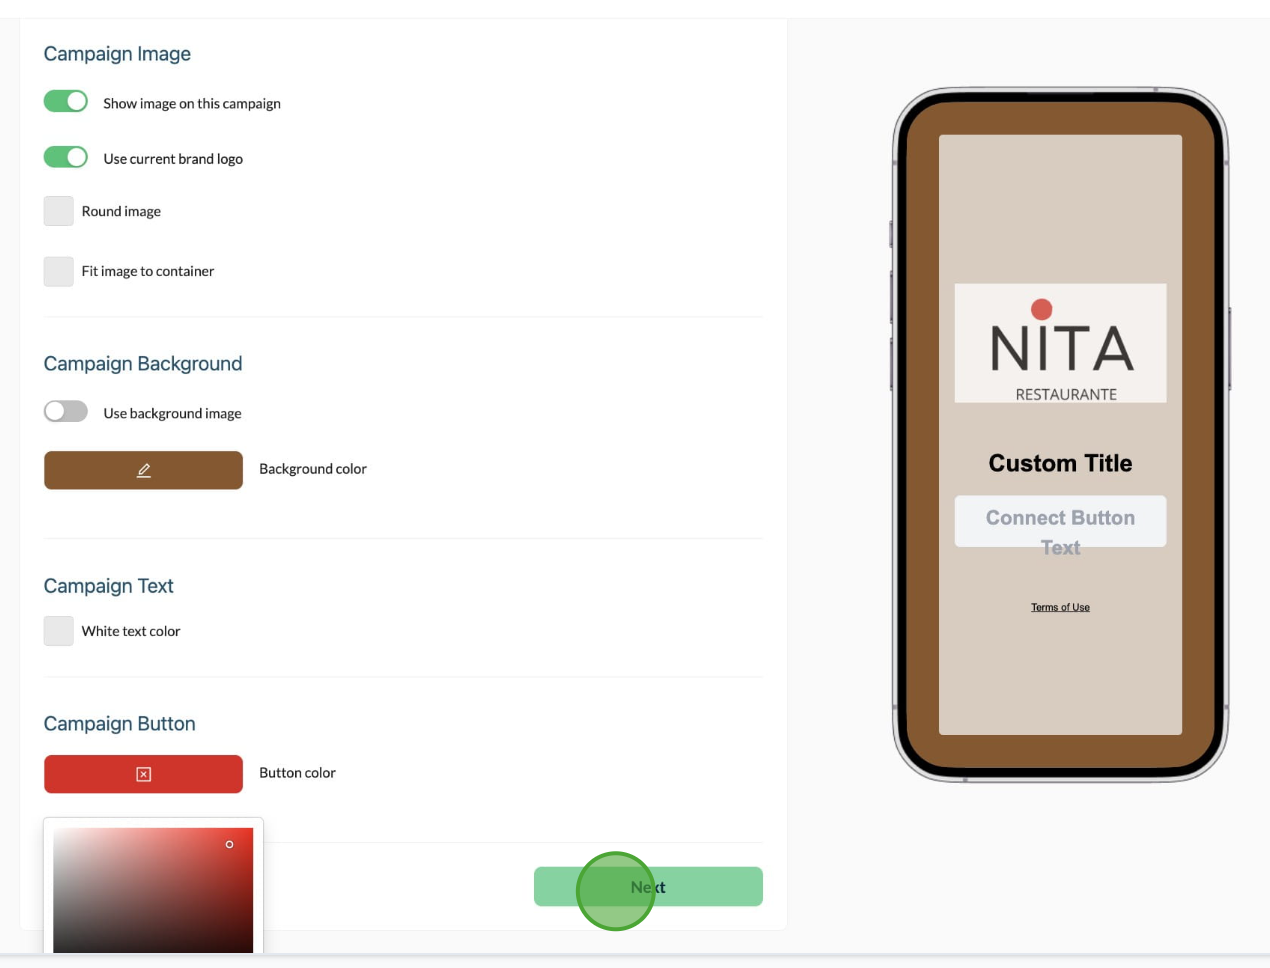
Campaign Image
Show image in this campaign.- You can activate or disable the button a side as you prefer.
Use current brand logo.- to use your current brand logo you can activate the button a side.
Round image.- To round your logo you can activate the button a side.
Fit image to container.- You can activate or disable the button a side as you prefer.
Campaign Background.- If you want to use a background image you can drag your file or you can click on "select from media" if you have images or gifs in your "Media Section".
Campaign Text.- Here you can choose if you want white text color opr black text color.
Campaign Button.- You can select here the button color.
3) Customize your Campaign Form
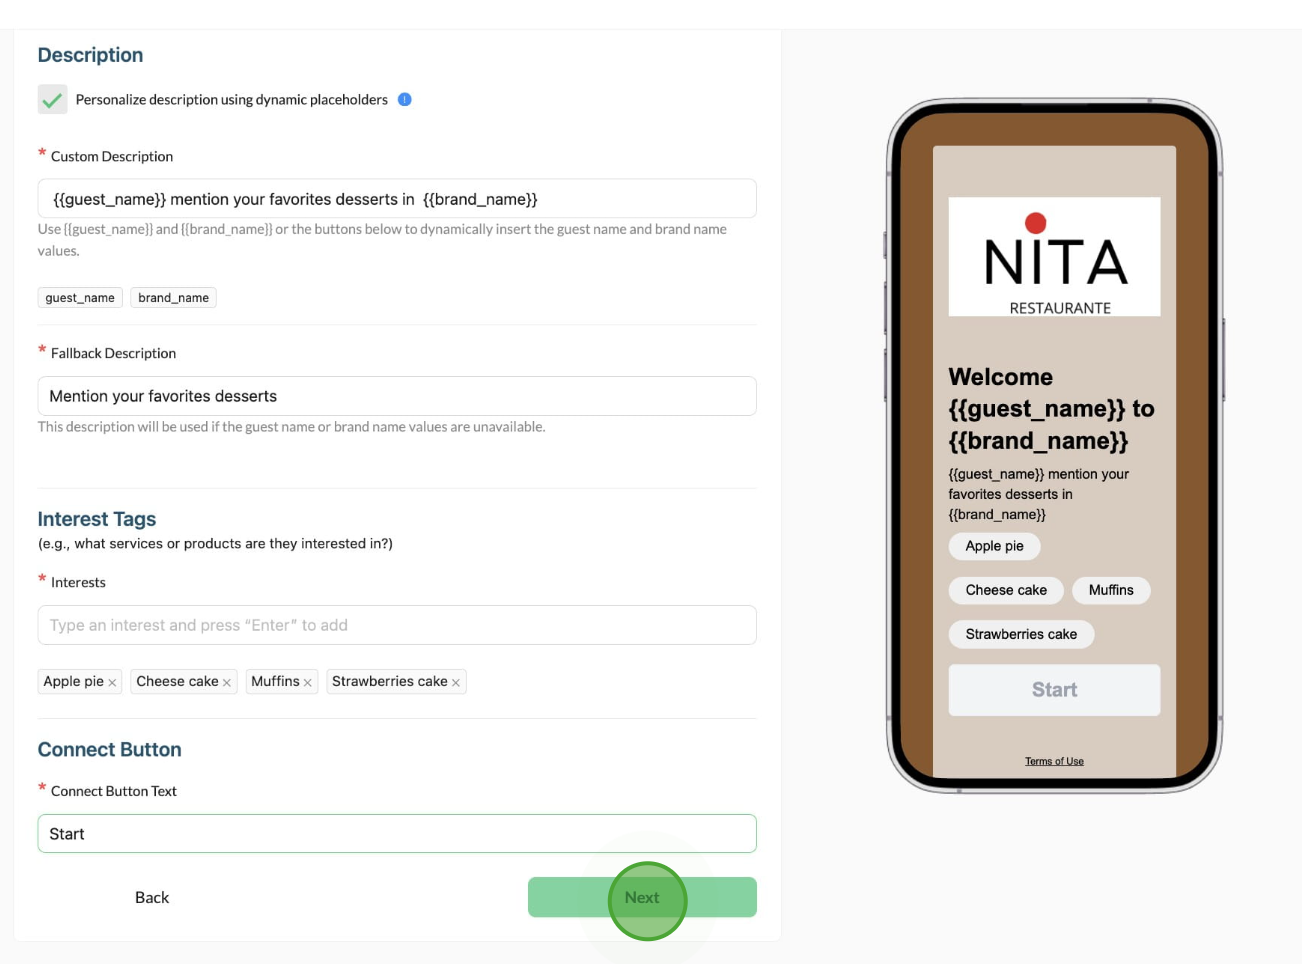
Personalize your Campaign Form.- Fill out the description (Question for your guest) and other fields. now you can personalize guests and brand names on your title. The title is the friendly word that will appear on your guest device.
Personalize description using dynamics placeholders.- Add personalized guests and brand names in your title. E.g. "Welcome {{guest_name}} to {{brand_name}}.
Custom Description.- Use {{guest_name}} and {{brand_name}} or the buttons below to dynamically insert the guest name and brand name values. E.g. {{guest_name}} mention your favorites desserts in {{brand_name}}.
Fallback description.- This description will be used if the guest name or brand name values are unavailable.
Please press "Enter" after typing each tag to add it.- Here you write the options for your guest. E.g. Cheese cake, Muffins, strawberry cake.
Your guest will be able to select either one ore more answers by clicking on the labels (tags) that appear on the screen. A maximum of 15 tags are allowed. This means that your guest will be able to select between one and 15 tags (response options).
Connect button text.- Write the button text.- E.g. "Start, Connect or Navigate".
4) Confirm your Campaign Details and Styles
If you want to make a change in one or many categories you can do it pressing the button "Back".
If you are agree about your Styles and Forms click on "Save Campaign".
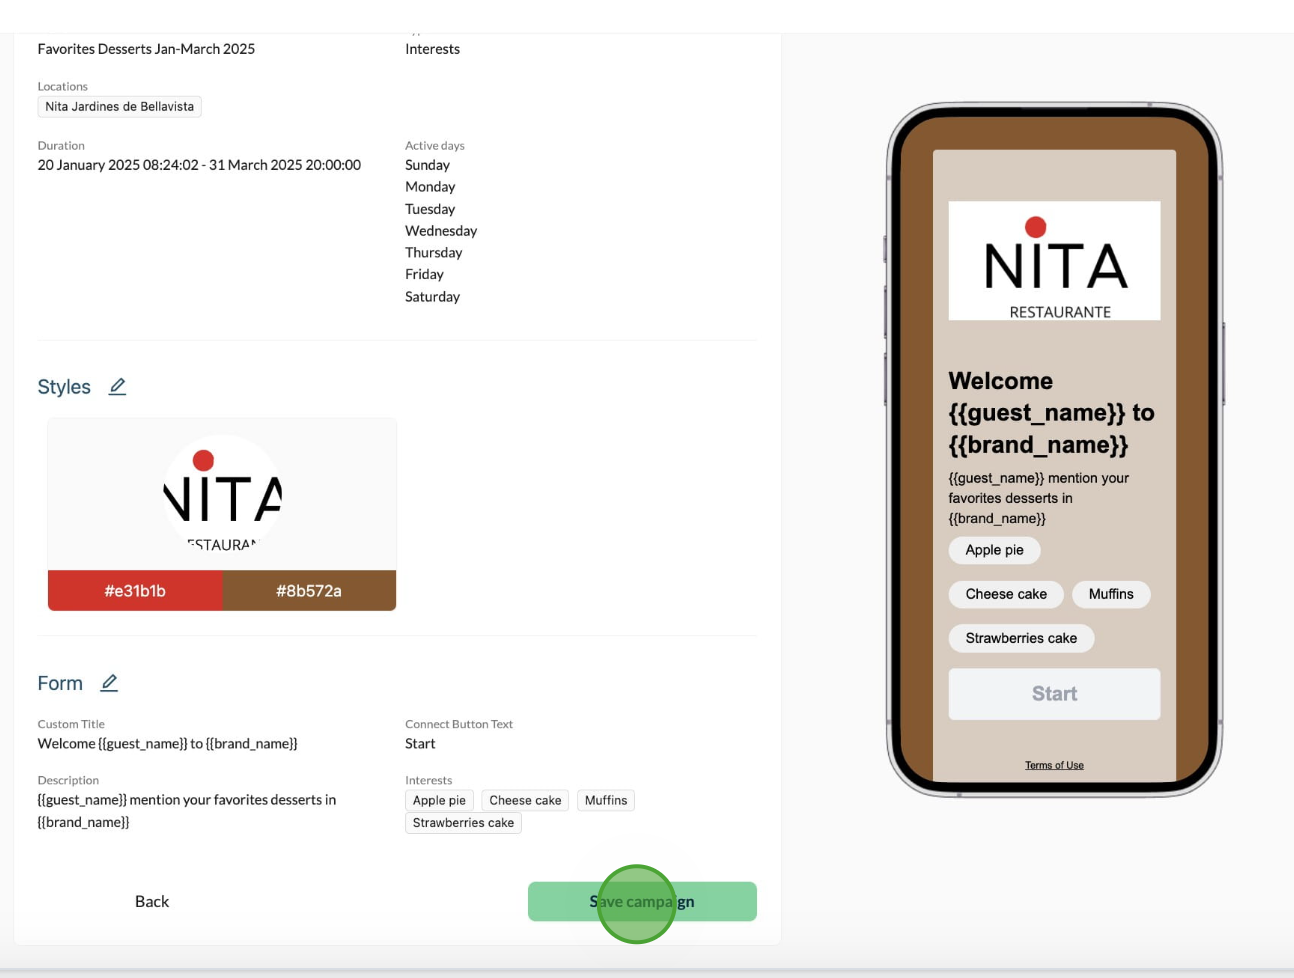
Here is an example of the Captive Portal Preview:
