Interactive Guide
To create a Display Campaign is easier than you can imagine!!
The Display Campaign is used to show a promotional banner, an image, a gif of a new product discount coupon, an offer or an opening of a new branch. This campaign is promotional in nature so no information is requested.
Steps to create a Display Campaign
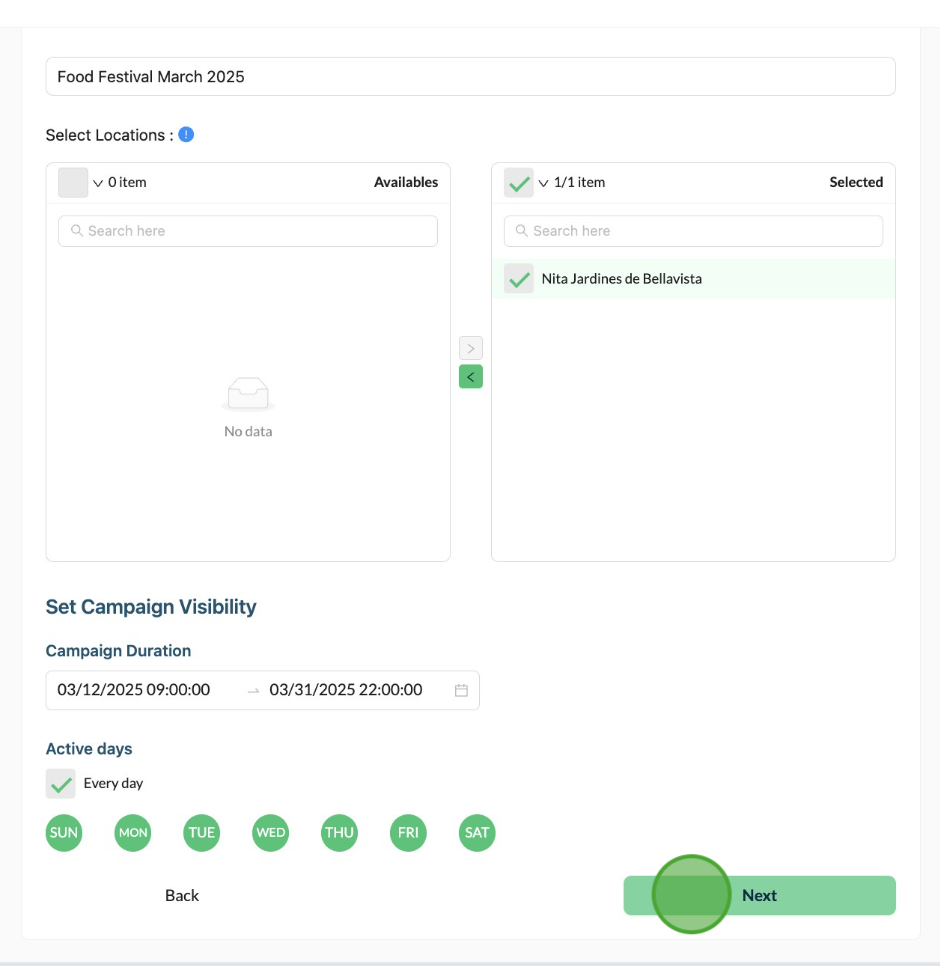
1) Customize your Campaign Details
Campaign Name.- Fill out the name of your Survey Campaign for your reference.
Select locations: You have to select from your available locations which one you want to use for your Survey Campaign.
Set Campaign Visibility: You may select the campaign duration. (The start date and the end date as well the start hour and the end hour of your Display Campaign).
2) Select your Campaign Styles
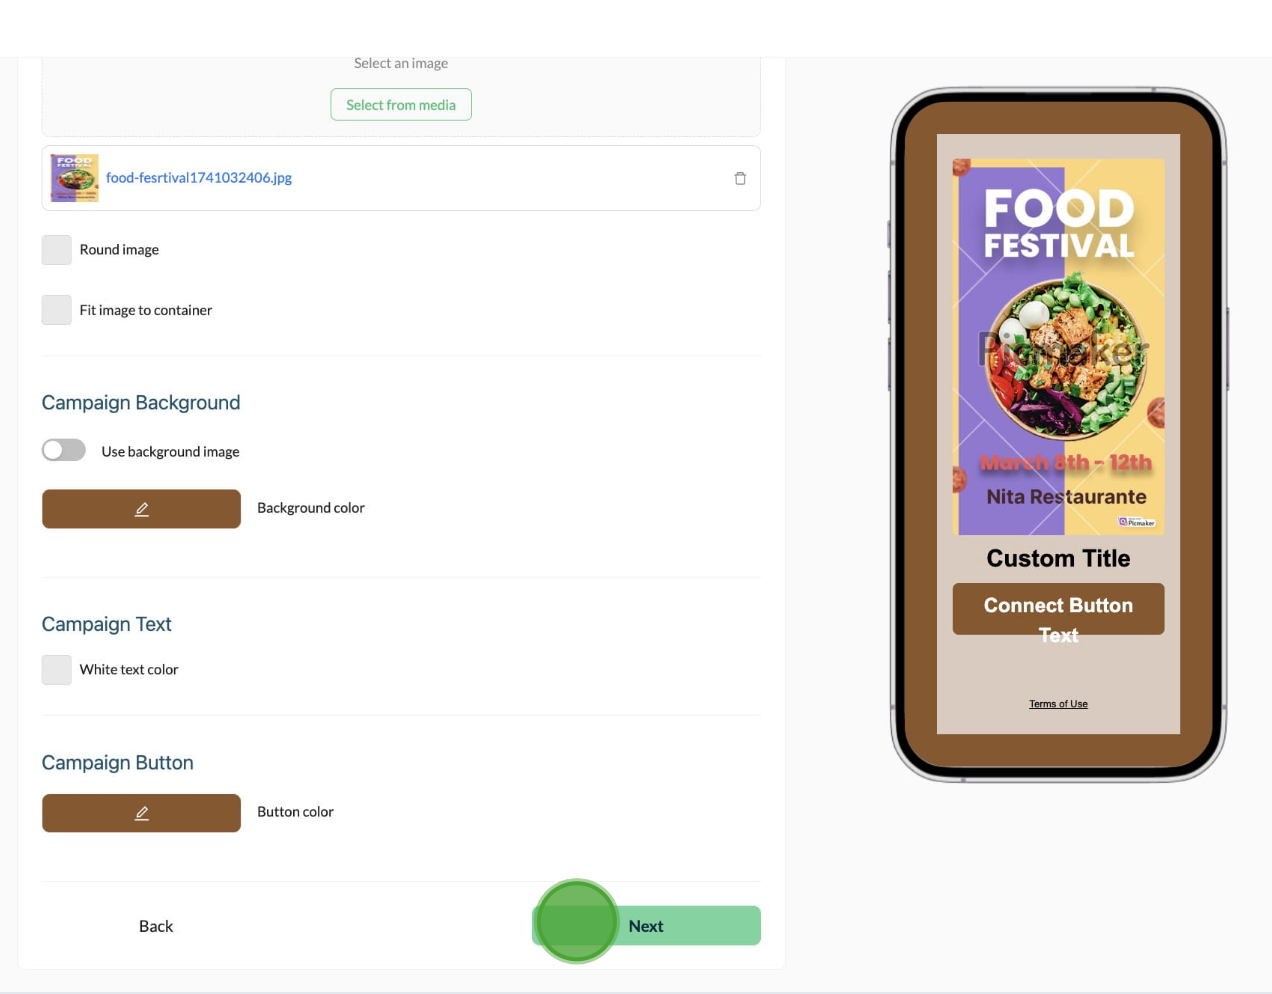
Show image in this campaign.- You can activate or disable the button a side as you desire.
Use current brand logo.- You can activate or disable the button a side.
Round image.- You can activate or disable the button a side.
Fit image to container.- You can activate or disable the button a side as you prefer.
Campaign Background.- If you want to use a background image you can drag your file or you can click on "Select from media" if you have images or gifs in your "Media Section".
Campaign Text.- Here you can choose if you want white text color or black text color.
Campaign Button.- You can select here the button color.
3) Customize your Campaign Form
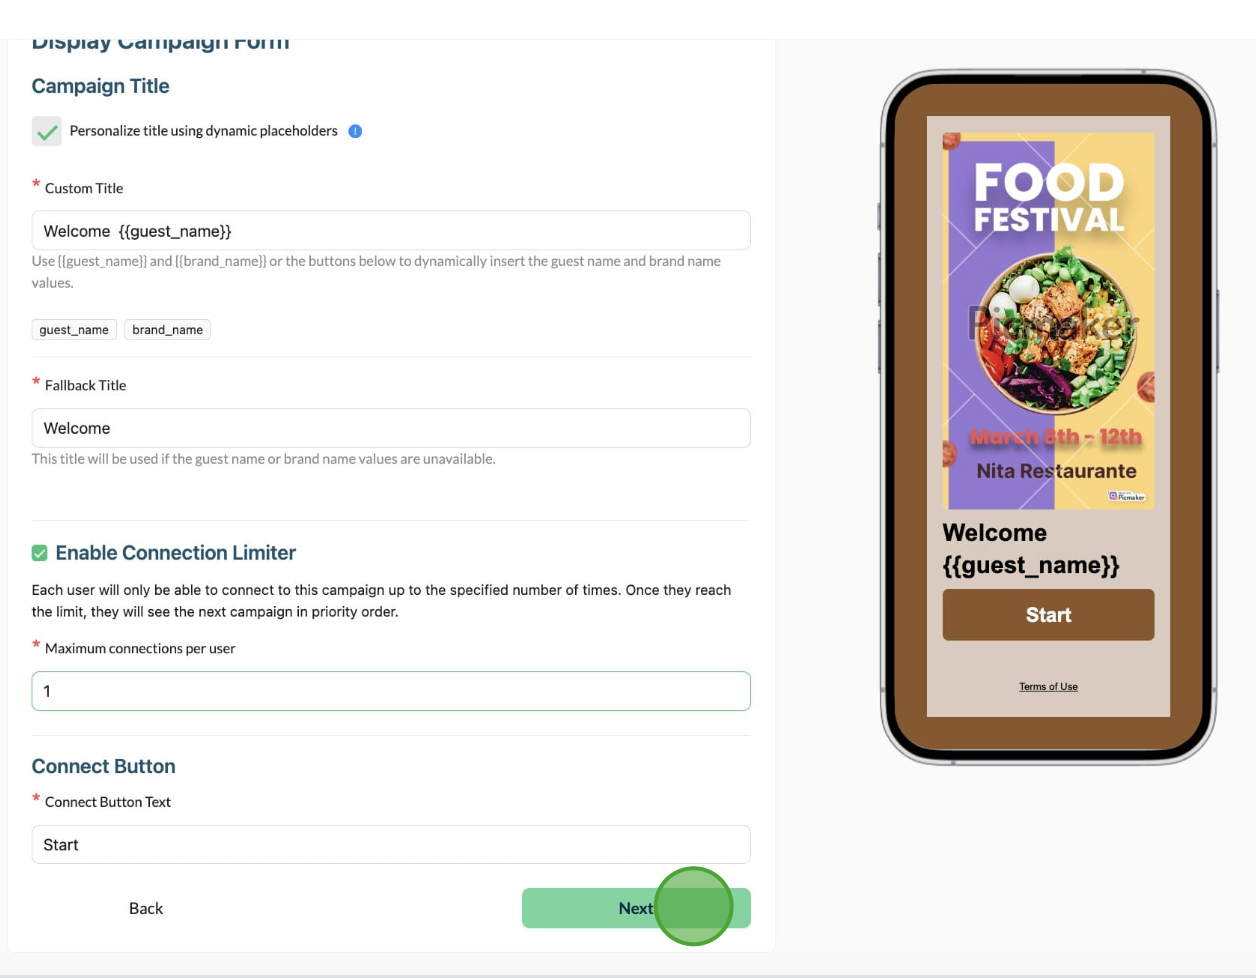
Campaign Title.-Personalize title using dynamic placeholders. Now you can add personalized guests and brand name in your title.
Custom Title.- Here you have to write the friendly word that illustrates the gif or image that you are promoting. Use {{guest_name}} and {{brand_name}} or the buttons below to dynamically insert the guest name and brand name values. E.g. Welcome {{guest_name}} to {{brand_name}}
Fallback Title.- This title will be used if the guest name or brand names values are unavailable. E.g. Welcome to Nita
Enable Connection Limiter.- Each user will only be able to connect to this campaign up to the specified number of times. Once they reach the limit, they will see the next campaign in priority order.
Maximum connections per user.- Here you have to write the specified number of times the user will be able to connect to this campaign.

When is disabled the Connection Limiter: There will be no connection limit, and each user will continue seeing this campaign indefinitely until the campaign expires, without moving to the next prioritized campaign.

Connect Button Text.- Write the word that will allow your guests to connect to your Wi-Fi network. (E.g. "Start", "Begin", "Connect").

Here is an example of a Display Campaign form:
4) Confirm your Details, Styles and Form of your Display Campaign
In this section you will find a summary of your campaign fields. If you want to make any change click on "Back " if you don't want to make any modifications then click on "Save Campaigns".
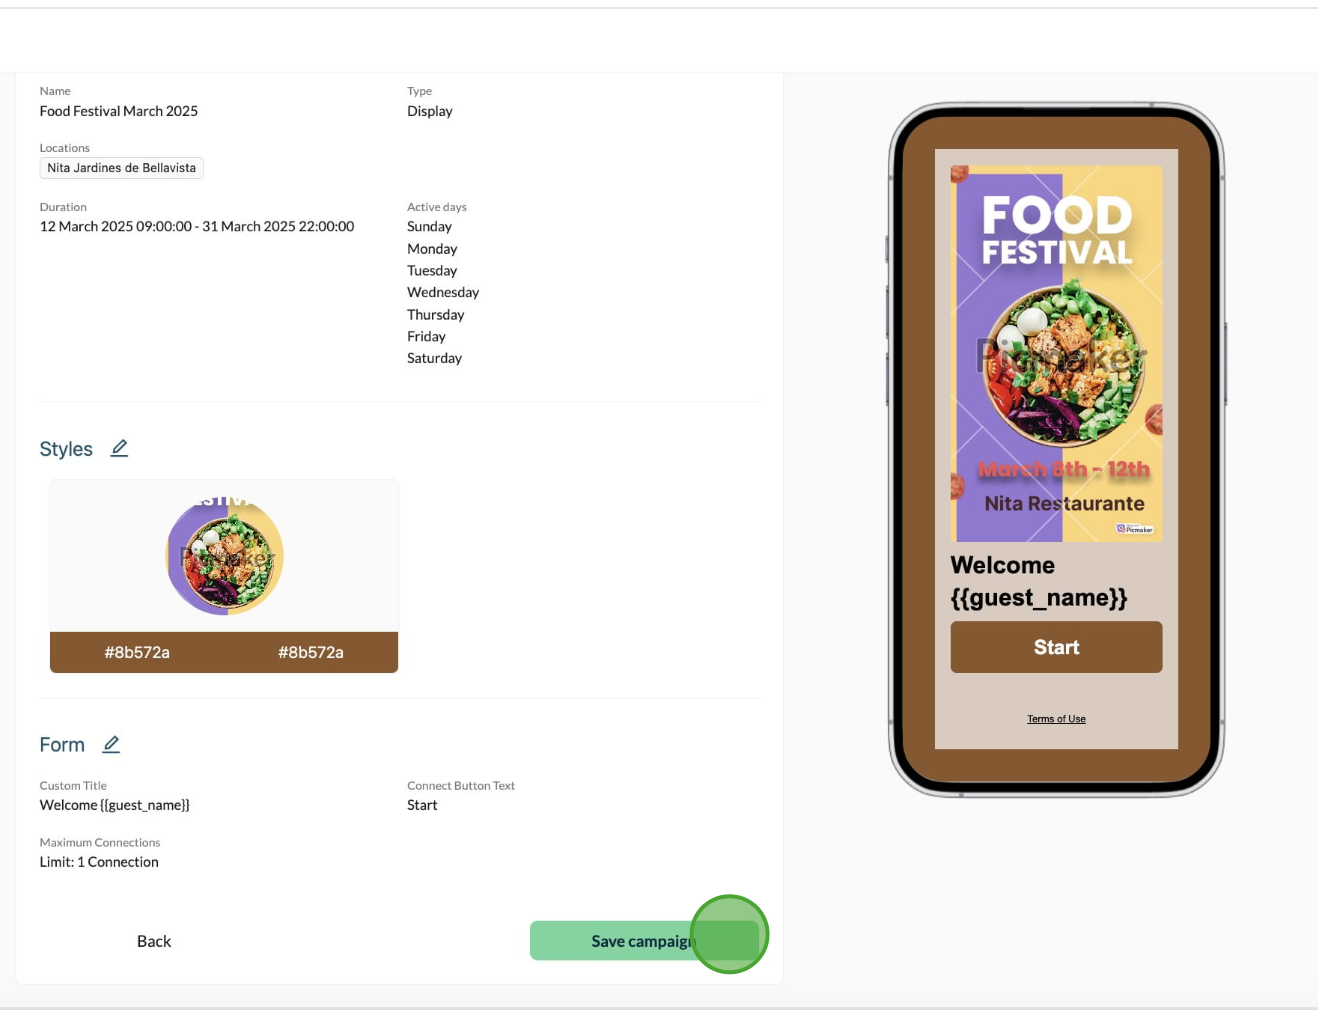
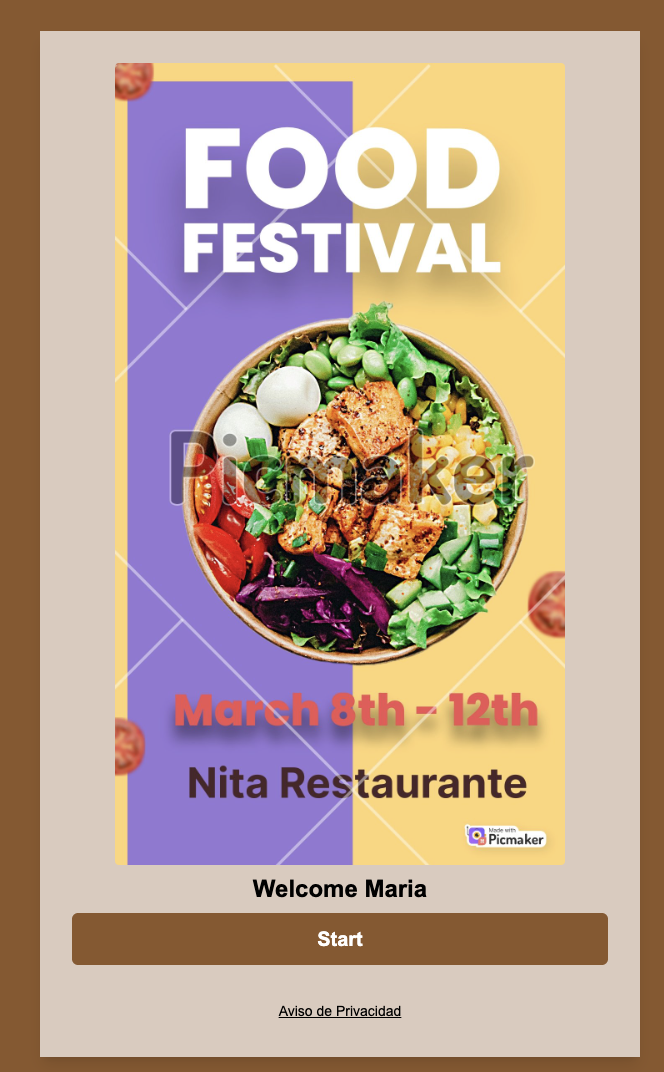
Here is an example of the Portal Captive Preview.
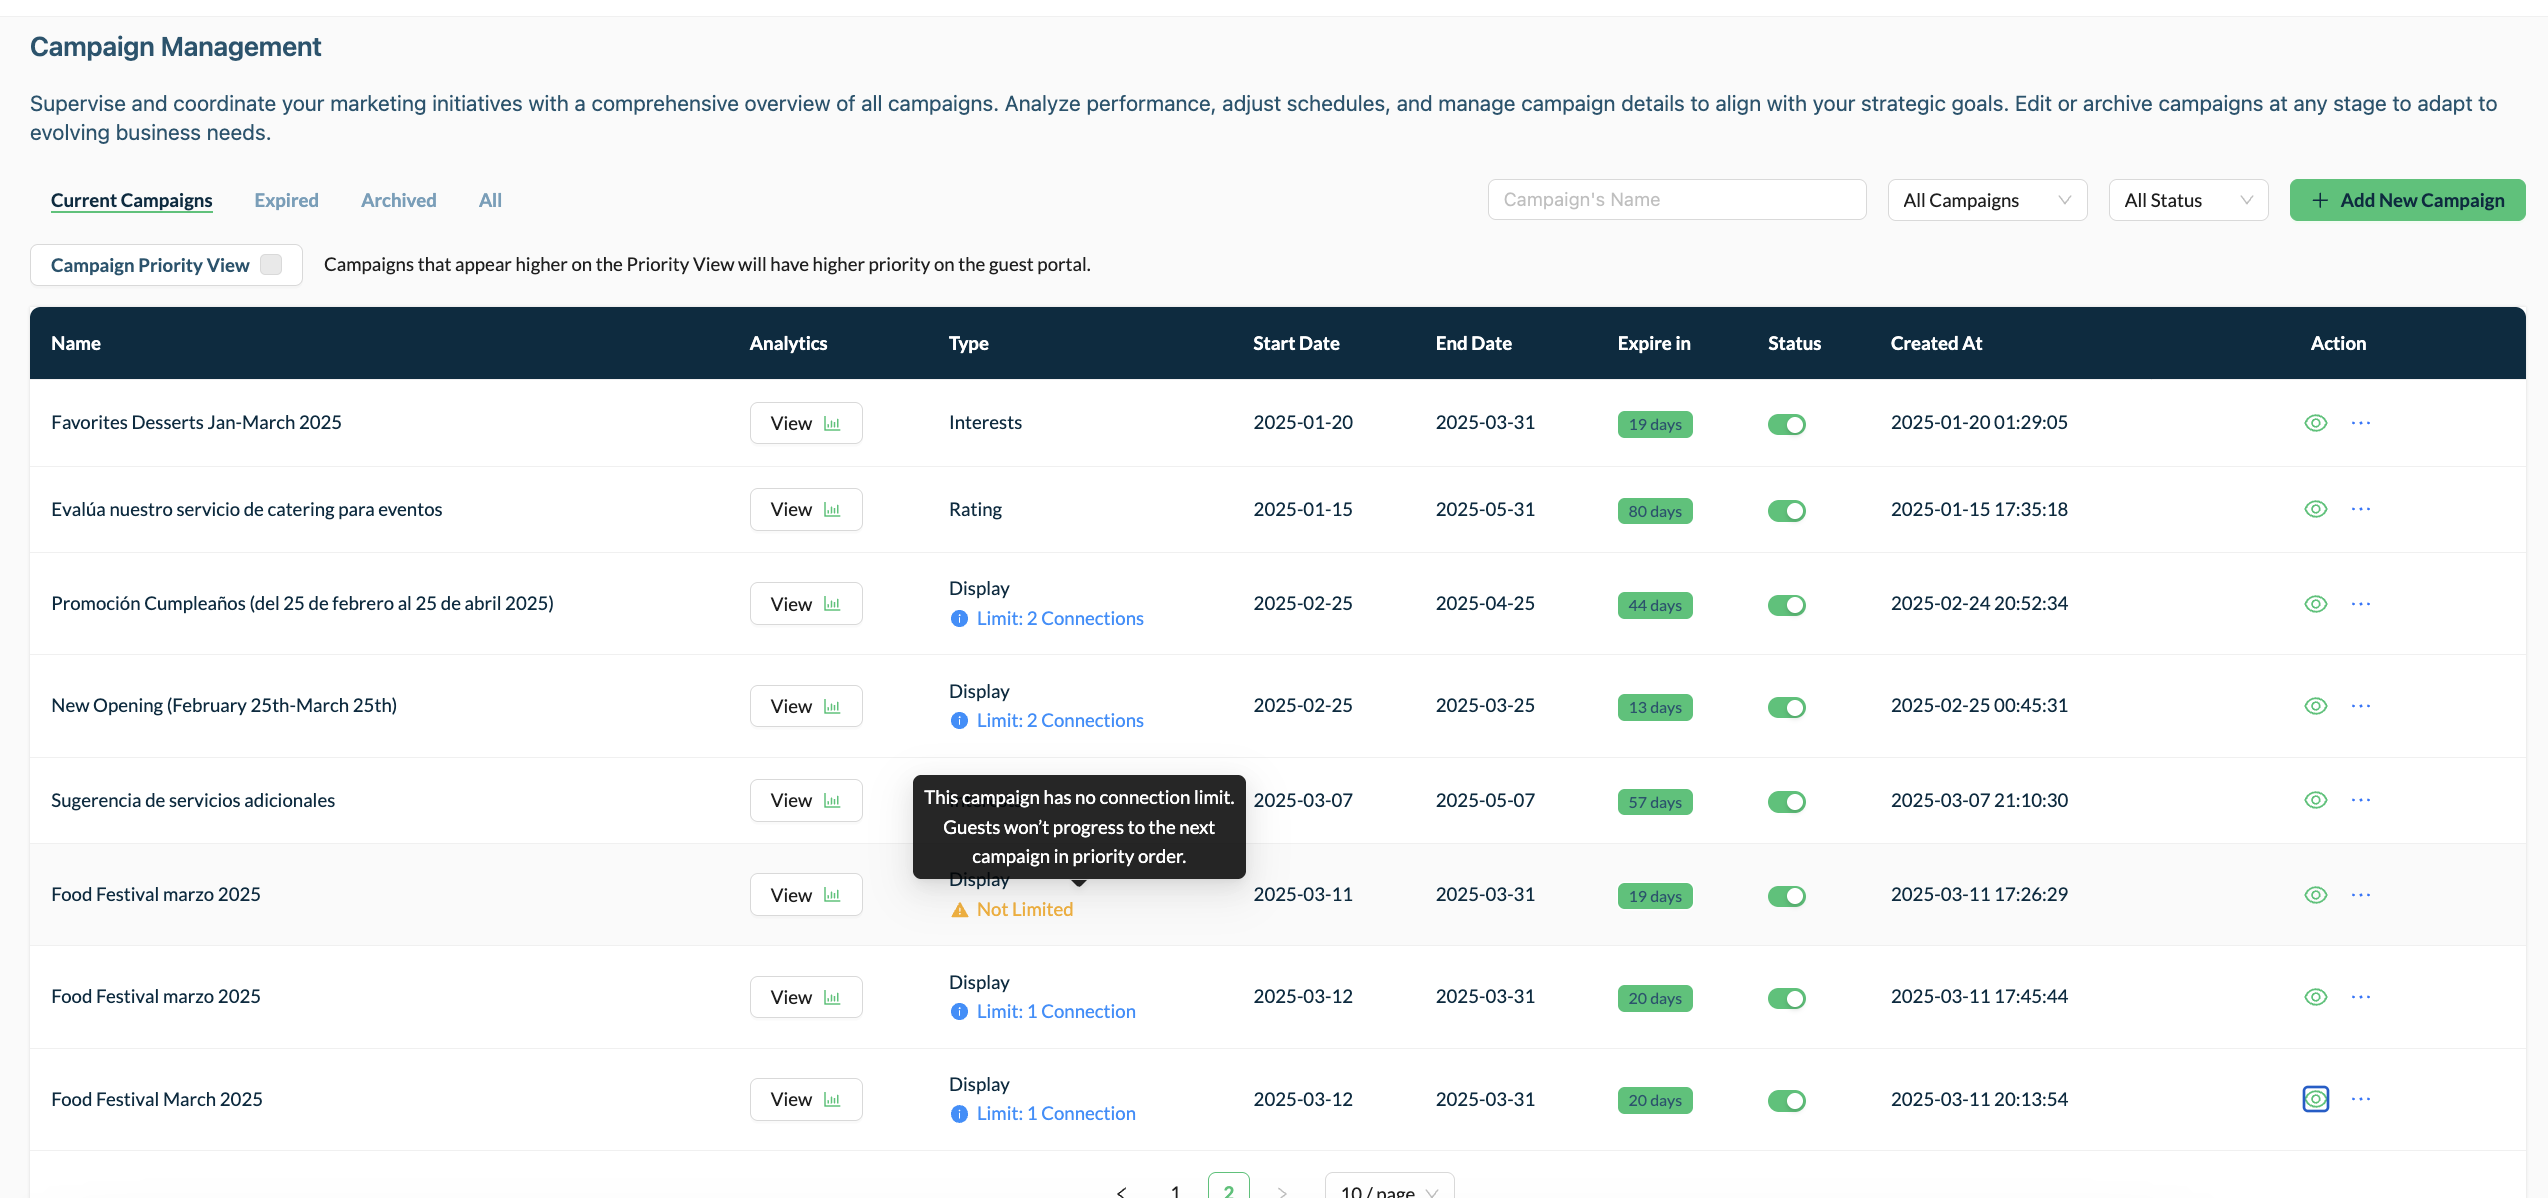
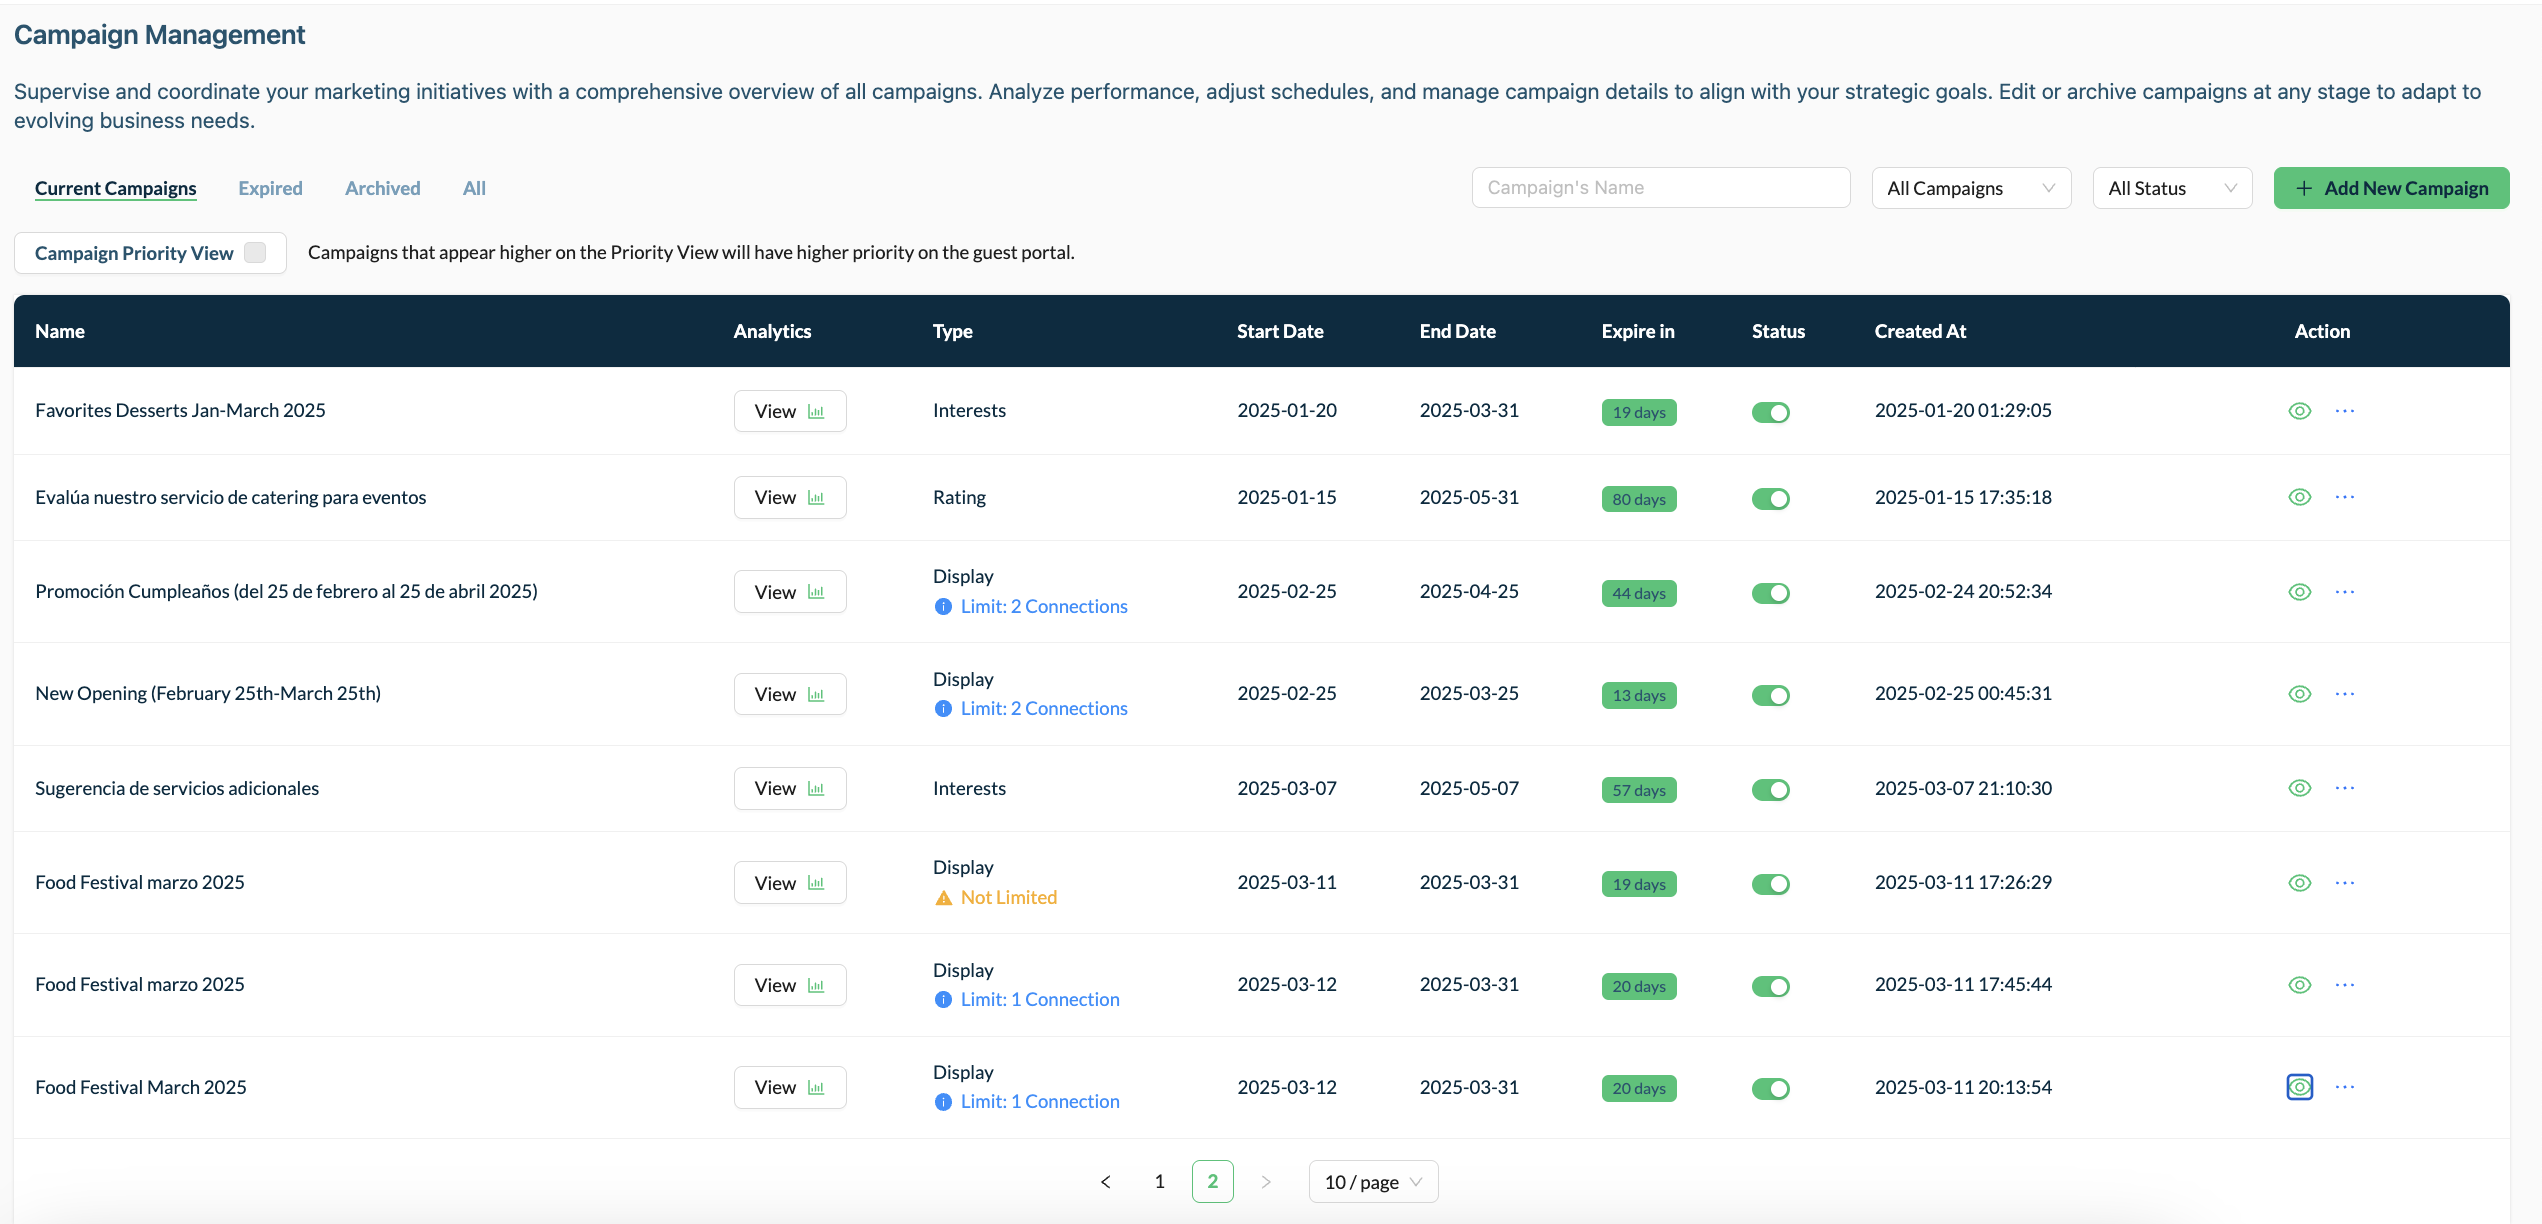
5) Your Display Campaign will be on your Campaign Management Dashboard
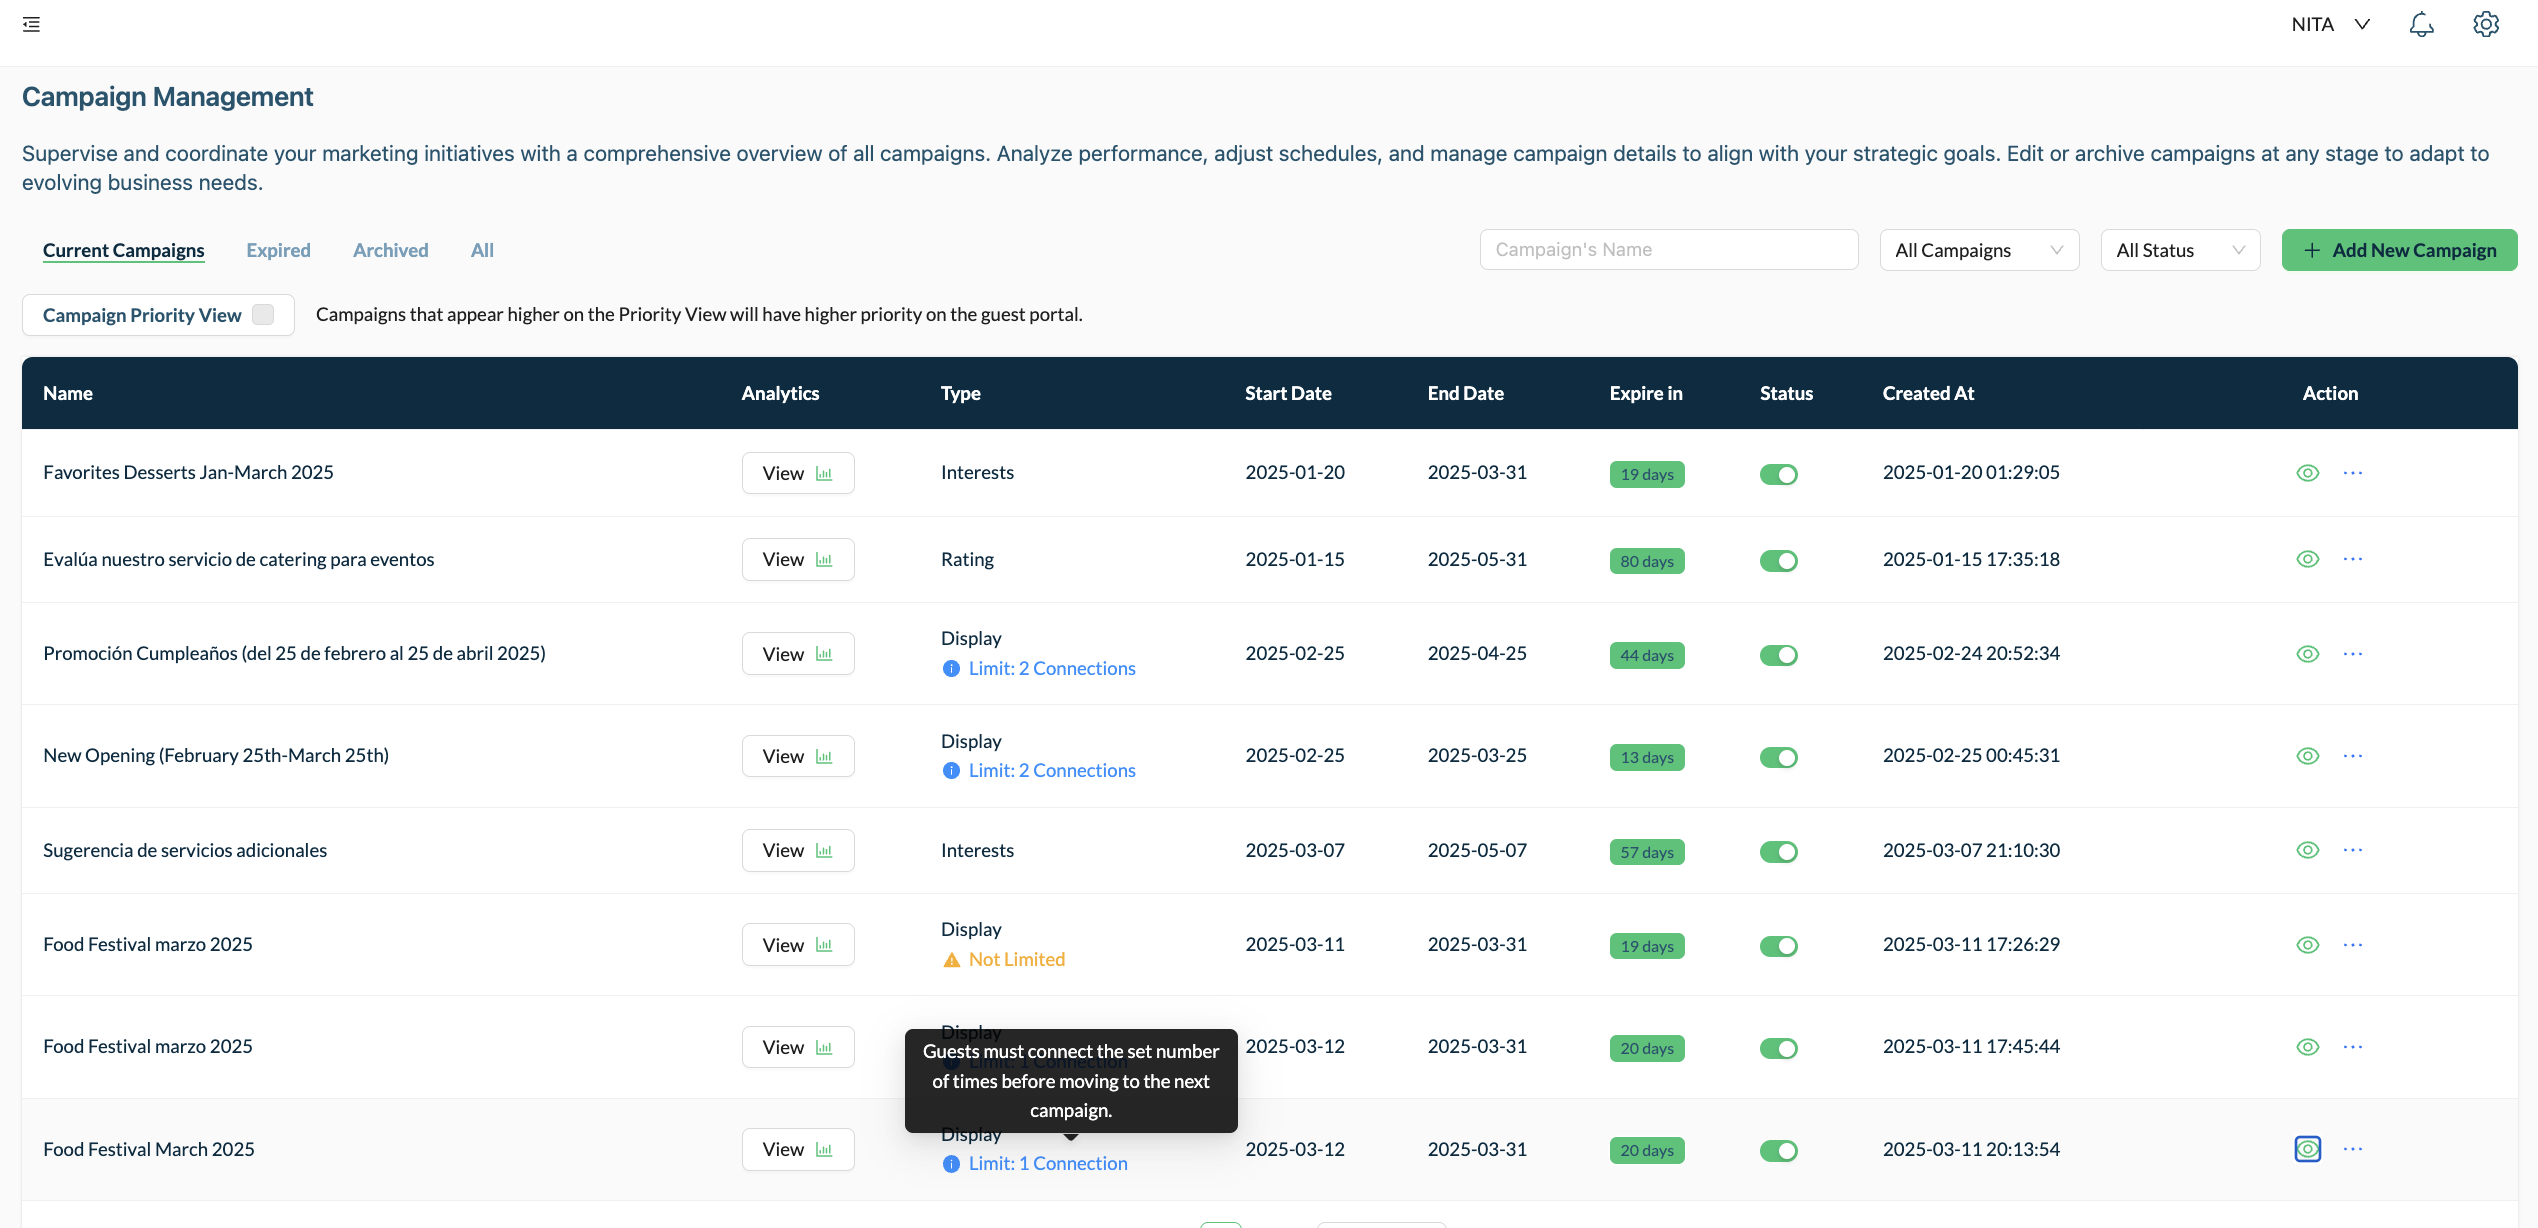
6) Display Campaign with enable connection limiter:
Bellow your Campaign type will be the number of limit connection and this message will appear: "Guest must connect to the set number of times before moving to the next campaign.
Here is an example:
7) Campaign with disable connection limiter:
Below your campaign type will appear the phrase: "Not Limited" and it will be seen this message: "This campaign has not connection limit guests won't progress to the next campaign in priority order".
Here is an example:
