Creation of webhooks using the Pabbly Connect App
Aiwifi gives you the opportunity to create new webhooks to integrate into your business.
There are a lot of Apps and Tools which their goal is the Data Synchronization between different apps. One of them is Pabbly Connect App.
Pabbly Connect is the integration software to connect and transfer data between different business tools and services by creating automated workflows. It is an integration platform through which you can connect different applications within a few clicks, including Google Forms, Google Drive, and many more.
Now you will see how easy is to create an automated workflow using Pabbly Connect Tool.
Aiwifi send the information to the app you choose and Pabbly Connect will transmit the information already structured to a third app like for example Mail Chimp, Mailer Cloud or other one.
With the Data Synchronization Tools you can create Facebook audiences, you can also send specific information using the email or sending SMS to your clients. With Pabbly App you can use 100 free events on a month, that means 100 of triggers that can be created and sent to another automatized email app.
Steps to create webhooks using Pabbly Connect
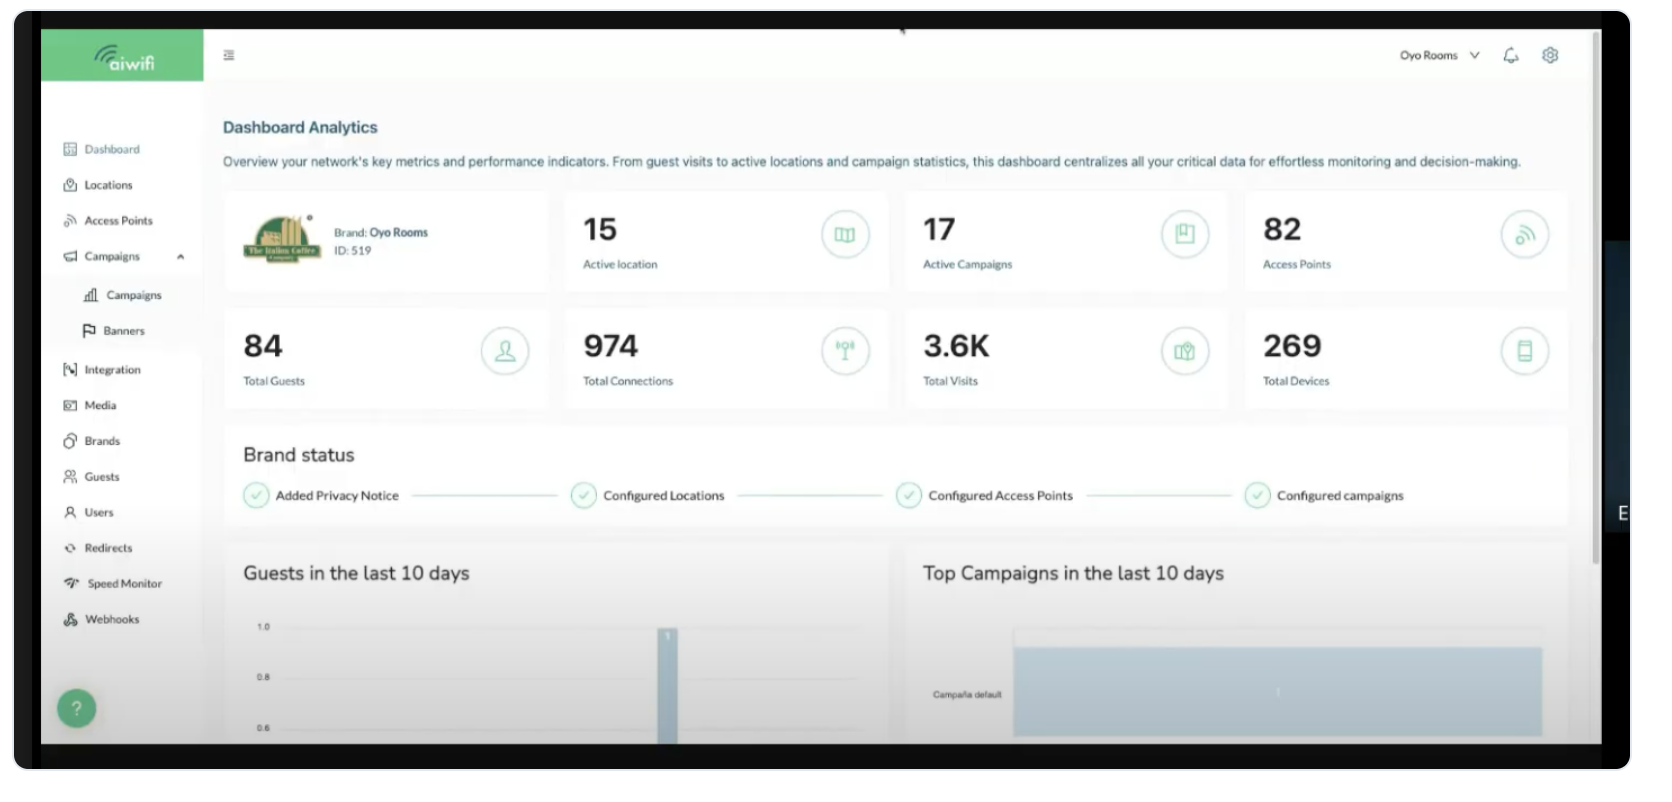
1.- Dashboard Analytics
On the Dashboard Analytics go to the left side and select "Webhooks"
2.- Webhooks
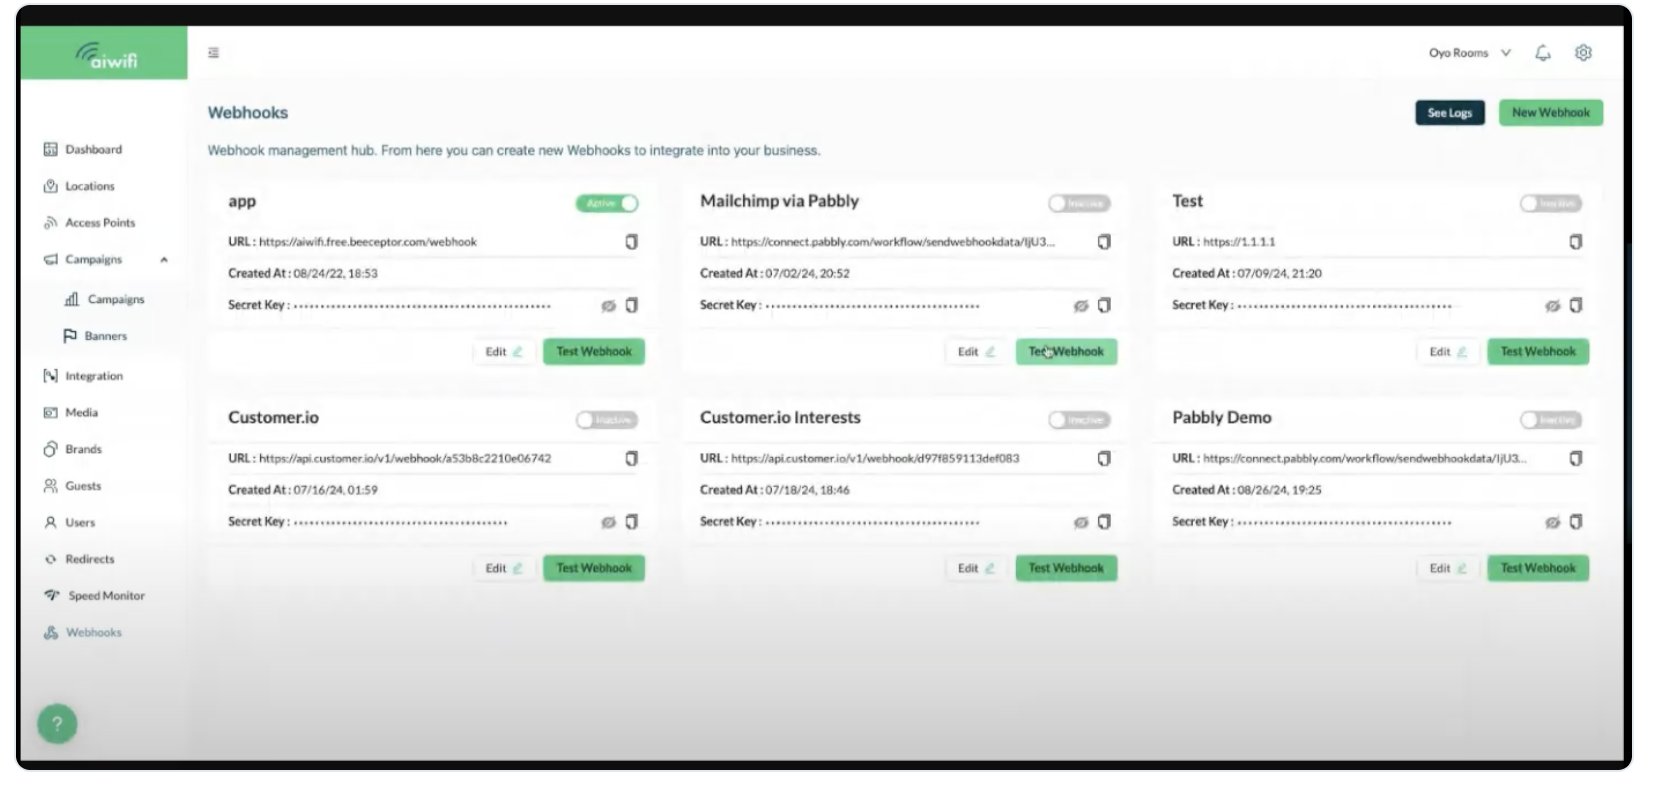
On Webhooks section go to your right and select "New Webhook"
3.- Pabbly Connect App
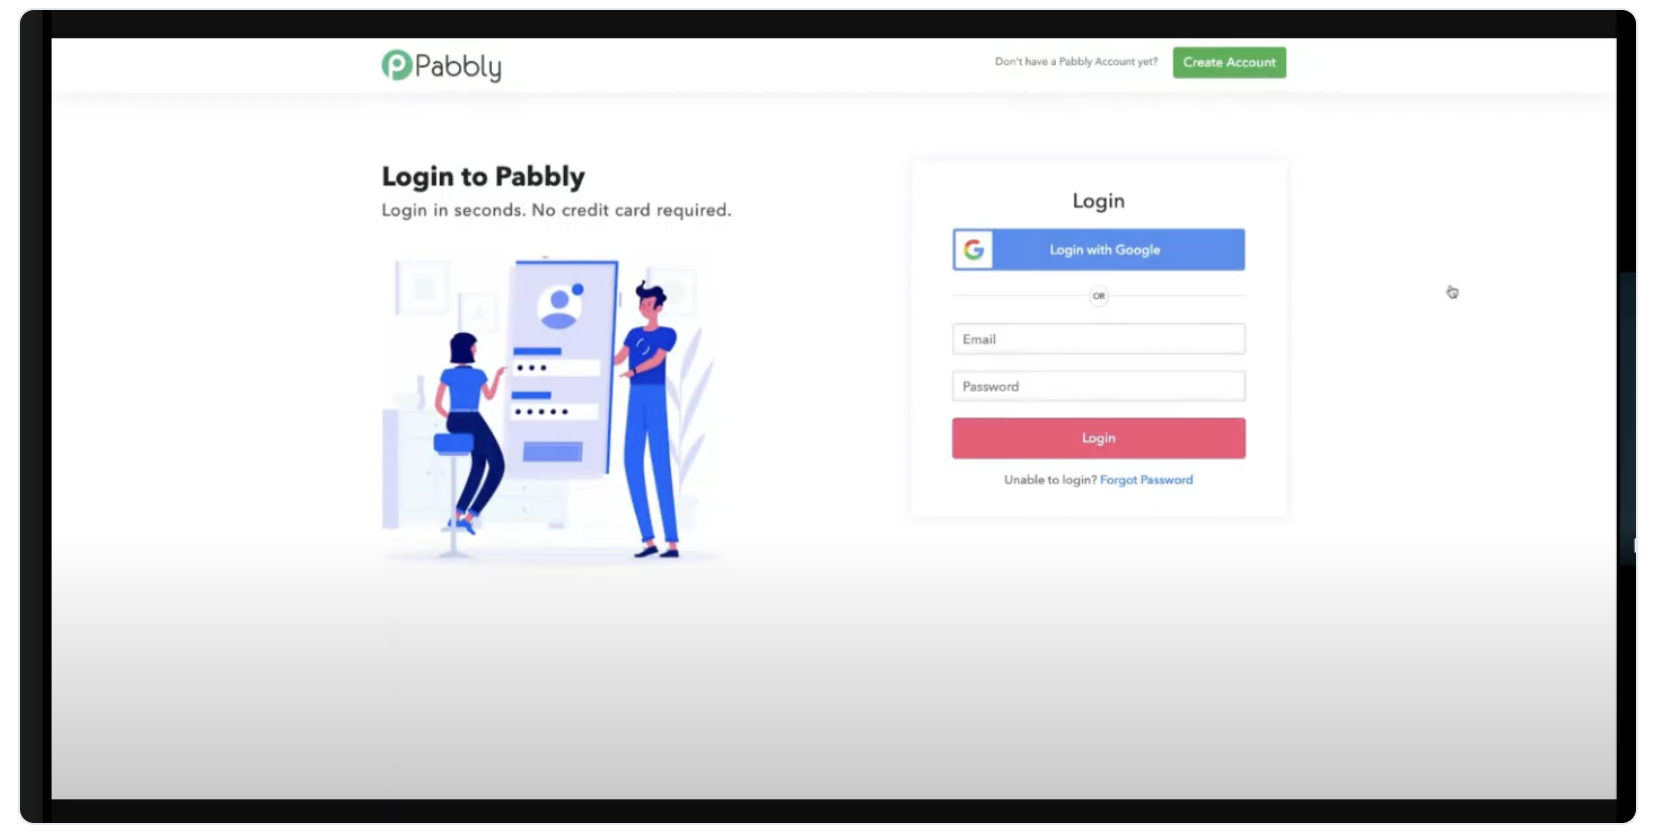
Open or create an account on Pabbly connect App
4.- Choose the app that will receive the information
On this case as an example we will use the Pabbly Connect App as a Receiving Tool. Pabbly Connect will get the information from Aiwifi and will transfer the structured information to Mailer Cloud.
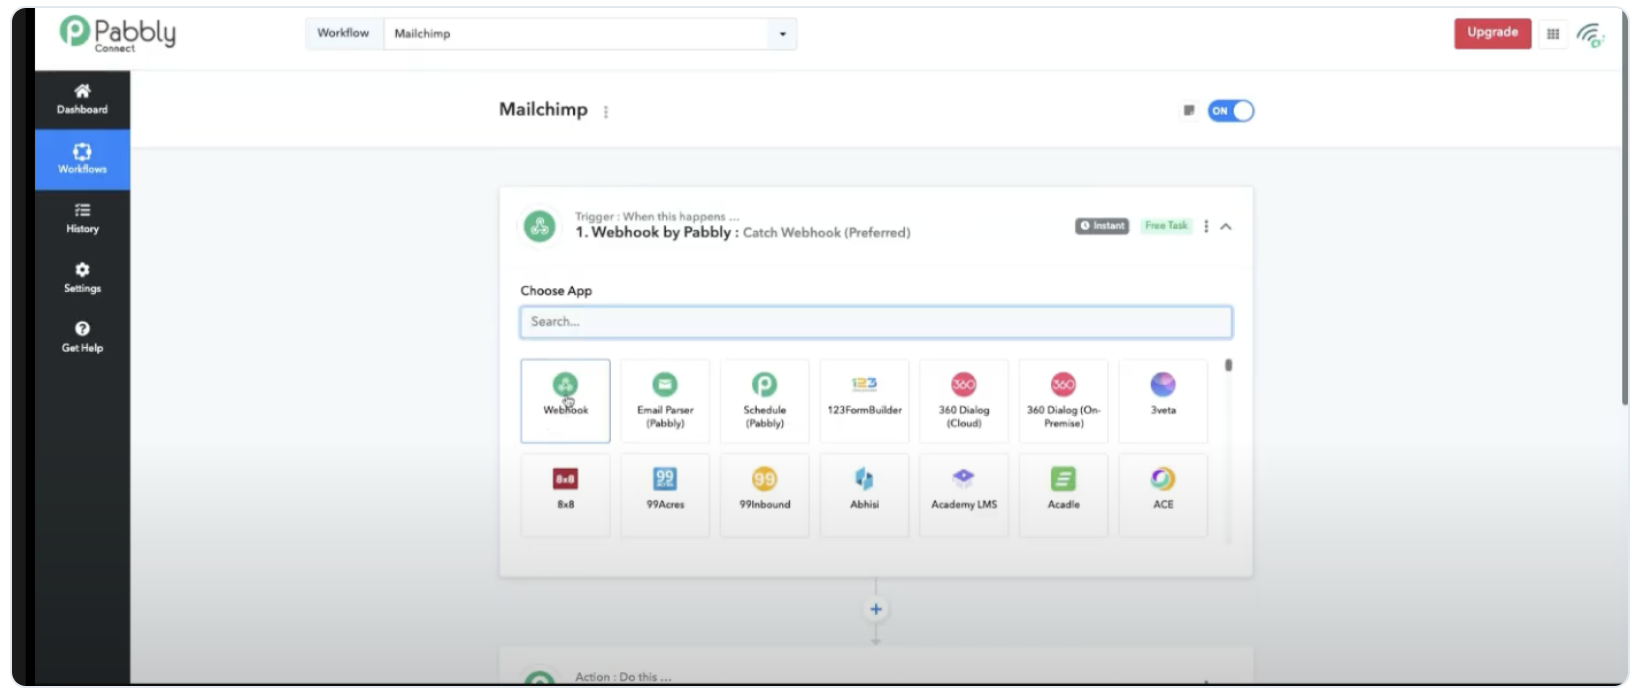
5.- Select the trigger event
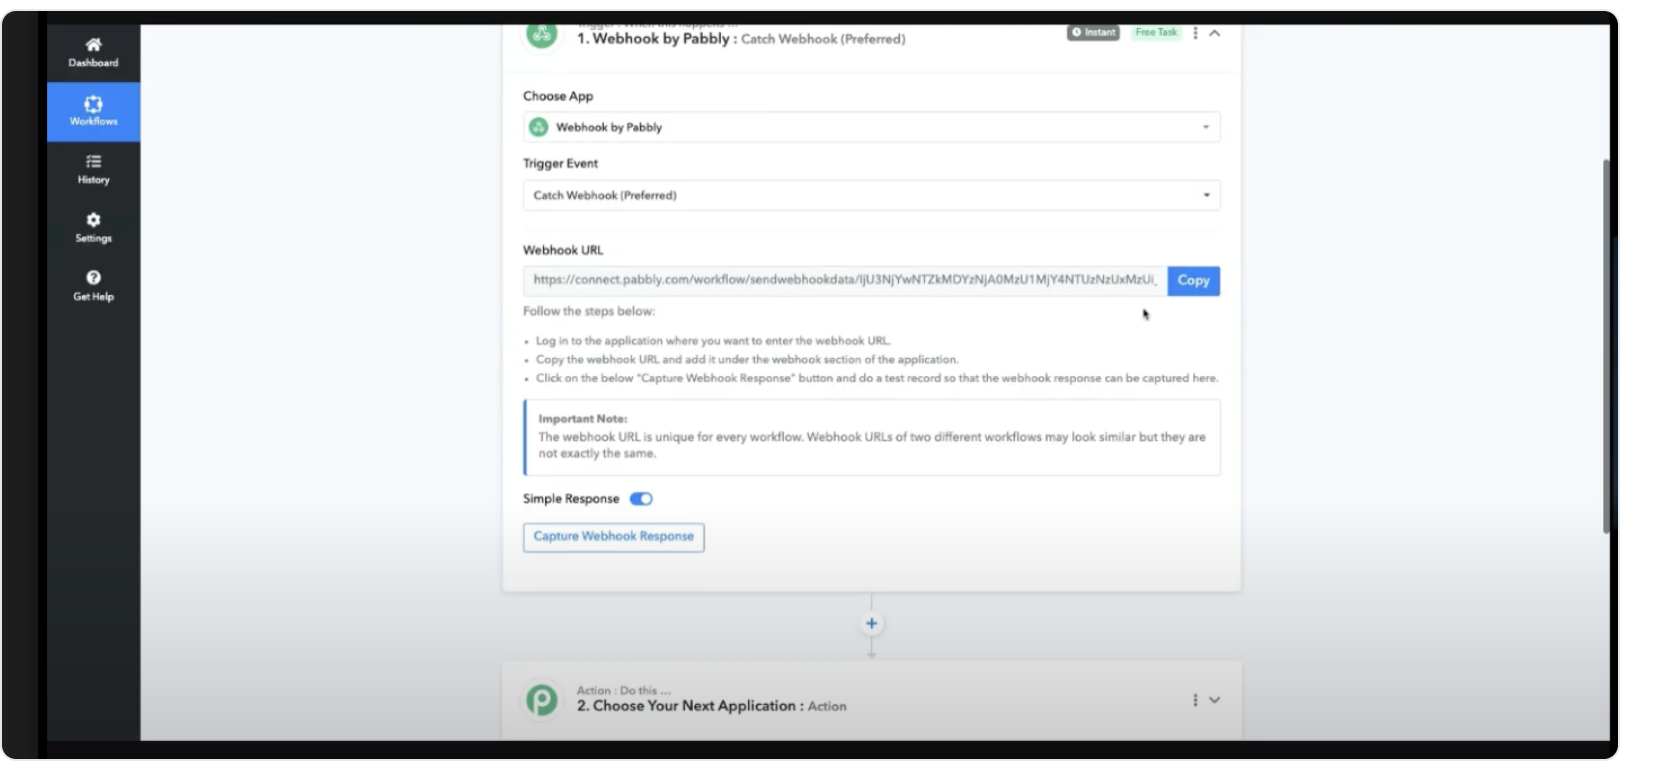
On this case we will select "Catch Webhook" (Preferred). Create a workflow in Pabbly Connect App. Fill out the workflow name to identify it and to integrate it by the webhook. on this case the trigger is "when this happen", "select custom webhook" and automatically will give you an URL . You will have to copy and paste it on Awifi Platform to create a new webhook.
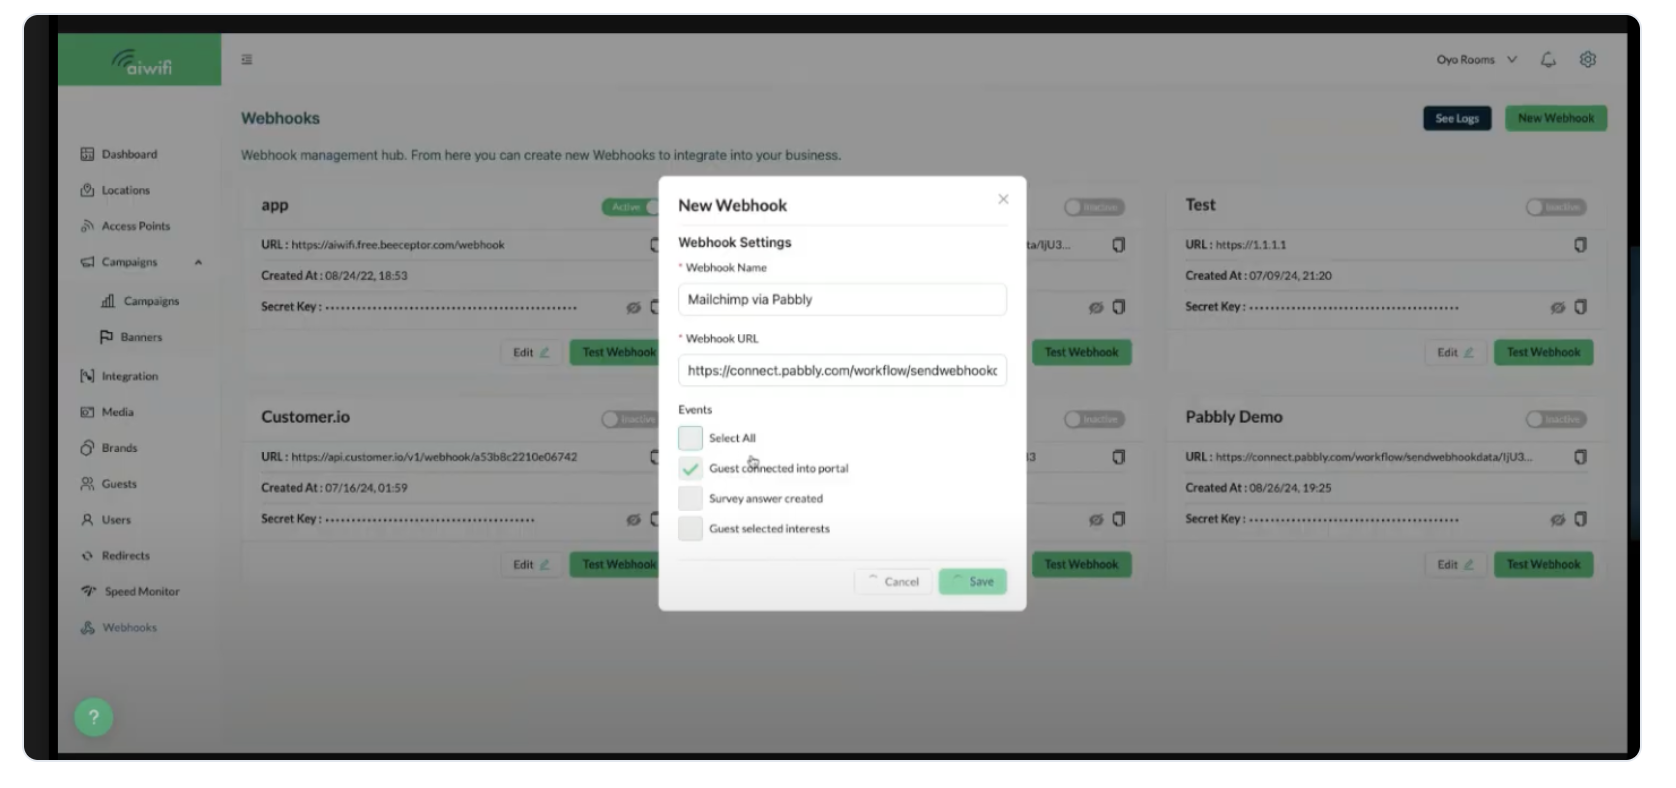
6.- Click on "Test Webhook"
Select the event and then click on "Save"
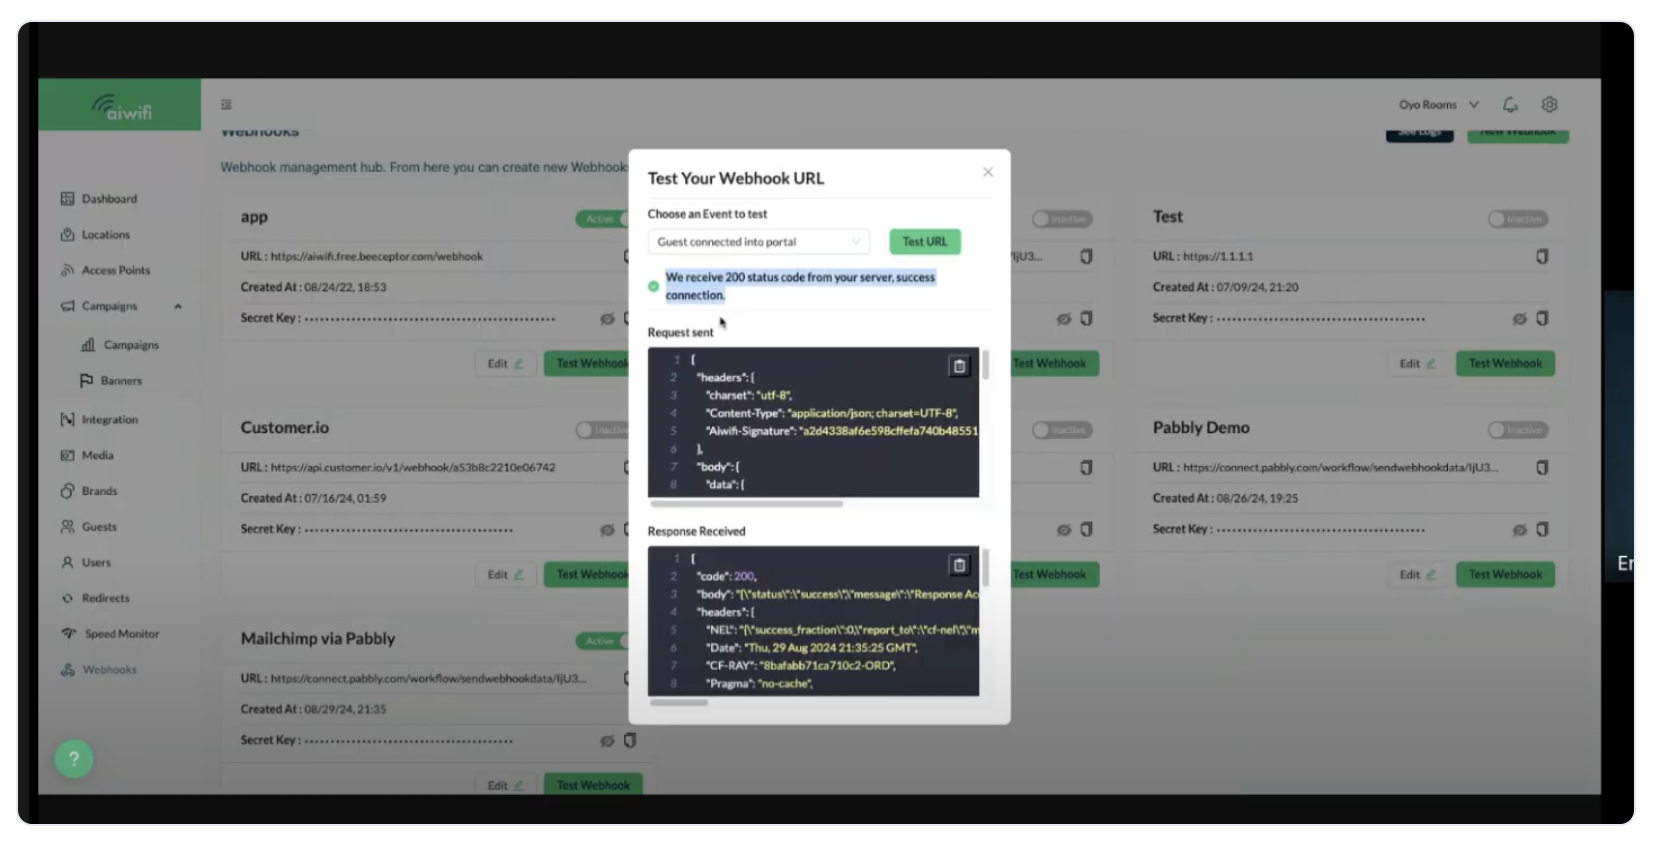
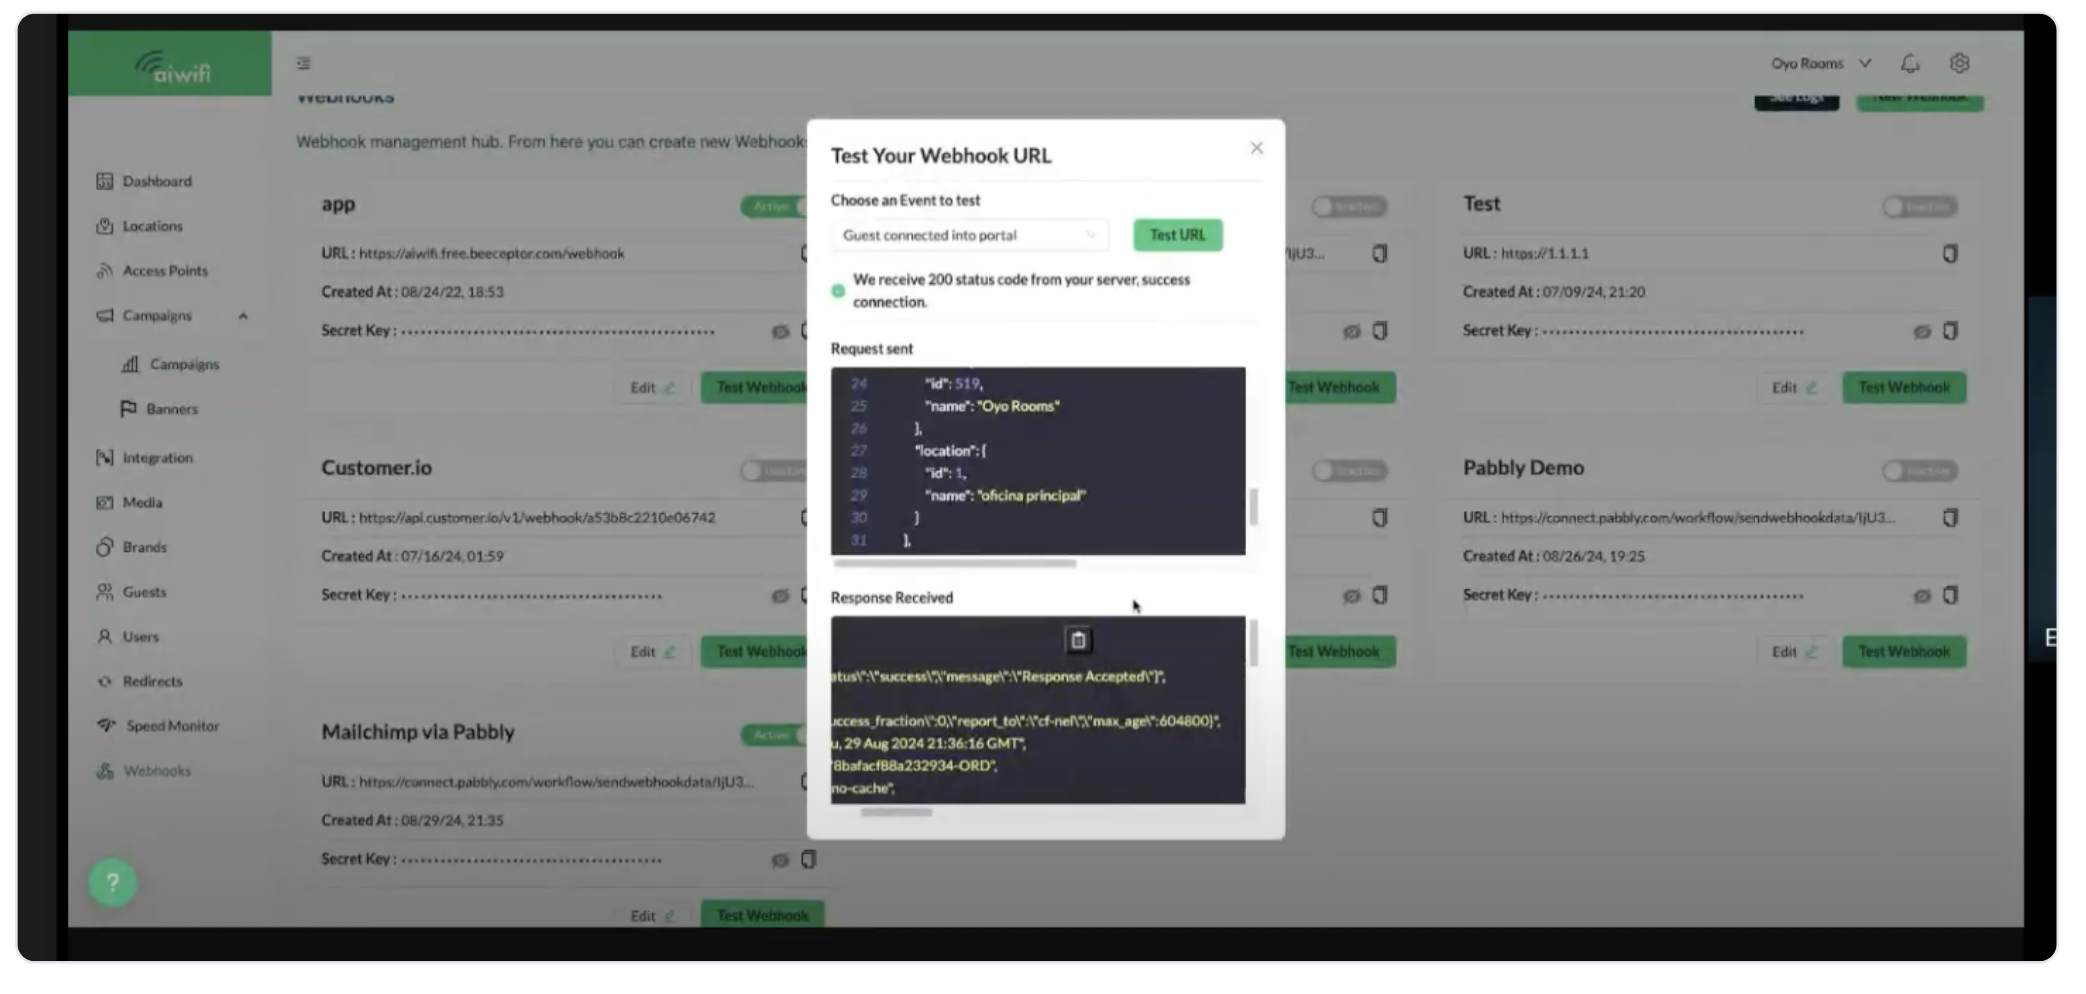
7.- Select Test your Webhook URL.
Choose an event to test and then click on "Test your URL"
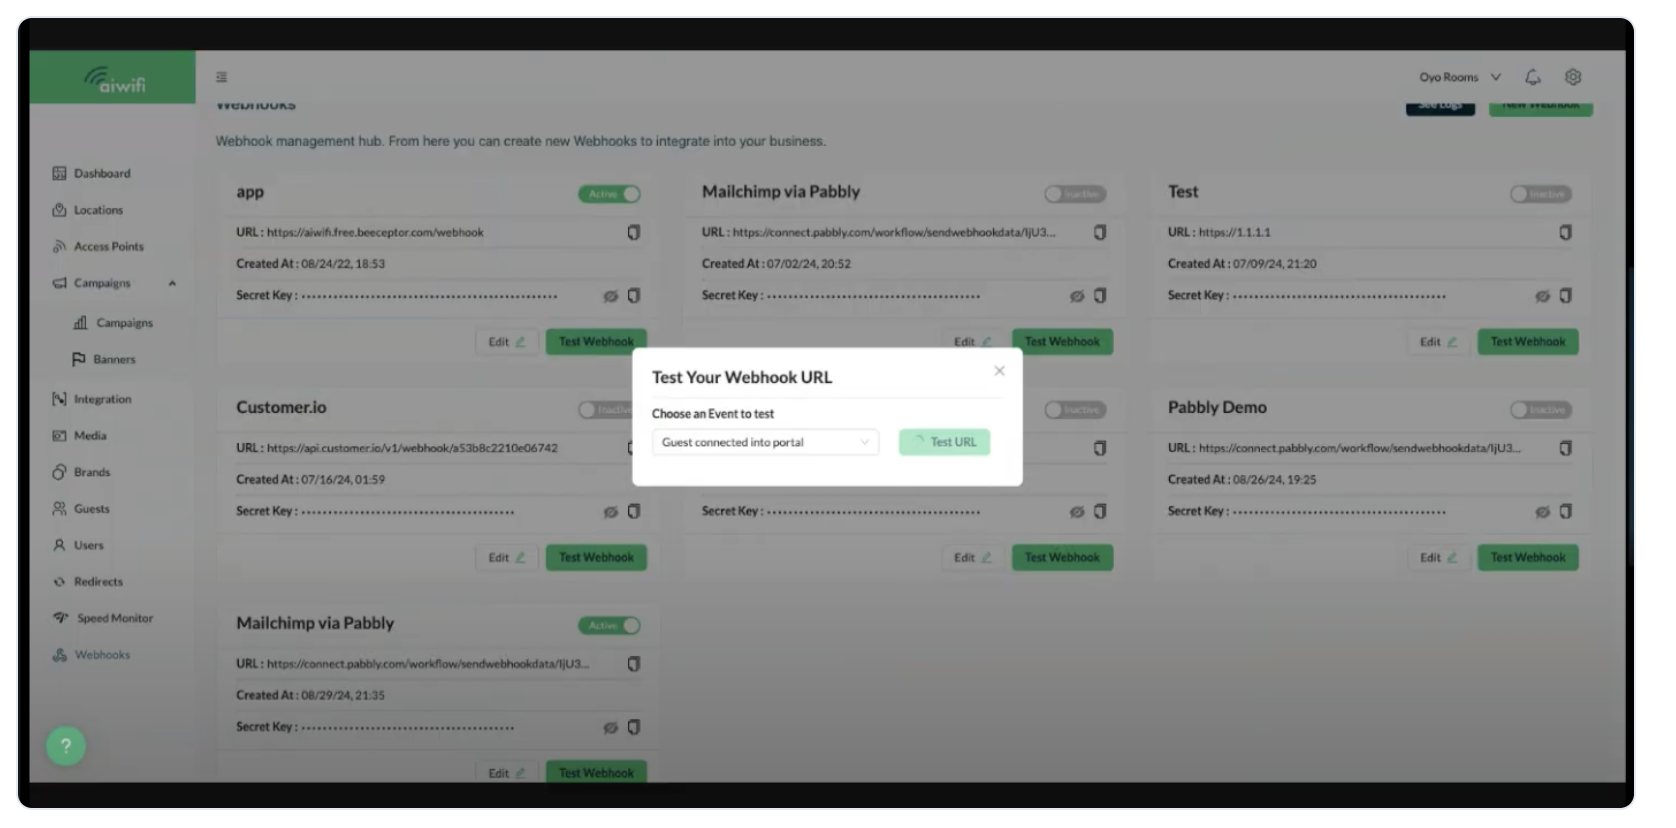
8.- Test URL
Click on "Test URL" and if we receive on HTTP 200 response from your webhook URL, we consider the webhook as failed and will resend the same payload.
Aiwifi will send a code with all the client's data information (user, brand and location), all the campaign's data information we had triggered.
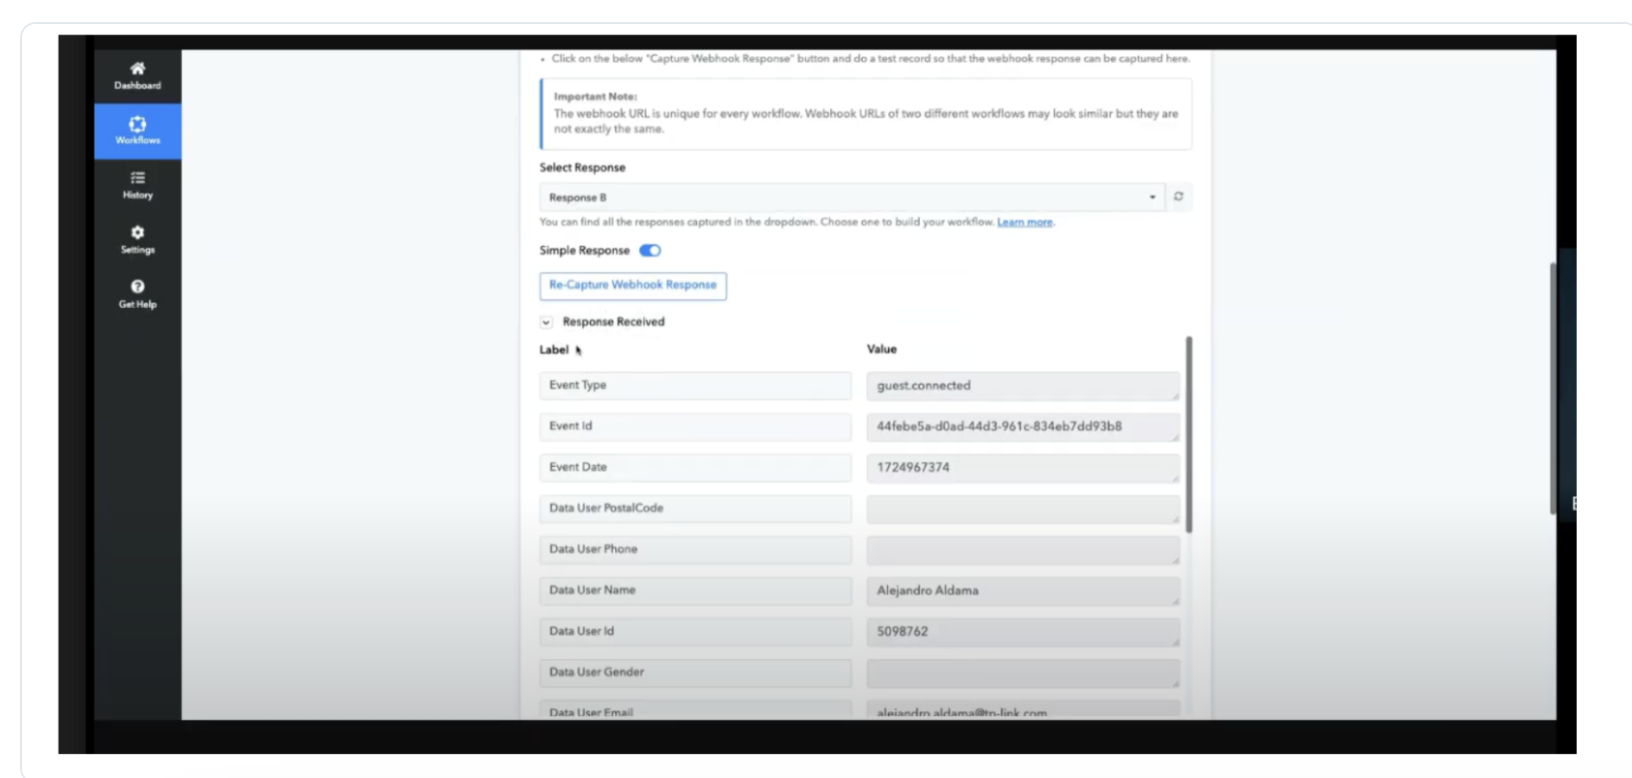
9.- Deployment of the client's information, here we can see the information.
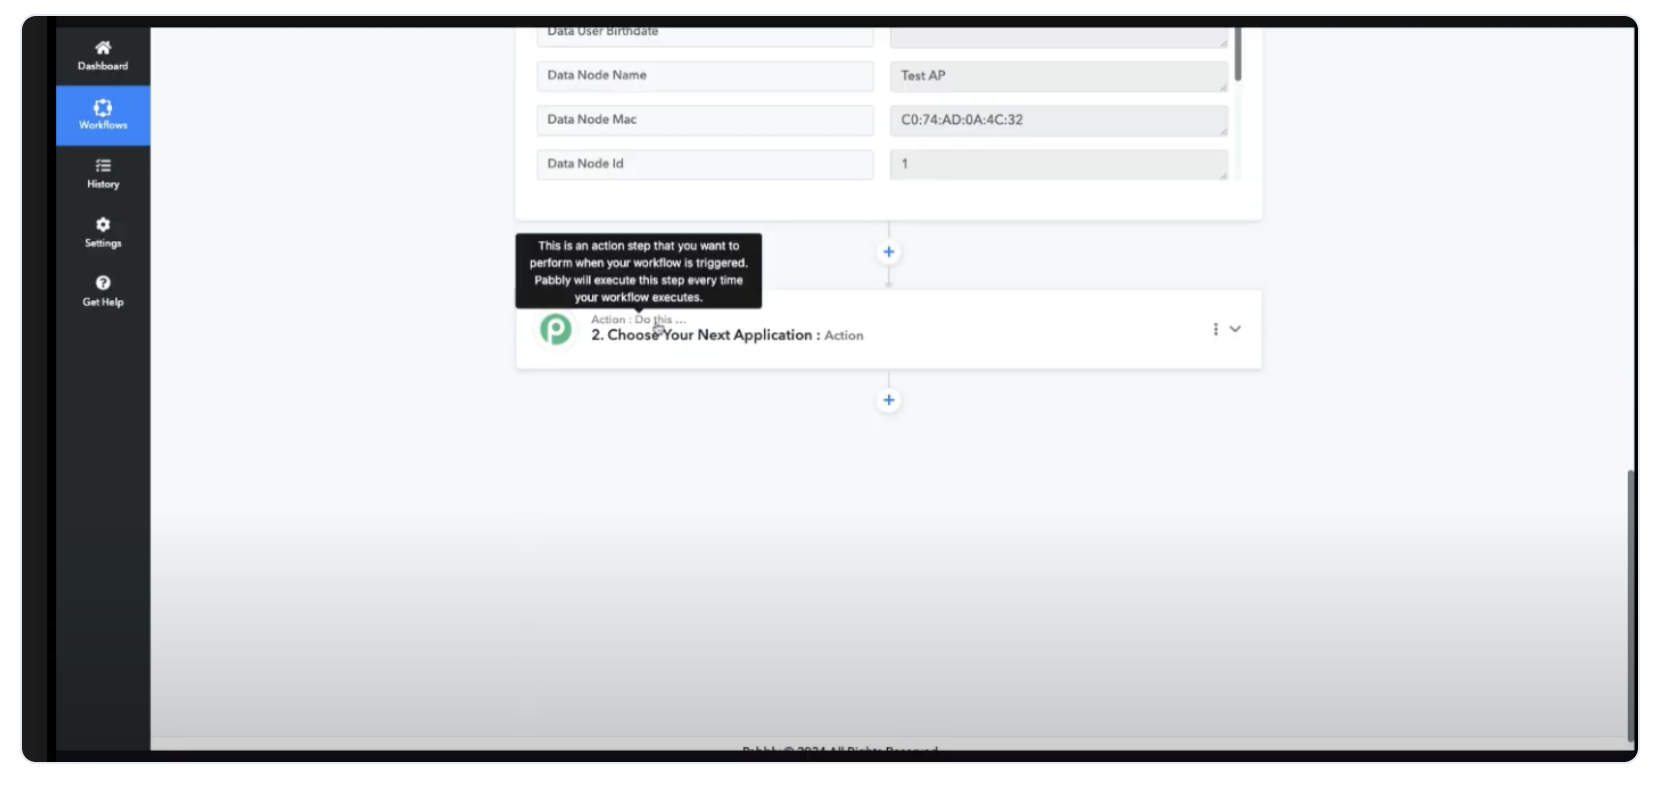
10.- Action "To this" Choose your Next Application
This is an action step that you want to perform when your workflow is triggered. Pabbly will execute this step every time your workflow executes.
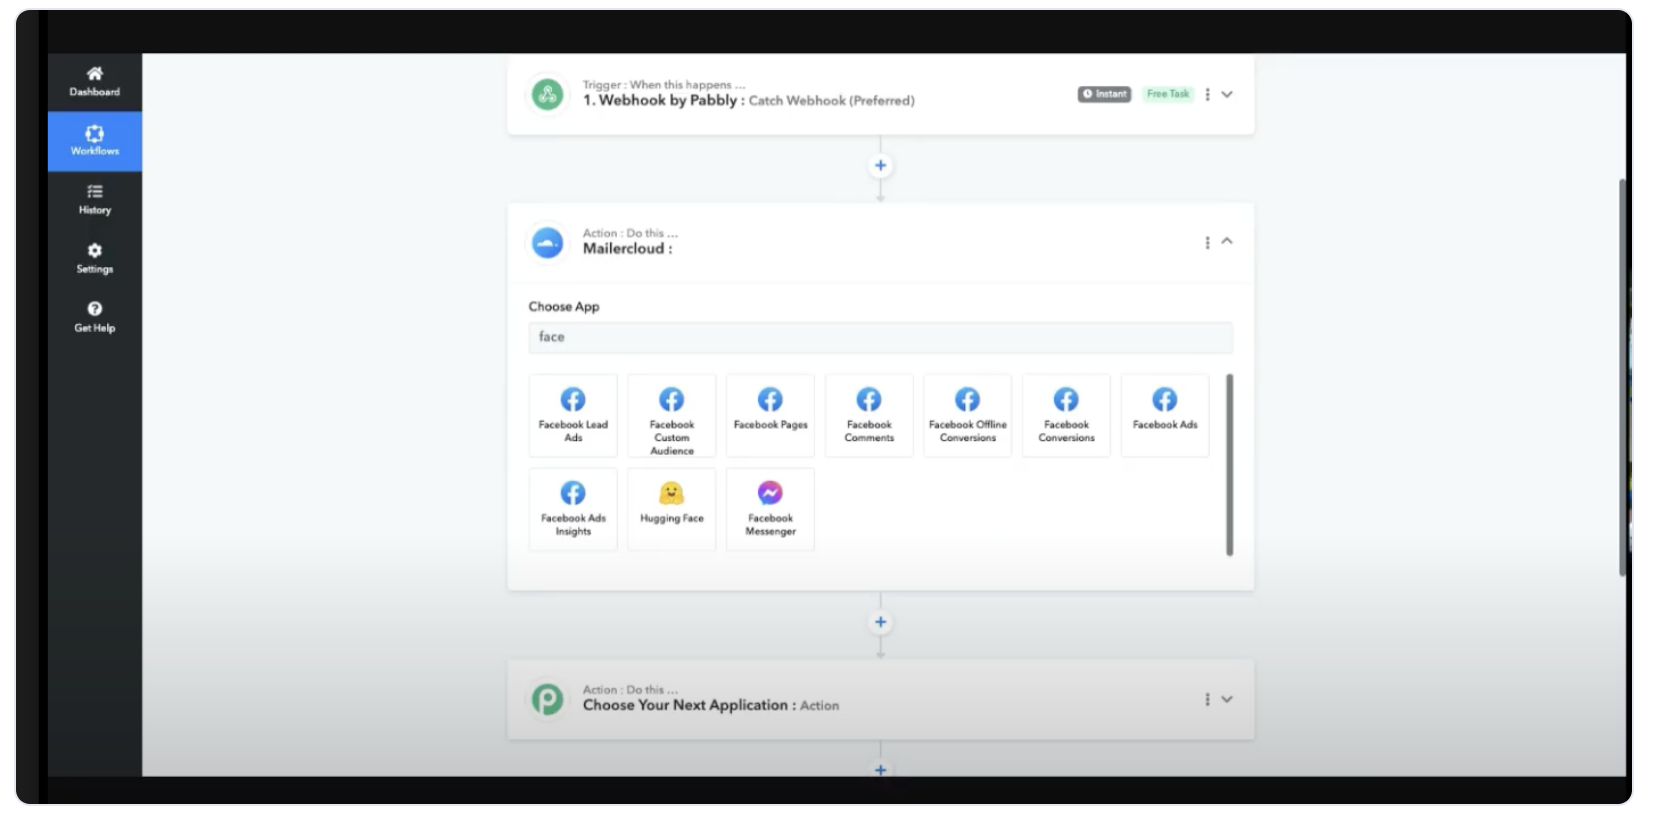
11.- Select the Application where you want to send the information.
In this case we will select Mailercloud
12.- On select an Action event from the list.
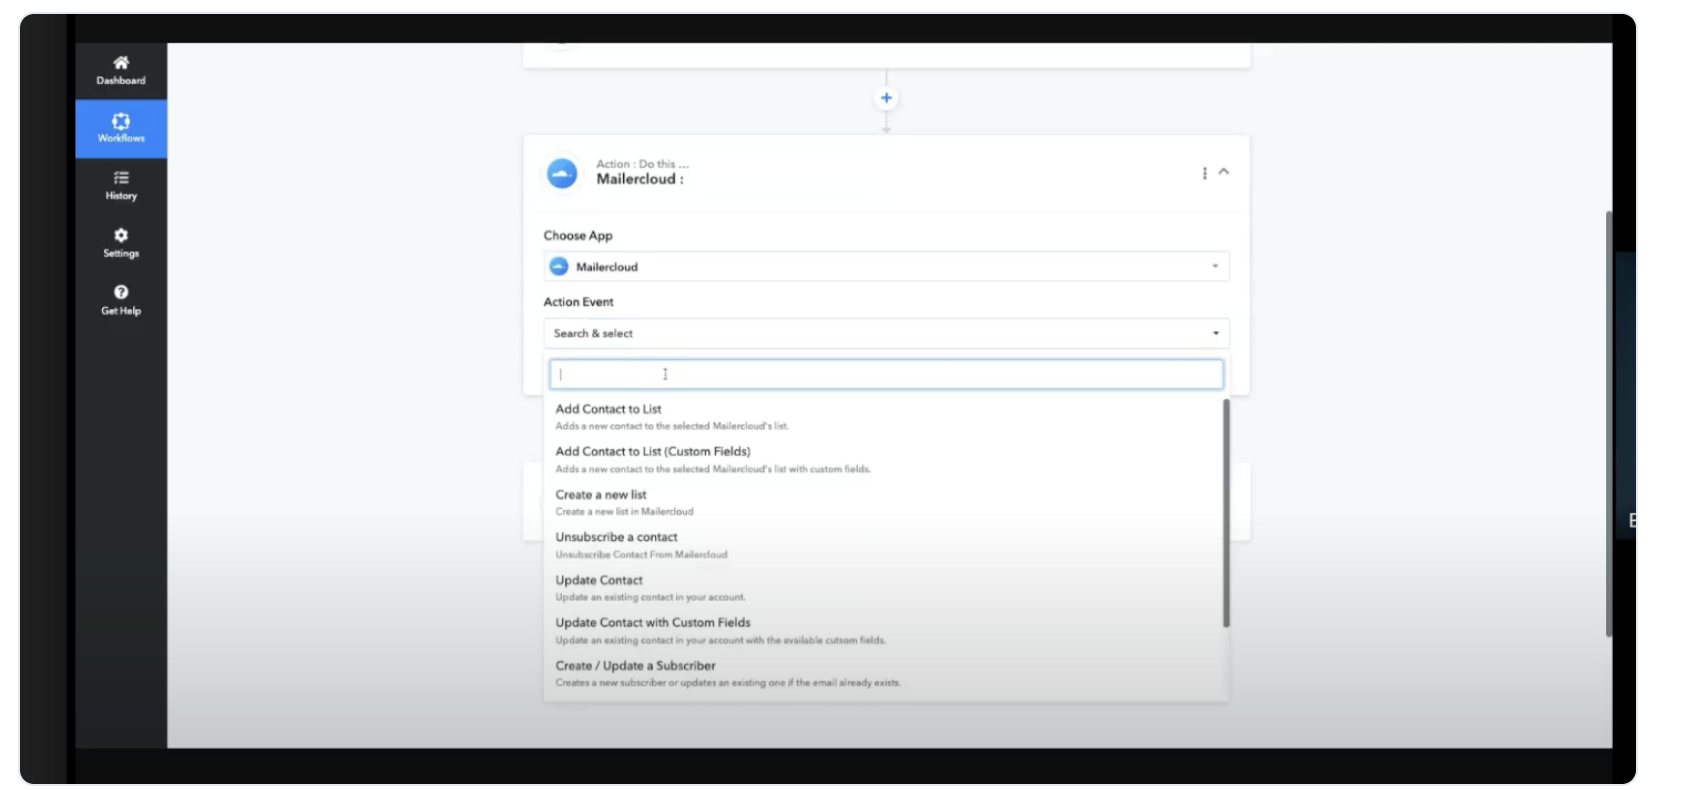
13.- Existing Connection or Select Connection
Once the Action event is selected, on click on "Connect or Select Connection" it depends of the case and click on "Save". In our case we will choose "Select existing connection" Mailercloud Account.
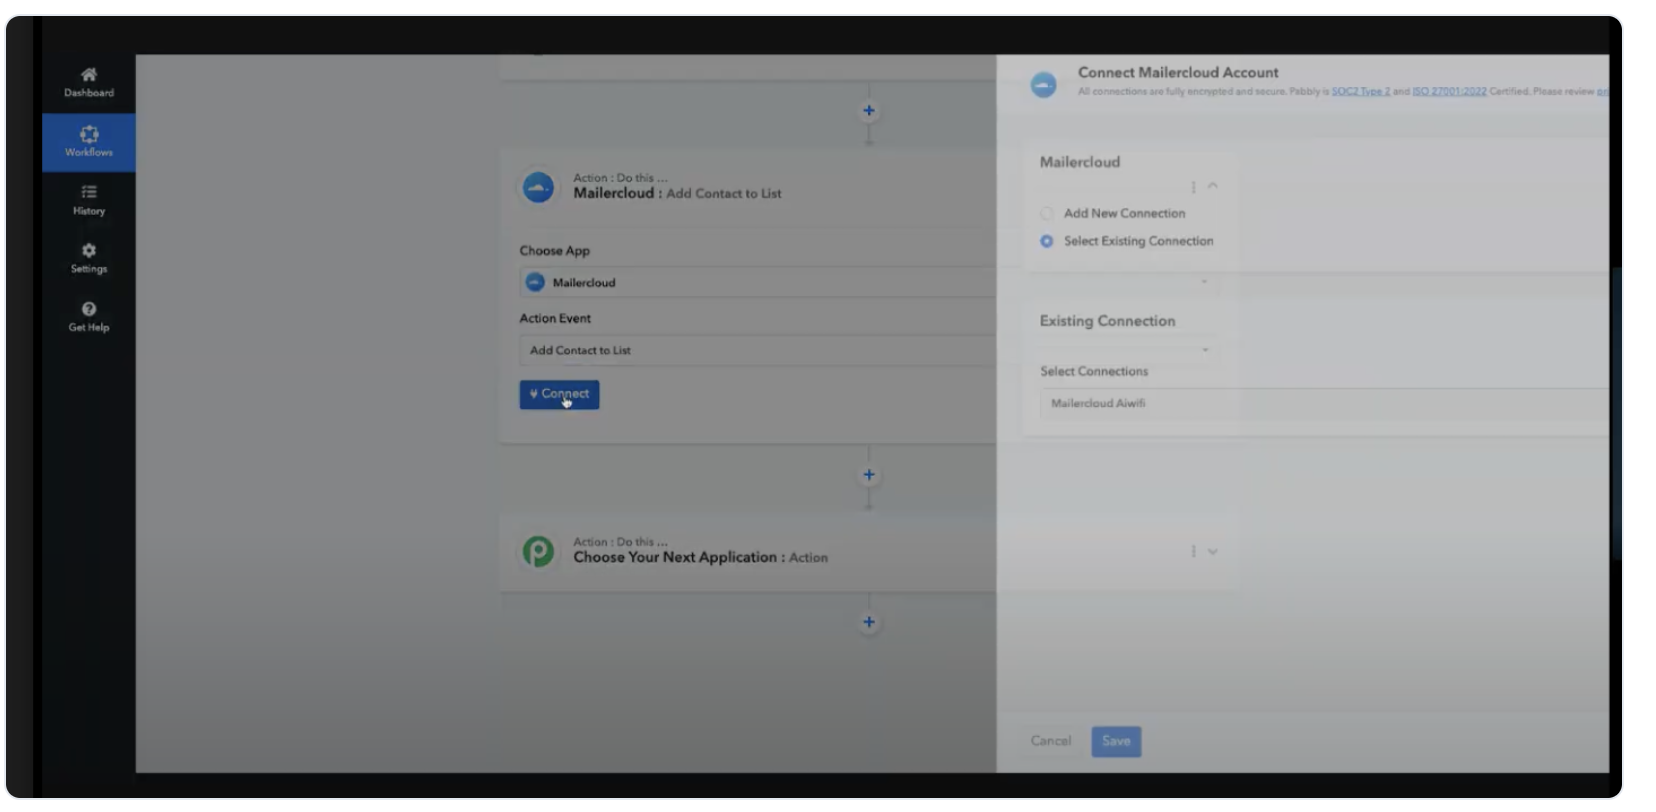
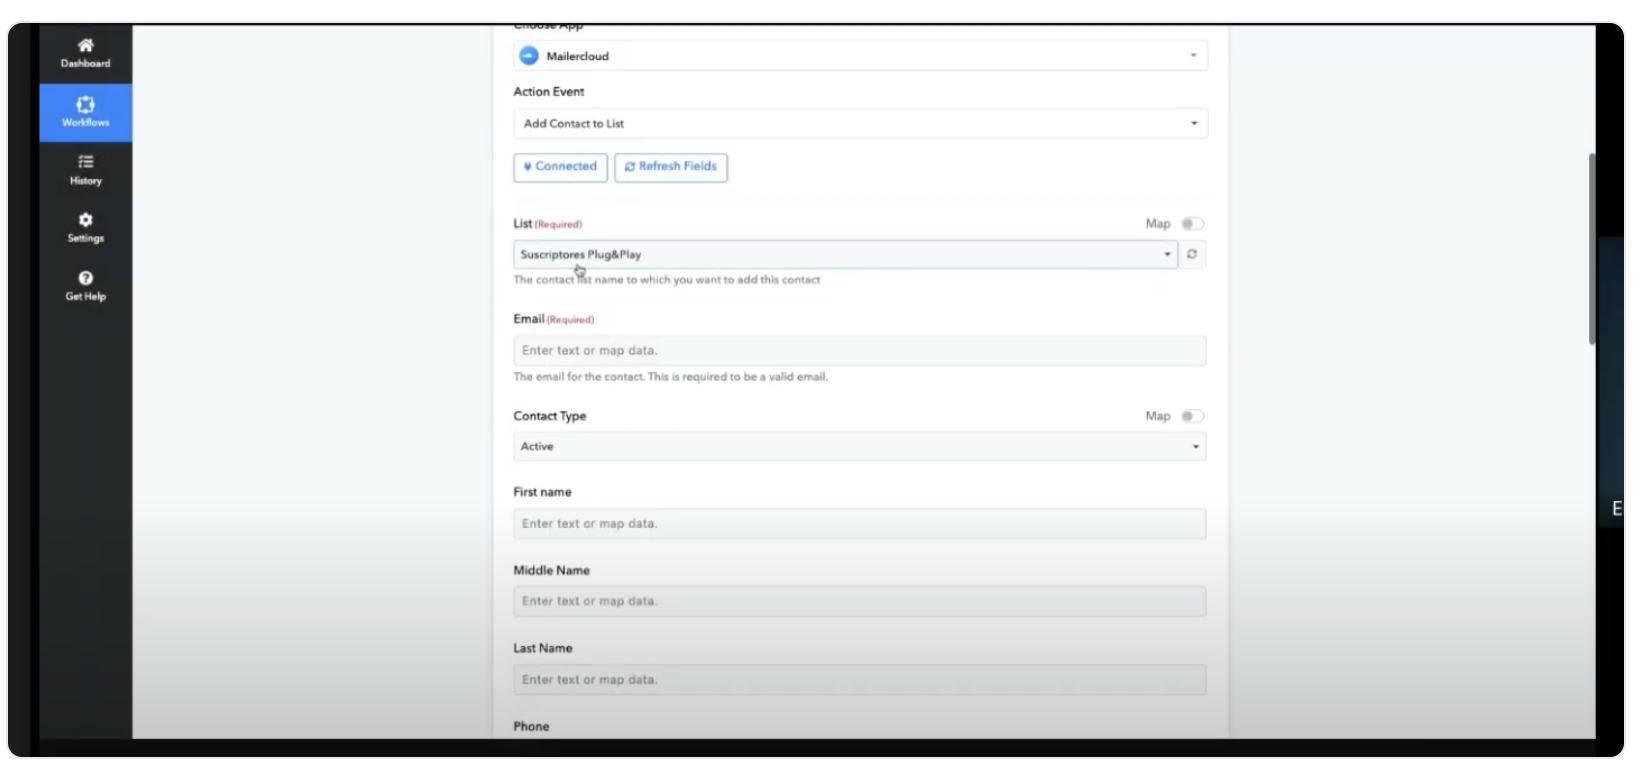
14.- Selection of list required
On select the email request and we map the "Data User Email"
15.- Save and send Test Request
This will save the values you filled above and will send data to the selected app for processing. A response will be received back once the processing is completed.
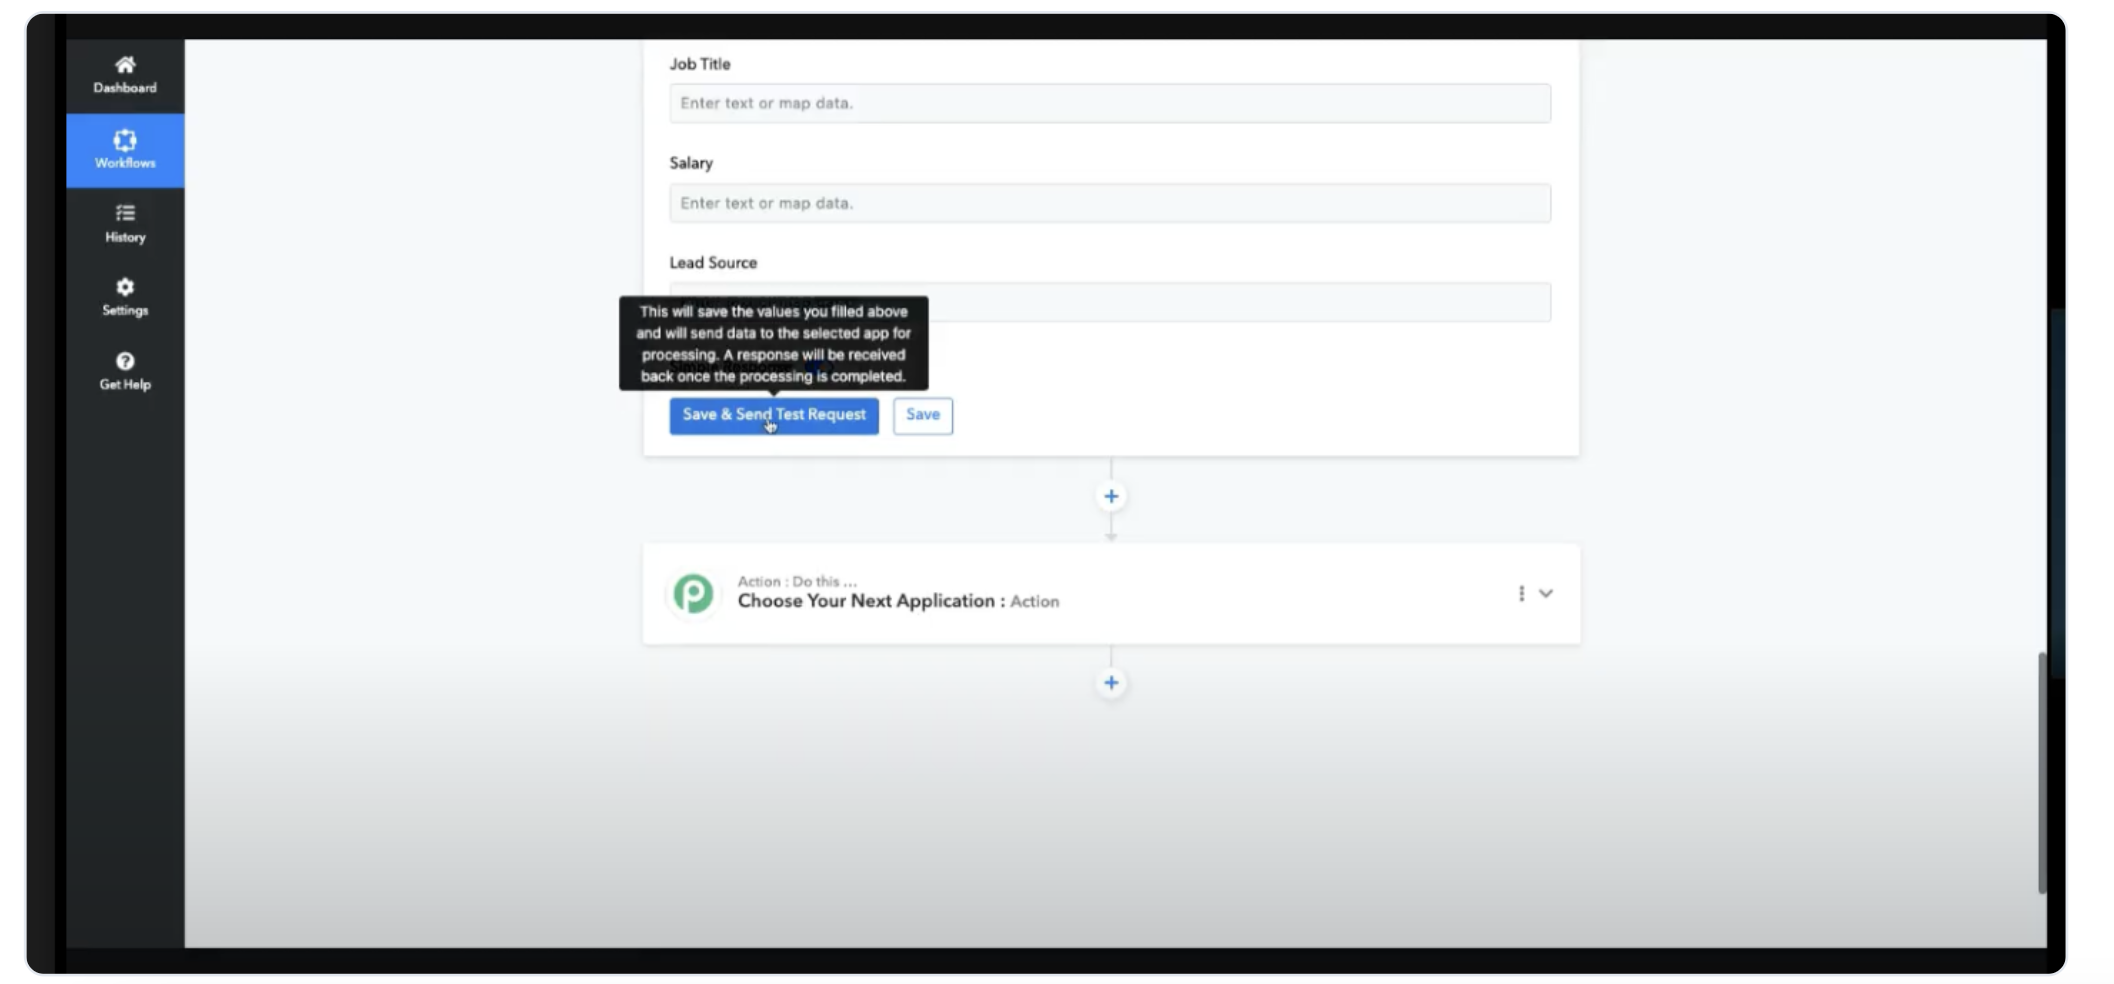
16.- Test of the URL and response deployed.
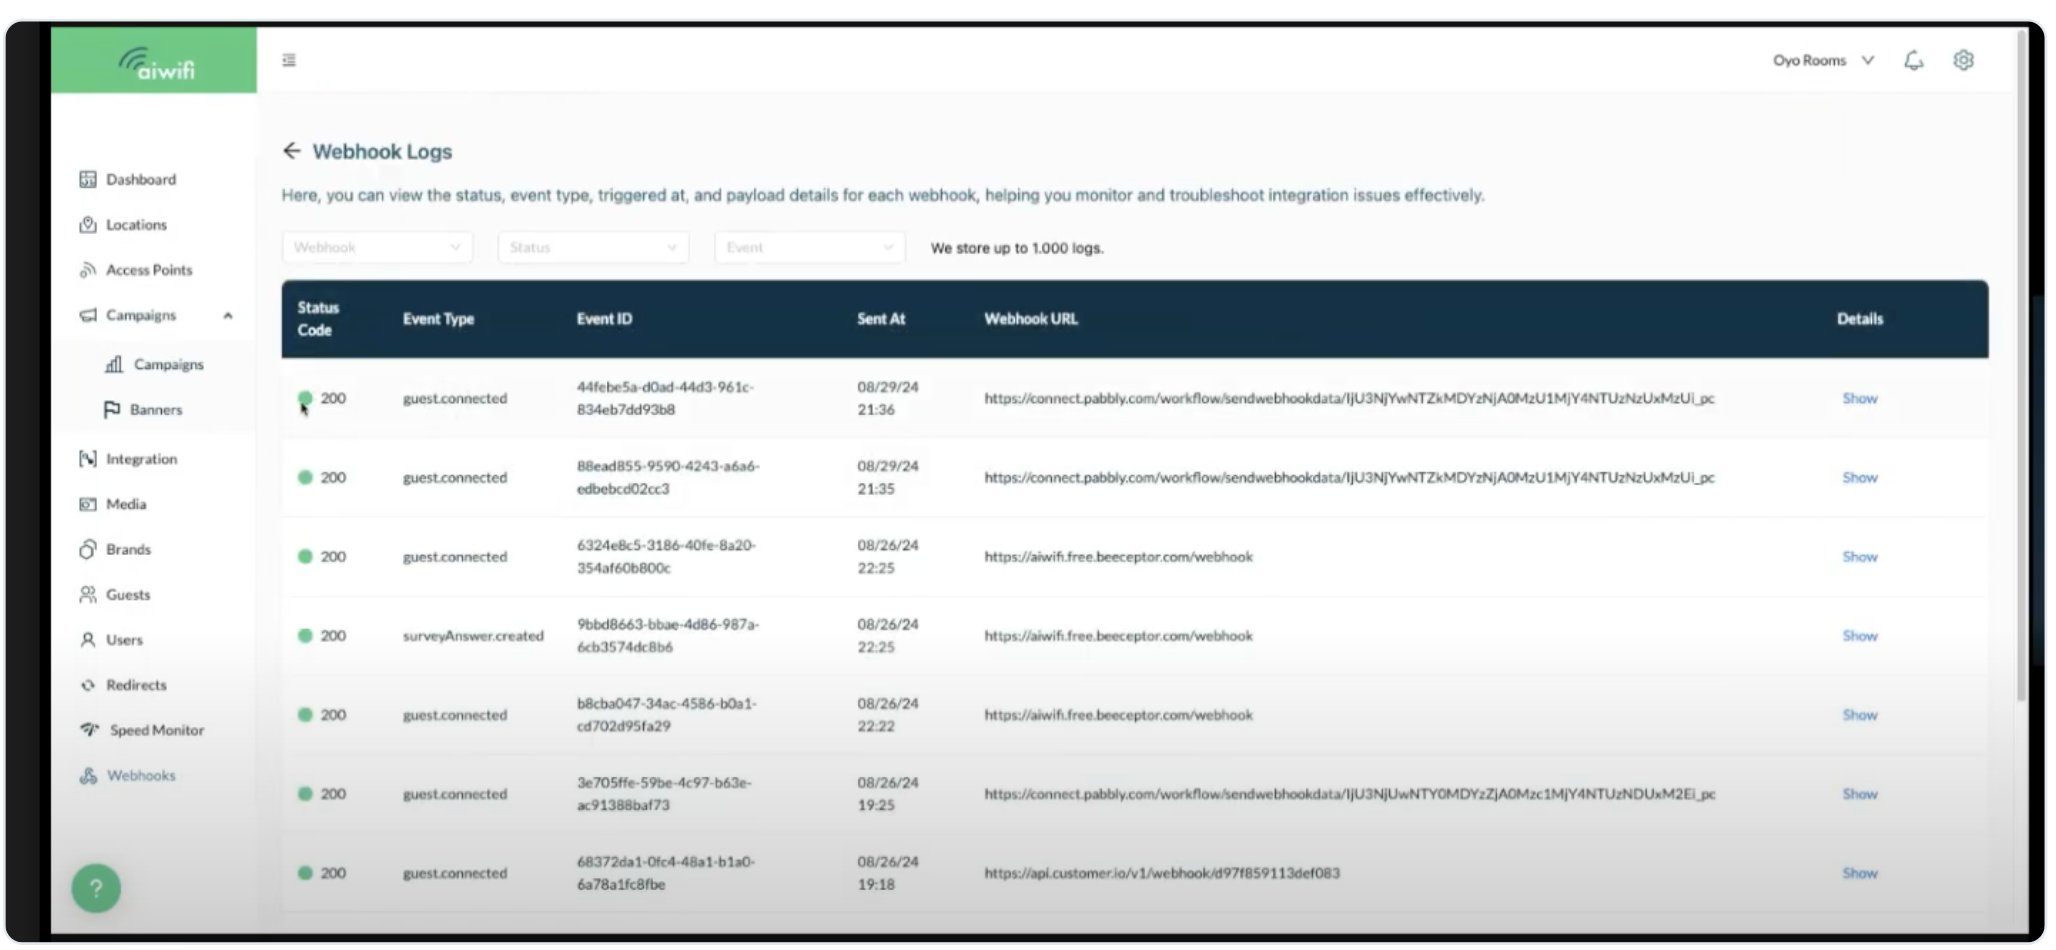
17.- Webhooks logs
Here you can view the status, even type, triggered at, and payload details for each webhook, helping your monitor and trubleshoot integration issues effectively.
